To take your visualizations in Cinema4Dto the next level, it is essential to create an engaging image look. In this guide, you will learn how to effectively implement color shifts, vignettes, and an increase in structure and contrast using the Camera Raw filter.
Key Insights
- The image look is more than just color and contrast settings.
- A vignette can significantly influence the atmosphere of an image.
- The right balance of clarity and structure is crucial for a professional result.
Step 1: Preparing Your Layer
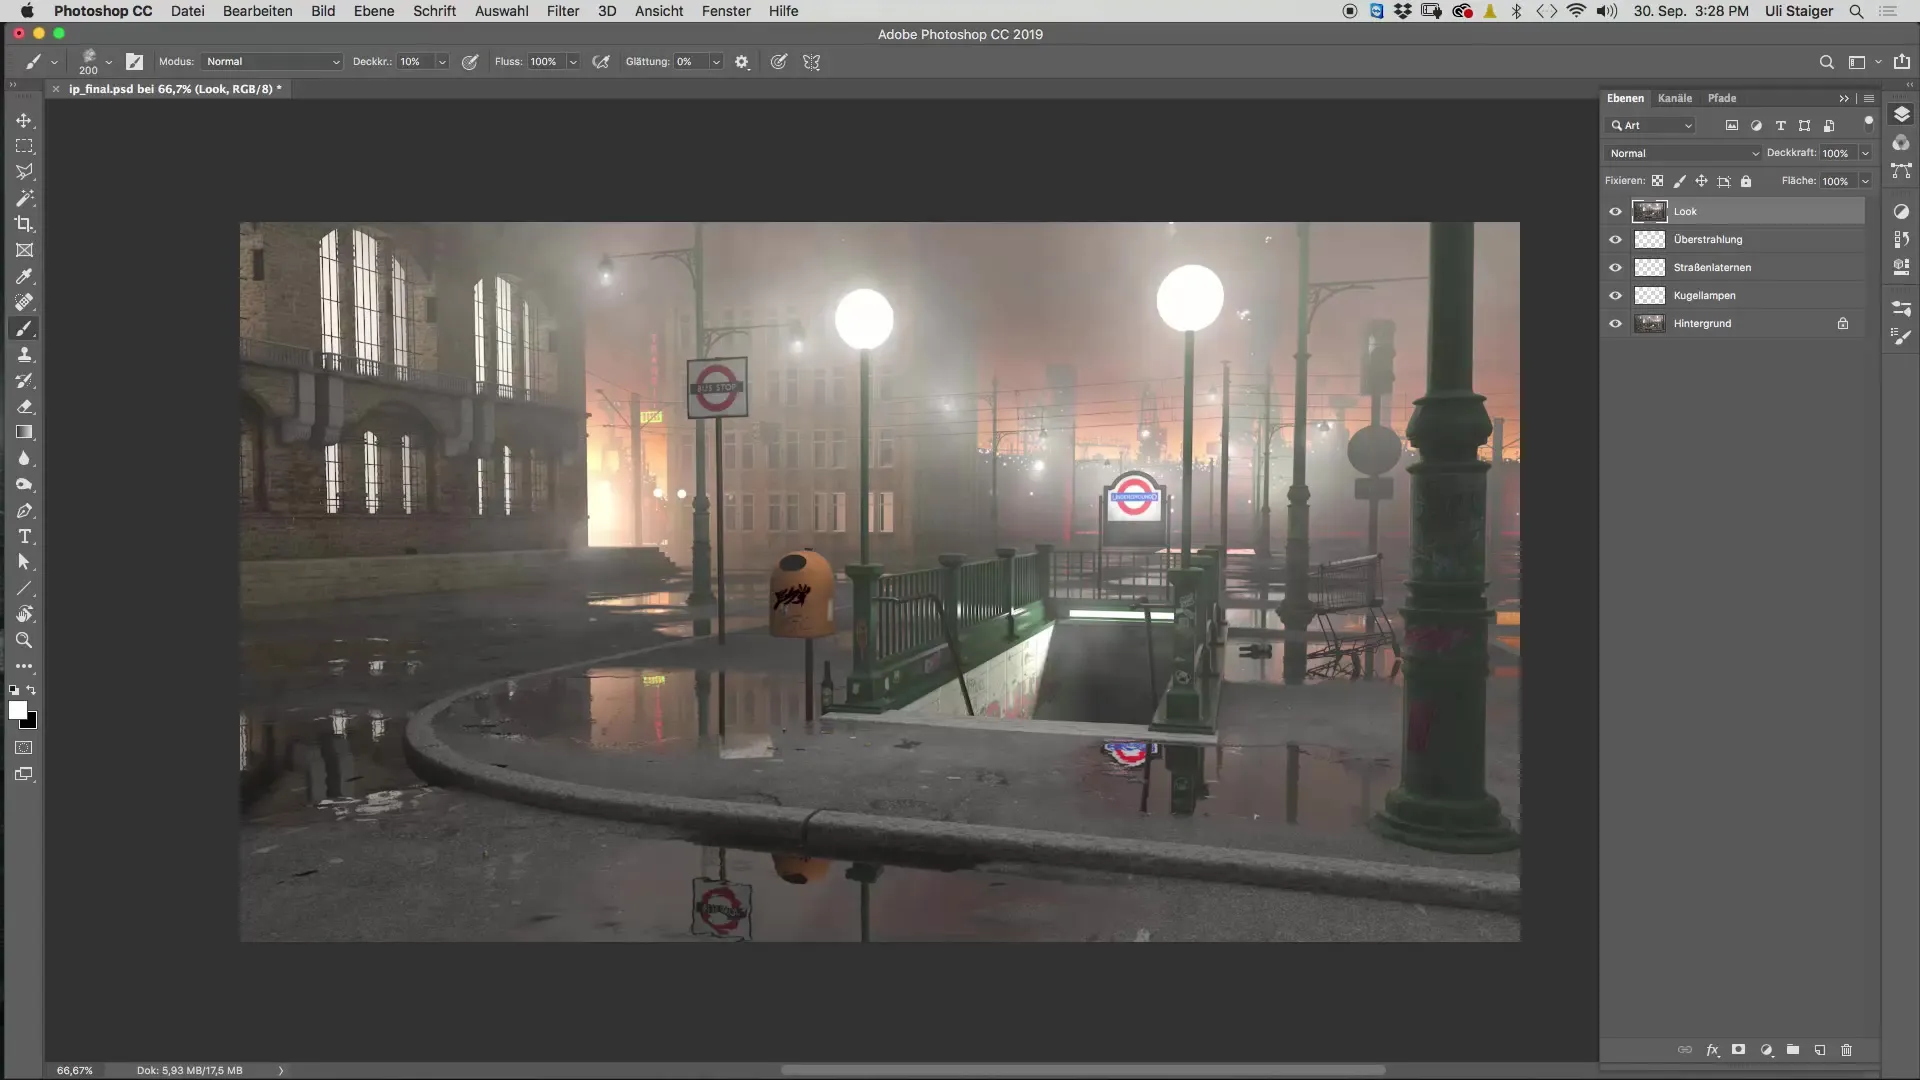
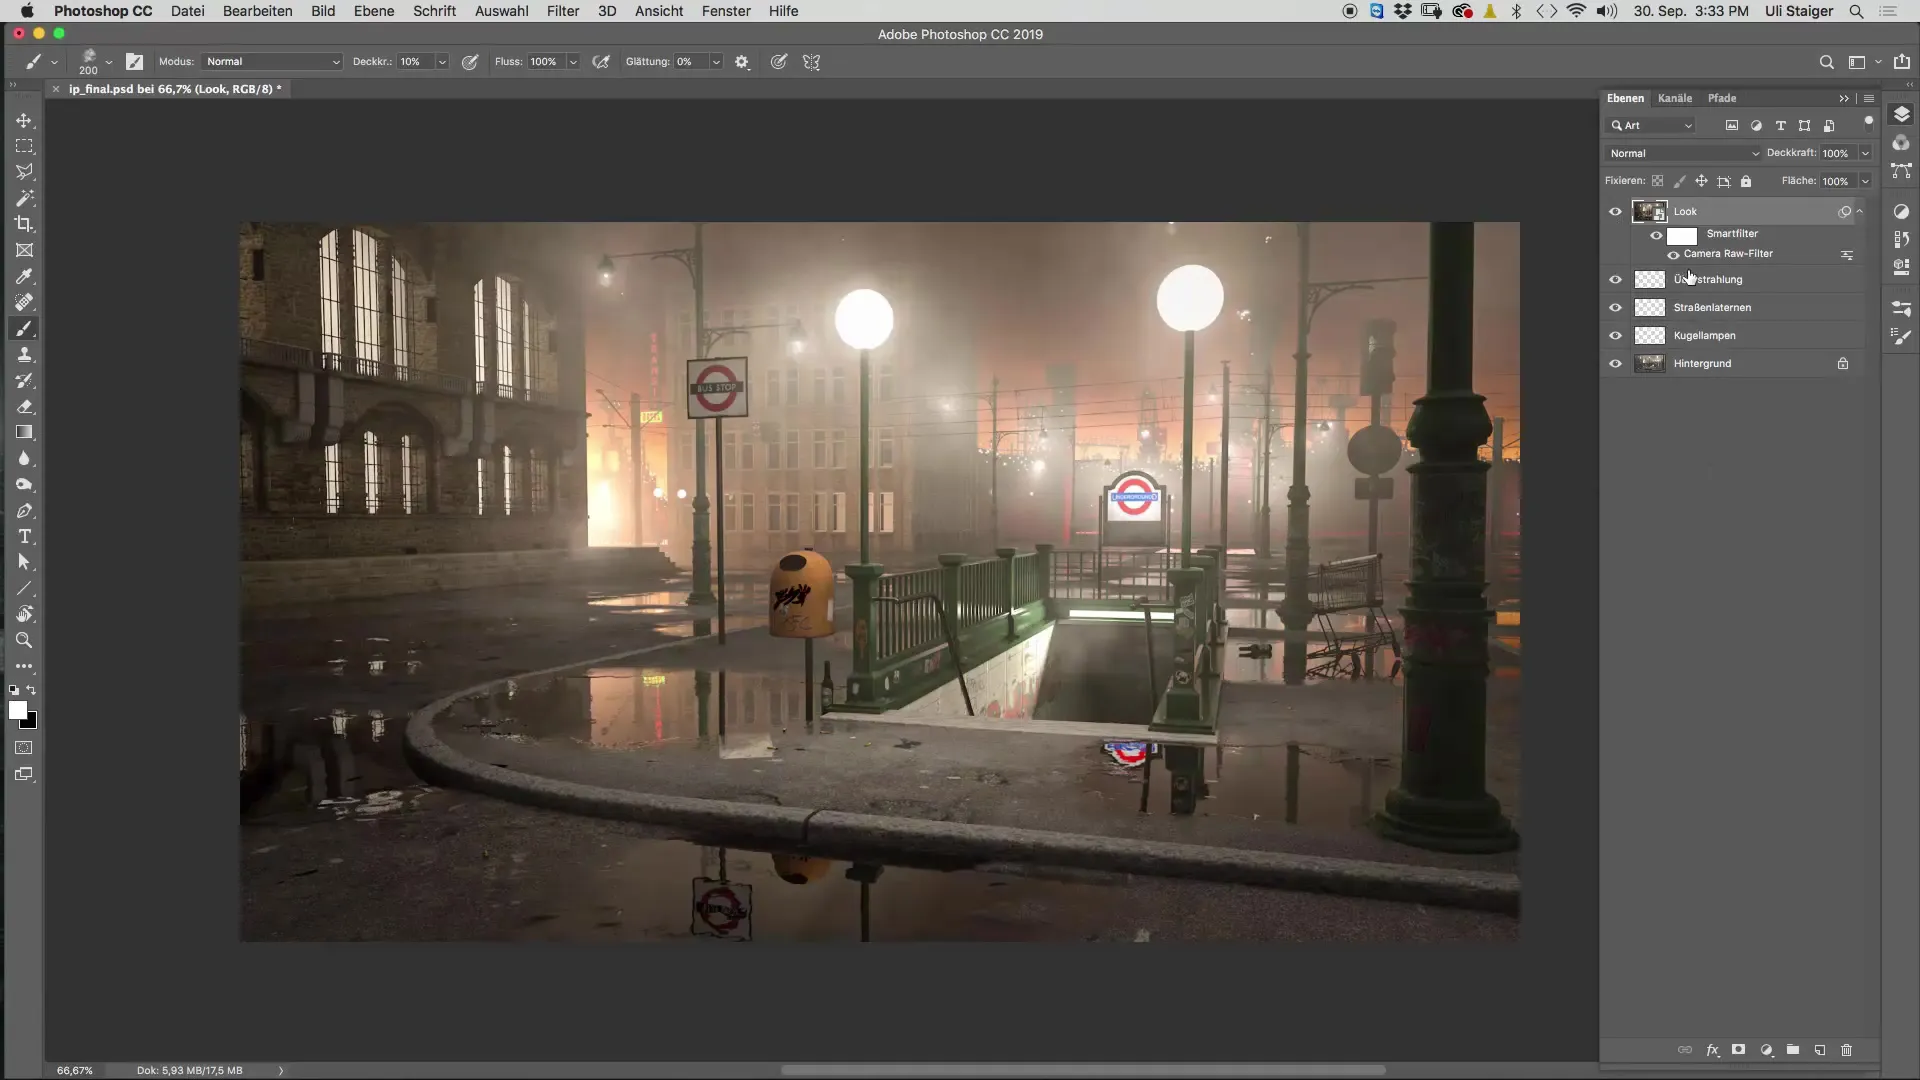
Before you start with the Camera Raw filter, make sure you have everything you need for your image look compiled into a single layer. First, click on the top layer of your project. For Mac users, the keyboard shortcut is Shift + Alt + Command + E, while PC users should use Shift + Alt + Ctrl + E. This will allow you to consolidate all existing layers into a new layer. Name this layer something like "Image Look" to keep a clear overview of your work.
Step 2: Converting to a Smart Object
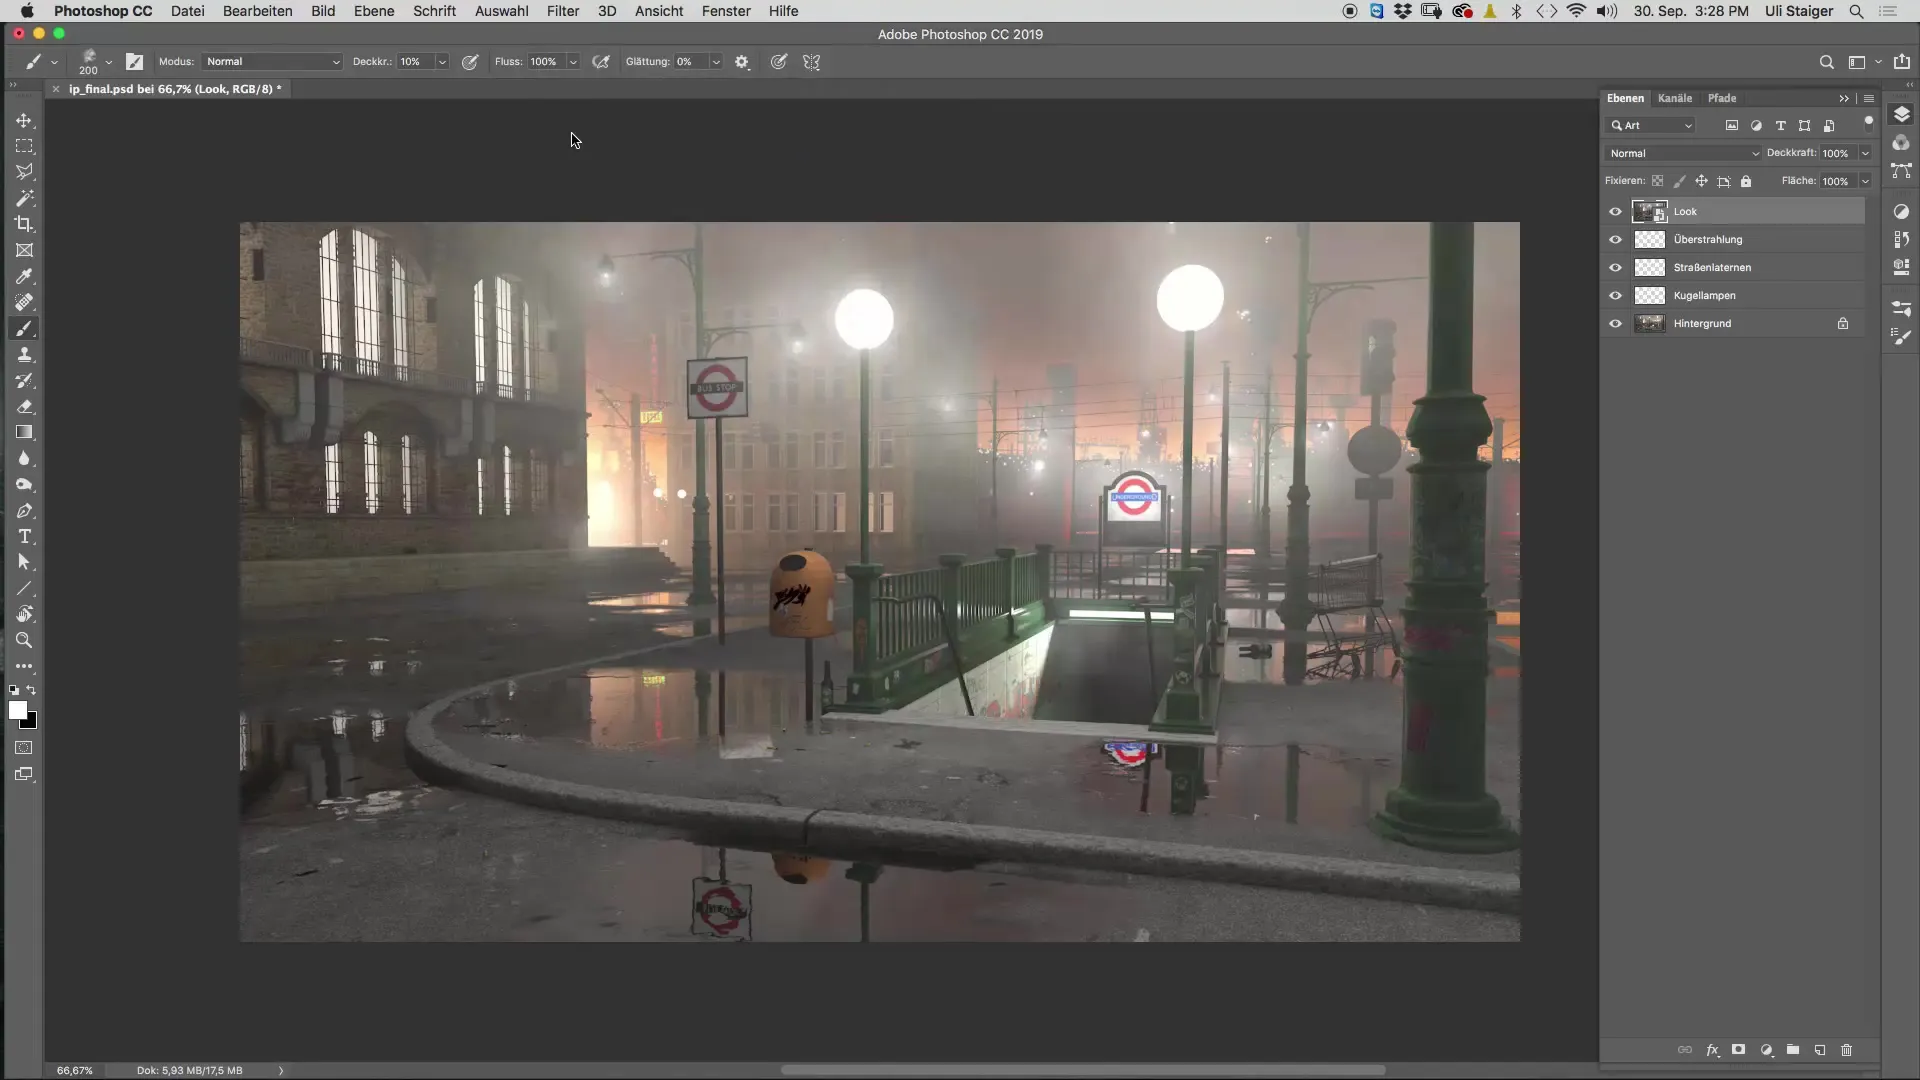
To work more flexibly with your image look, you should convert the newly created layer into a Smart Object. This allows you to reapply or adjust the Camera Raw filter at any time without losing the original data. Right-click on the layer and select "Convert to Smart Object".
Step 3: Applying the Camera Raw Filter
Now that your layer is a Smart Object, go to the "Filter" menu and select "Camera Raw Filter". Here, you have many useful tools available to achieve the desired image quality. The image may look slightly blurry at first. Make sure to set your view to 100% to see a more accurate picture of your adjustments.
Step 4: Adjusting Clarity and Structure
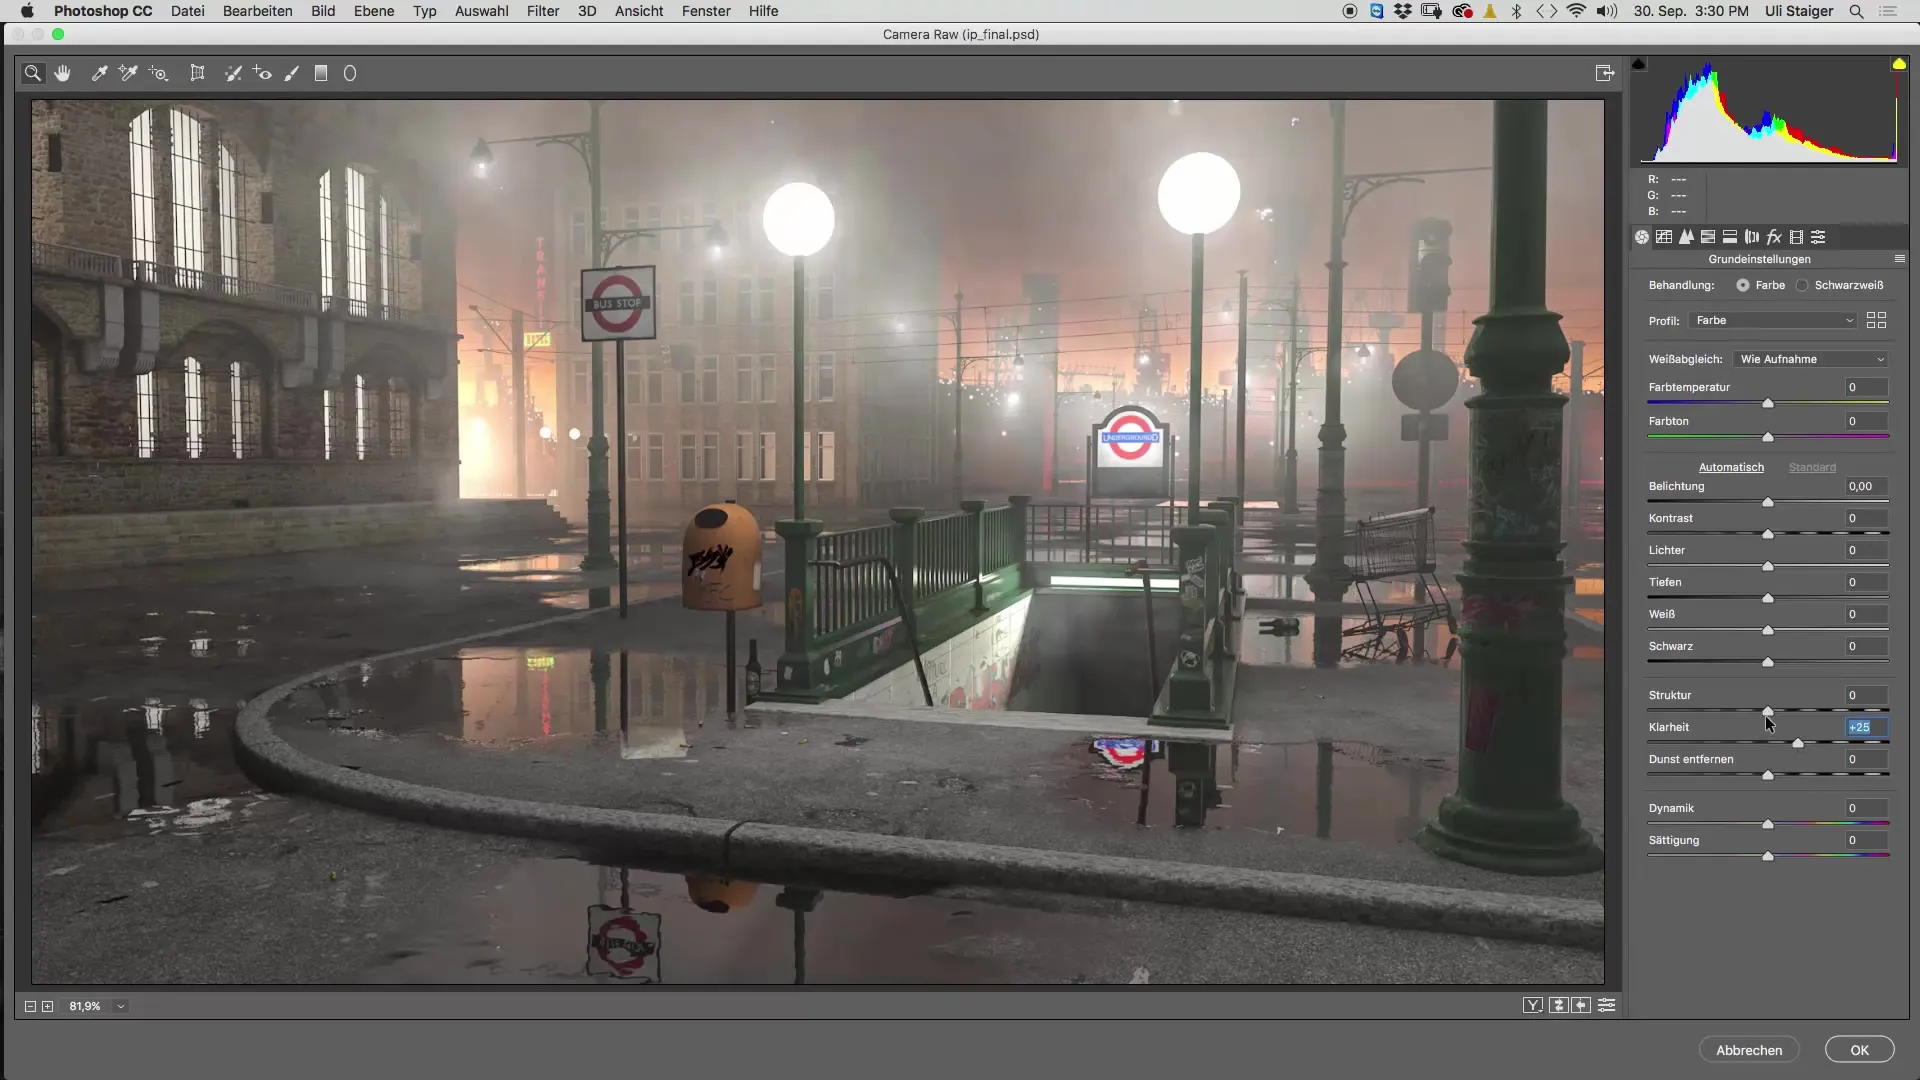
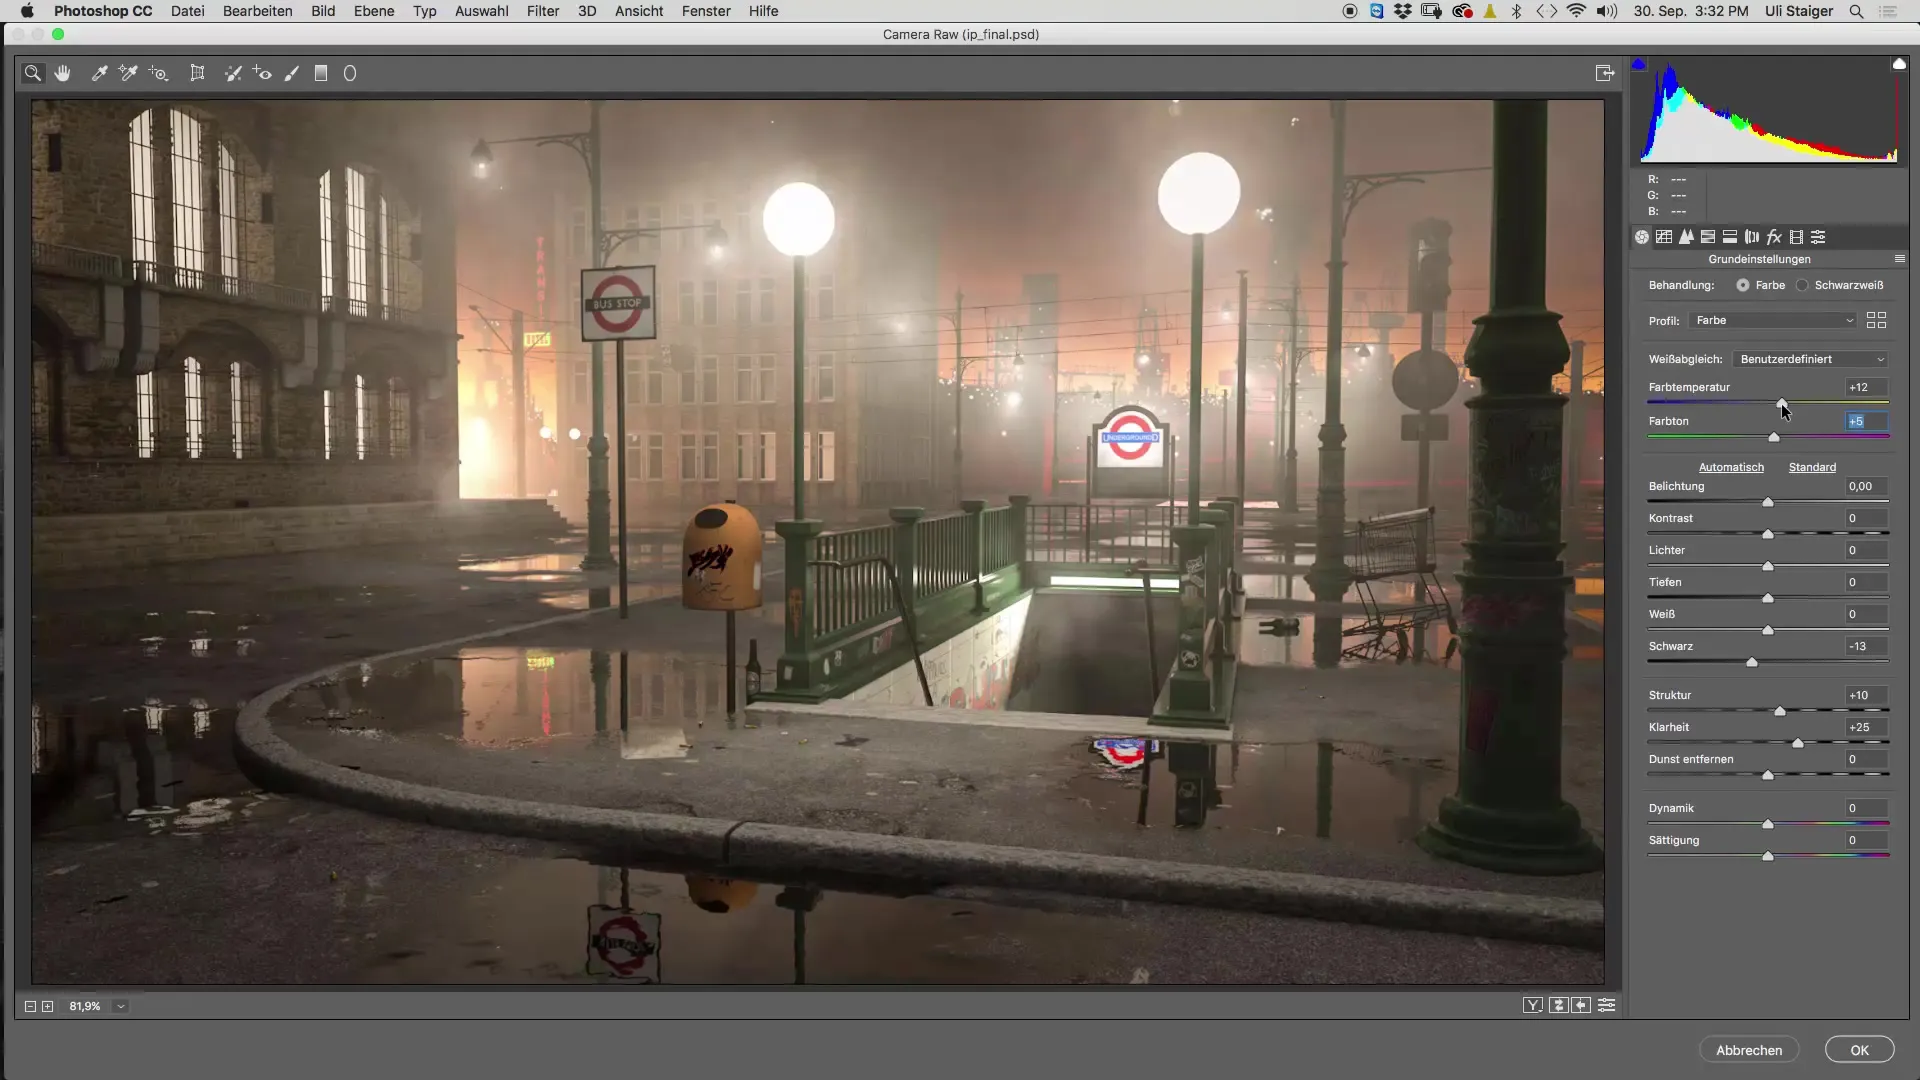
Start with the settings for "Clarity" and "Structure". These two parameters should make the image appear more vibrant. Be careful not to overdo the clarity, as this can quickly lead to unnatural results. A value between 25% and 30% is usually optimal. Increase the structure gently to make your image fundamentally sharper, but keep the value at a maximum of 10% to avoid overemphasis.
Step 5: Adjusting Shadows and Black Levels
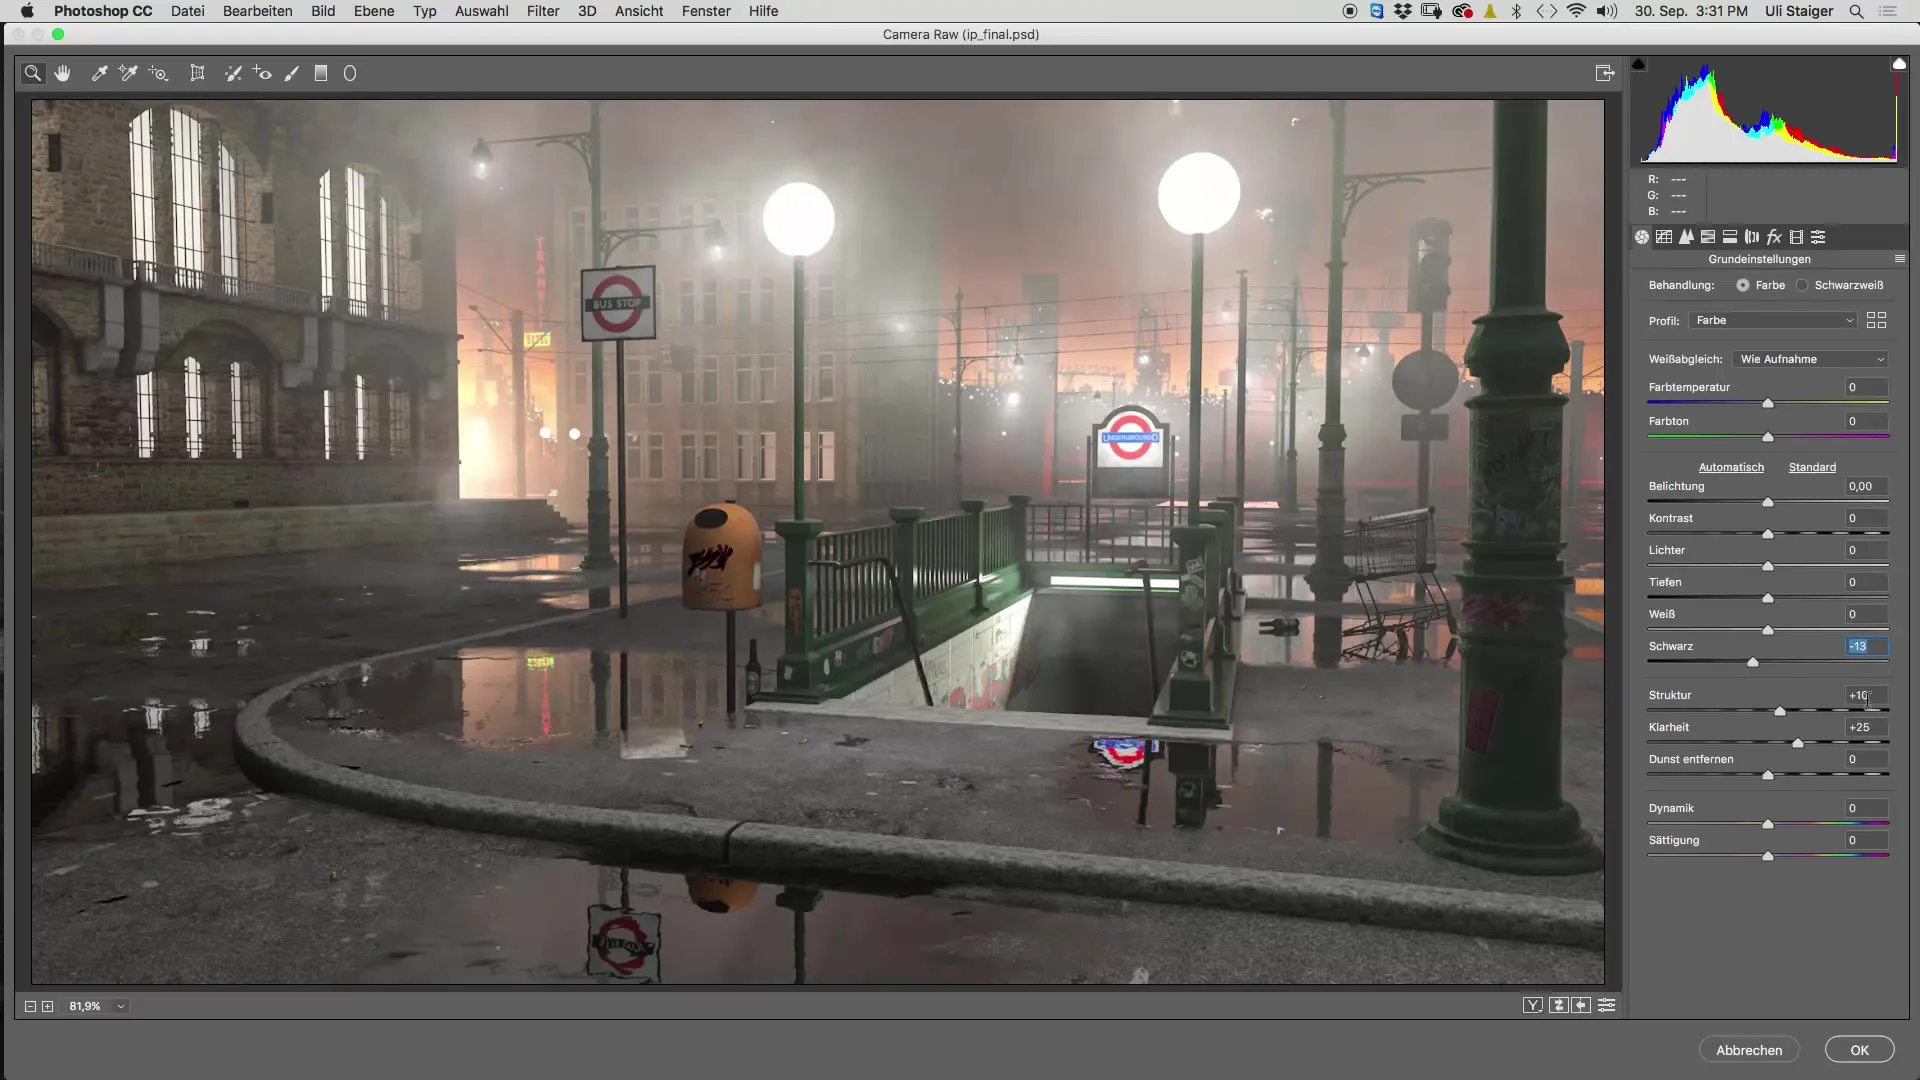
Next, check the shadows and black levels in your image. Sometimes it can be helpful to increase the black level to make the image more dynamic. Keep an eye on the histogram to ensure you do not lose the desired contrast. A slight increase in the black level can make the overall image clearer and more striking.
Step 6: Adding a Vignette
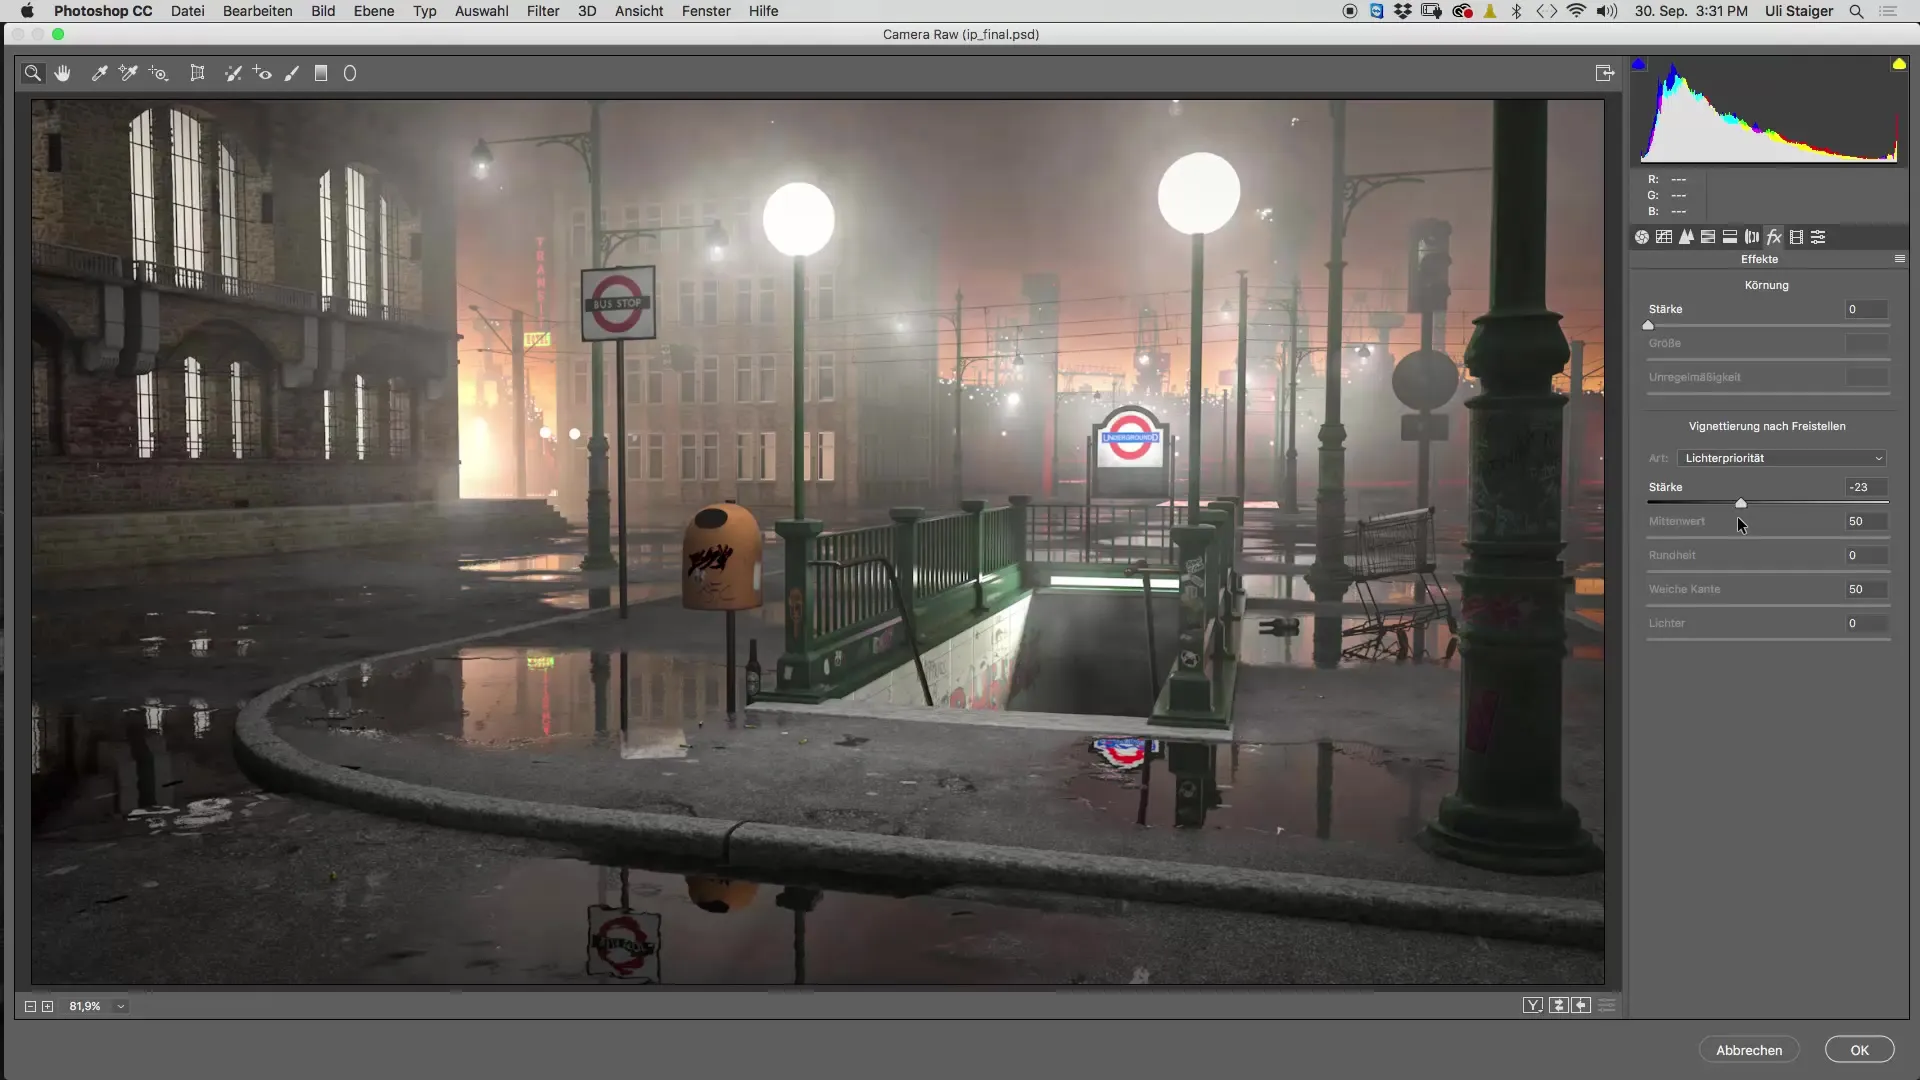
A vignette can draw attention to the focal point of your image. Under the "Effects" section in the Camera Raw filter, you can create a vignette. Make sure to adjust the center point and roundness to your liking. Darker edges can help make the image appear more dramatic, which pairs especially well with a darker look.
Step 7: Adjusting Hue
To give your image a warm hue, go back to the "Basic" settings and adjust the color balances. A warmer hue can create an environment that feels both inviting and mysterious. This is especially important for a scene influenced by the light sources in Cinema 4D.
Step 8: Final Adjustments
Now compare your image in the before-and-after view. It is important to see the changes and ensure that all your adjustments work harmoniously. Take this moment to make final changes to clarity, structure, or the vignette if needed. You can return anytime and reapply the Camera Raw filter.
Summary - Creating an Image Look in Cinema 4D: Step-by-Step Guide
By the end of the process, you should have created an engaging image that reflects your vision. Applying these steps will help you master the technical side of Cinema 4D and bring your creative ideas to life.
FAQ
How long does it take to create an image look in Cinema 4D?The time can vary, but generally, you will need between 15 and 30 minutes to create an engaging image look.
What is the Camera Raw filter?The Camera Raw filter is a powerful tool in Photoshop that allows edits such as exposure, contrast, clarity, color, and more.
How can I ensure that my image doesn't look over-processed?Make sure to keep the values for clarity, structure, and color within a harmonious range and avoid overdoing effects.
