

Imagine you photograph a real wall and turn the image into a material that reproduces light, shadow, and relief in the render with deceptive realism. That is exactly what this tutorial shows you. You will learn how to work with the node-based material system of Cinema 4D, which has been available since version R20. The path leads through the Node Editor, where you assemble materials step by step from individual building blocks. At the end, you have a physically correct material that you apply to a facade.
The video is only loaded from YouTube when you play it – data (including your IP address) is then transmitted to YouTube/Google. More in the privacy policy
This guide is deliberately intended as an introduction. It explains the basic principle of the Node Editor and shows you a complete workflow. It is not a comprehensive course on all functions, but you will get a clear feeling for how the building blocks work together.
Key Takeaways
A node material consists of an input, an output, and any number of nodes in between that you connect to each other with lines. With the Node Commander (key C) you add new nodes, such as an image generator or a relief map. You do not load photos in the Node Editor itself, but in the Attribute Manager. The color information belongs in the color channel of the BSDF layer, which ensures a physically correct material. A relief map delivers a blue base tint because it is automatically converted into a normal map, which you connect to the normal channel. You reduce the strength of this effect directly on the relief node. Finally, you assign the finished material to the object via the Material Manager and adjust the mapping.
Creating a new node material and opening the Node Editor
To get started, you create a new material in the Material Manager and choose the type Node Material. At first it appears as a completely ordinary white preview. Double-clicking the material opens the Node Editor. There you find two basic building blocks: an input, which forms the starting point, and an output called Material. The output always sits at the end of your chain and determines what will actually be visible in the render later. You can move the nodes freely around the canvas. Only the connection between them is decisive; the position does not matter.


Navigating in the Node Editor
The Node Editor grows quickly, which is why navigation is important. At the bottom of the editor there is a small search function that lets you search for nodes specifically. If you get lost, you can reset the view at any time and bring the content back to the center. You will get used to it quickly, and with a little practice you will find every building block without detours.

Integrating a photograph as an image node
Now it's time for the actual texture. For this you need a node that loads an image and passes it on to the next stage. Open the Node Commander with the C key. A search term like "Foto" returns no suitable result in this case, but "Bild" finds exactly what you are looking for, namely the image generator. Drag it into the editor and connect it to the input. By the way, the Node Commander is especially helpful when you don't yet know the names of the nodes by heart, because it searches all terms related to images, colors, and textures.

Loading the image file in the Attribute Manager
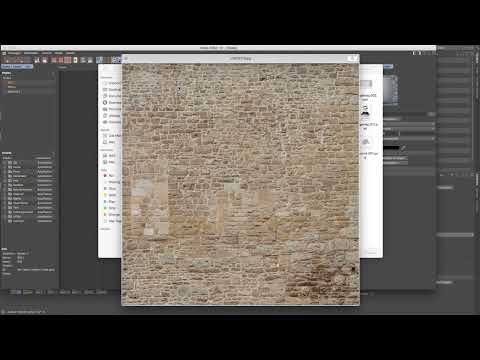
You do not load the file itself via the Node Editor, but in the Attribute Manager. Select the image generator there and click the three dots next to the File entry. Through the familiar dialog, you choose your wall photograph. In the example, it is a shot of an old castle in France, which is ideally suited for this purpose. After loading, the image generator displays the photo, and you can continue working with the result.

Connecting the image to the color channel
Now you connect the output of the image generator to the color input. The result ends up on a so-called BSDF layer. This layer controls how light is reflected and scattered on the surface. This creates a physically correct material that behaves convincingly in the scene. With the result from the photo, you can already see a realistic base texture.
Add a Relief Map for Depth
A wall only looks real when it shows depth. For that, you need a relief channel. There is no direct connection option for this in the material channel itself, but you can open the Node Commander again with the C key and search for "Relief". There you will find the Relief Map. Drag it into the editor and connect it to the result of your image. The Relief Map therefore needs the image as an input signal, because it derives the height differences from it.

Convert the Relief Map into a Normal Map
When you look at the Relief Map, you will notice that it is almost entirely blue. This is not an error, but exactly as intended. The coloring is typical for normal information. The editor automatically converts the Relief Map into a Normal Map via an internal normalizer. If you look at the output more closely, you can also see shades of green and red, which together with the blue describe the direction of the surface normals. You then connect this Normal Map to the Normal channel of your material. This is the moment when the wall looks three-dimensional.

Adjust the Strength of the Relief Effect
The first impression is often too strong, and the wall looks exaggerated. You control the intensity in the Relief node itself. Click on the node there and reduce the strength. A value of around 25 percent may already be too much to start with. Try it out and check the result in the preview until the structure looks natural.

Finish the Material and Assign It to the Object
Once you have finished building the material, close the Node Editor. The material remains in the Material Manager and can be edited there like any other material. The difference is that in the Node Editor you have significantly more options, because you can control each step individually. Then drag the material onto the object, in this example onto the facade segment. Make sure that render instances of the segment adopt the material. If this bothers you, you can convert the render instances into regular null objects with the C key and apply a separate material to them.

Adjust the Mapping and Treat Arches Separately
In the first test render, the facade still doesn't look right. This is due to the mapping. For rectangular buildings, cuboid mapping is usually suitable. However, the round arches do not follow this projection cleanly. A simple solution is to give the arches their own object with a separate material that calculates the UVW coordinates to match the curvature. You can also stretch the texture by setting the tile value below one. You apply this change both horizontally and vertically so that the structure doesn't look distorted. Since the original texture is relatively large, it then fits the surface well.

Check the Test Render and Readjust the Relief Strength
For a test, render a section with lights and shadows. In this example, the material already worked well, but the relief effect was still too strong and looked over-sharpened and a bit dirty. So you open the Relief node again and reduce the strength from 25 percent to 5 percent. With this value, the wall looks much more balanced. Feel free to try further intermediate values until you like the result.

Summary ??? Creating a Cinema 4D Node Material: Step-by-Step Guide with Your Own Photos
You have seen how a node material is built in Cinema 4D. You start with a new material, open the Node Editor, and connect an image generator to the BSDF layer. You load the photo in the Attribute Manager. For depth, you use a Relief Map, which becomes a Normal Map through the automatic conversion. You adjust the intensity on the Relief node, and you assign the finished material via the Material Manager. With the mapping, you make sure the texture sits cleanly on the facade. If you familiarize yourself a little with the Node Editor, many possibilities for your own materials open up to you.
FAQ
Do I need prior knowledge of the Node Editor?A basic understanding helps, but the tutorial explains the most important steps so that you can find your way around quickly.
How do I add new nodes?With the C key you open the Node Commander, where you search for the desired building block.
Why is the Relief Map blue?The blue base coloring is typical for normal information. The editor automatically converts the Relief Map into a Normal Map.
Where do I load an image file for the material?You load the file in the Attribute Manager via the File entry of the image generator, not directly in the Node Editor.
What does the BSDF layer do?It controls how light is reflected and scattered on the surface. This creates a physically correct material.
How do I reduce a relief effect that is too strong?You click on the Relief node in the editor and reduce the strength, in the example from 25 to 5 percent.
What do I do with render instances that should not adopt the material?You convert the render instances into regular null objects with the C key and apply a separate material to them.
When is cuboid mapping suitable?It is suitable for rectangular buildings. Curved elements such as arches should be given their own material and suitable mapping.

