

A illuminated sign only looks convincing when it doesn't glow uniformly, but instead looks like a real object with dirt, uneven brightness, and contrast. That is exactly what you'll work on in this tutorial. Using a London Underground sign as an example, I'll show you how to create a luminous material, apply it only to the front of the object, insert an Underground design, and create realistic dirt with a Layer shader in the Diffusion channel.
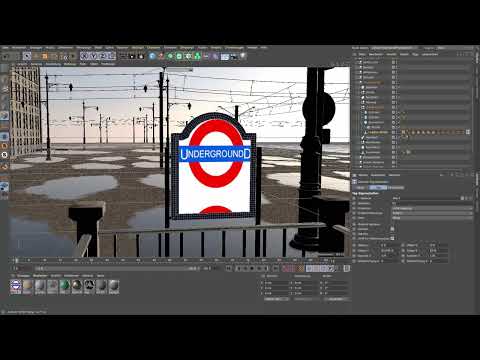
The video is only loaded from YouTube when you play it – data (including your IP address) is then transmitted to YouTube/Google. More in the privacy policy
This guide is suitable for anyone who has already worked with materials in Cinema 4D and wants to light their scene more believably. You need a scene with an extruded sign object and a graphic file of the desired design, such as a PSD file.
Key Takeaways
A luminous material only needs the Luminance channel. Reflectance and color are not necessary for the pure glow effect. To make only the front side glow, you must convert the object into an editable polygon object with the C key and select the appropriate cap. You load the design as a texture into the Luminance channel. You build the dirt in the Diffusion channel with a gradient, whose contrast and brightness you fine-tune using a Layer shader with the Brightness/Contrast/Gamma effect. For the visible glow effect, Global Illumination must be activated.
Step-by-Step Guide
Step 1: Create a luminous material and activate the Luminance channel
First, create a new material and open its settings. Activate the Luminance channel there. You don't need to adjust the reflectance or the color, because the Luminance channel alone ensures that the material emits light. Don't assign the material to the sign yet, but first check that the channel is active.

Step 2: Prepare the object for the front side
If you drag the material directly onto the extruded sign, the entire object glows, including the edge and the back. That would be unrealistic, because the sign should only emit light from the front. To change this, select the object and press the C key. Cinema 4D thereby converts it into an editable polygon object.
Unlike before, you no longer get separate front and back sides as a surrounding shape with roundings, but a list of selections. You can recognize them by their names: C1 and C2 stand for the caps, i.e. the cover surfaces. R1 and R2 stand for the surrounding side surfaces. Click through the selections one after another to identify them. For the glow, you need the caps, i.e. the cover surfaces.

Step 3: Assign the correct selection to the material
Drag the luminous material onto the appropriate selection. With this method, it's normal to pick the wrong selection on your first attempt. Take your time trying out the selections until the material sits on the cap. In the example, the second selection was wrong, and the third one was successful. Once the material is assigned correctly, only the front of the sign glows.


Step 4: Load the Underground design into the Luminance channel
So that the sign doesn't just glow but also looks like a London Underground sign, you load your design as a texture into the Luminance channel. You can store images and graphics there. In the Luminance channel, open the option for loading a texture and select your file. In the example, it is an Underground PSD file. However, you can also design your own fantasy sign if you don't have a template.

After loading, the design doesn't fit the sign properly yet. This is normal and can be corrected with tiling.
Step 5: Adjust the tiling of the design
In the Luminance channel, you'll find the tiling settings, both for the horizontal and the vertical direction. At first, it makes sense to set the design significantly smaller so that you can see everything at once. Then you adjust the values step by step until the logo sits visually harmoniously on the surface.
Note that the sliders react very sensitively. If you hold down the Alt key, the inputs are changed by only about a factor of ten. This helps with fine-tuning. Ideally, the curves of the design run roughly parallel to the circle and to the top edge of the sign. If necessary, you will also have to adjust the values for the tiling in terms of length.


Step 6: Activate Global Illumination
For the luminous material to actually emit light into the scene later, you need Global Illumination. You can find it in the effects of your render settings. Add it and activate it. At this point it is not strictly necessary yet, but otherwise the sign would not glow. Since Global Illumination is needed for the scene anyway, this should work without any problems.

Step 7: Build up the dirt in the diffusion channel
A perfectly clean sign looks artificial. That's why you create a layer of dirt, specifically in the diffusion channel. Click there on the option for a texture and choose a gradient. The gradient is a good starting point here because you can work with it very flexibly. To be able to see the effect at all, activate the Luminance option in the material channel, as well as Reflection if necessary.
At first, the gradient does not yet match the desired result. You want a circular gradient that becomes darker toward the outside. To do this, simply swap the two color sliders with each other. You can adjust the gradient setting again at any time later.

Step 8: Use turbulence and dose it sparingly
The gradient offers a turbulence with which you create organic, irregular structures. In the example, the effect is initially too strong. You can weaken it by reducing the mix strength. The brightness of the turbulence can also be adjusted, but that doesn't help in the example. Pull the mix strength down until the dirt looks only subtle. The mix strength can be adjusted continuously, so you can control the effect exactly as you need it.


Step 9: Control contrast and brightness with a Layer shader
Now comes the most important part for making the dirt look realistic. The gradient alone does not allow precise control of the contrast. That's why you replace the gradient with a Layer shader. The gradient is retained in the process, because it sits in the layer. The layer is thus just a container that gives you additional possibilities.
In the Layer shader, create a Brightness/Contrast/Gamma filter via the Effect option. First increase the contrast until the structure becomes clearly visible. Then increase the gamma slightly to make the dirt brighter. The brightness mainly affects the dark corners. In the example, the effect is initially somewhat exaggerated, but it can be brought to a pleasant level with small adjustments. Be careful not to increase the contrast too much. A value that makes the structure visible without making it look harsh is usually ideal.


Step 10: Check the result
When contrast, brightness, and gamma are in harmony, you have created a luminous material with realistic dirt. At the bottom edge of the sign, you can later add the name of the subway station in glowing letters. This is optional, but it shows very well how flexible the material is. Then render the scene and check whether the brightness and the dirt look consistent in your overall scene.

Summary ??? Luminous material in Cinema 4D: Creating a realistic subway sign
You have learned how to activate a luminance material in the luminance channel and apply it only to the front of a sign. With the C key and the selection of the right cap, you achieve exactly this effect. You load the underground design as a texture into the luminance channel and adjust the tiling. For the dirt, you use a circular gradient with subtle turbulence in the diffusion channel. With a Layer shader with Brightness/Contrast/Gamma, you control contrast and brightness precisely. Don't forget to activate Global Illumination so that the sign actually emits light into the scene.
FAQ
Why does the whole object glow for me and not just the front?This happens when you drag the material directly onto the entire object. Convert the object into an editable polygon object with the C key and assign the material only to the appropriate cap.
Do I need reflectivity or a color for the luminance material?No, the luminance channel is sufficient for the glow effect. Reflectivity and color are not necessary for this purpose.
How do I recognize which selection is the cap?After converting with C, Cinema 4D displays the selections. The caps are labeled C1 and C2, the surrounding surfaces R1 and R2. Click on the selections one after another until you have found the cap.
How can I align the design more precisely?First scale the design down so that you can see everything. Then adjust the tiling step by step. With the Alt key held down, the sliders become much more sensitive.
Why do I need a Layer shader in the diffusion channel?The gradient alone does not offer precise control over contrast and brightness. The Layer shader applies the Brightness/Contrast/Gamma effect over the gradient and thus enables exact fine adjustment.
Why is the sign not visibly glowing in the scene?Check whether Global Illumination is activated in the effects. Without it, the luminance material does not emit light into the surroundings.

