

The physical sky in this scene does provide reflections in the puddles, but the terrain looks cut off at the horizon. With a backplate, you solve this problem by using a photograph as the background that still brings light and reflections into the scene. You will learn how to set up a polygon as a carrier, fix it to the camera with an Align-to expression, and correct the proportions.
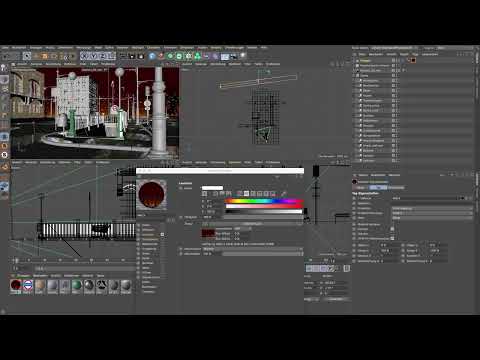
The video is only loaded from YouTube when you play it – data (including your IP address) is then transmitted to YouTube/Google. More in the privacy policy
Key Takeaways
- A polygon with a luminance channel texture replaces the physical sky and still provides light and reflections.
- An Align-to expression ensures that the polygon always faces the camera and no perspective distortion occurs.
- The aspect ratio of the polygon must match the image. At 3:2, a width of 10,000 cm corresponds to a height of about 6,666.67 cm.
- For correct reflections, you have to activate Global Illumination. With the blend mode "Multiply," the texture becomes brighter without distorting the colors.
Step-by-Step Guide
Step 1: Create the Carrier Polygon
First, turn off the physical sky, because it will be replaced by the photograph. Then grab a polygon from the object palette. It initially lies flat on the ground, so it's best to view it in the side view until you stand it upright on the Z axis. This polygon will later act as the carrier for the material with your harbor scene.

Step 2: Create the Align-to Expression
So that the polygon always faces the camera, you need an expression. Select the polygon, open the animation tags, and find the Align-to expression at the very top. As the target object, enter your 30 mm camera. After that, the polygon aligns itself completely to the camera, and you no longer have any perspective distortion or warping in the background.

Step 3: Position the Polygon in the Scene
In object editing mode, you can enlarge the polygon so that it extends further into the frame. Then, in one of the other views, you need to make sure it sits at the very back of the scene. Push it back until it lies behind the streets, traffic lights, and overhead lines. It should therefore act like a movie screen that closes off the scene.

Step 4: Fit the Canvas to the Edge of the Scene
Now pull the polygon out from the center upward and downward as well as to the left and right until it fills the entire background. Make sure that no gaps remain at the edges. The polygon should cover the scene completely so that your backplate looks seamless.

Step 5: Set Up the Material with the Luminance Channel
Open the prepared material from the project files. You don't need reflectivity or base color here. Instead, activate the luminance channel and load the provided PSD file in the "Load Image" area. The luminance channel should not simply make the image glow brightly, but adopt the brightness distribution of the photograph. The PSD file can easily be recolored or adjusted in brightness.

Step 6: Adjust the Texture in Photoshop
The PSD file is deliberately kept editable. The sky is heavily darkened, which suits the mood well, but you can also implement your own ideas. Open the file in Photoshop, change colors or brightness distributions, and save it again. Cinema 4D then updates the texture automatically, so you see the result directly in the scene.

Step 7: Drag the Material onto the Polygon
Drag the finished material onto the polygon via drag & drop. You immediately recognize the harbor in the background. However, the world is upside down, which often happens with material assignments because Cinema 4D does not automatically detect the orientation of the texture.

Step 8: Flip the Texture
To display the texture the right way up again, change the value for the vertical scaling to 100 and put a minus in front of it. After that, the image looks much better. If the polygon should be pulled further up so that more of the harbor is visible, you can do that now.

Step 9: Correct the Horizontal Orientation
You will probably notice now that the lettering in the image also looks mirrored. Therefore, also put a minus in the horizontal scaling (U) so that the lettering and the positions of the elements are correct. After that, everything is in the right place.

Step 10: Adjust the Aspect Ratio
The polygon initially has an aspect ratio of 2:1, while your image has 3:2. Therefore, enter 10,000 cm as the width. You then have to set the height to 6,666.67 cm so that the ratio is correct. Only when the proportions match will the scene be displayed without distortion. If you then move the polygon a little to the left and closer to the edge, the last gaps disappear.

Step 11: Optionally Remove the Expression
You can remove the Align expression again and set the polygon horizontally. This eliminates converging vertical lines. However, this is optional. You can also leave the expression active if the perspective works for you.

Step 12: Activate Global Illumination
For the light of the background to reach the scene, you absolutely need Global Illumination. Turn it on in the render settings. For a quick preview, set the setting for the irradiance cache density to "Preview". On the "General" page, set the samples to low. This noticeably shortens the render time, even though the result is then not yet perfect.

Step 13: Use the Interactive Render Region
In the interactive render region, you can immediately see how the scene behaves. Even at low quality, you can see that the reflection of the background in the puddles works. However, the scene still looks too dark.

Step 14: Increase the Brightness of the Background
In the Luminance channel, increase the brightness, for example to 140%. At first, nothing will change. Only when you switch the blend mode from "Normal" to "Multiply" does the image become brighter. The reflections in the puddles thereby become much more visible.

Step 15: Check the Result and Fine-Tune
Render the scene at a somewhat higher quality to get a realistic impression of the lighting mood. On this basis, you can decide how to design the lighting of the scene. The scene is now prepared for lighting.

Summary ??? Backplate in Cinema 4D: Setting Up a Harbor Scene as a Photo Background
With a polygon as a carrier, an Align expression, and a Luminance channel material, you have replaced the physical sky with a photograph. Pay attention to the correct aspect ratio, correct the orientation of the texture, and activate Global Illumination. This creates a background that credibly complements the scene and enables reflections in the puddles.
FAQ
Why do I have to activate Global Illumination?Without Global Illumination, the light of the backplate is not transferred into the scene, and the reflections are missing.
What is the Align expression for?It ensures that the polygon always faces the camera. This way you avoid perspective distortion and warping in the background.
Why is the image displayed upside down after assignment?Cinema 4D does not automatically recognize the top-bottom orientation of the photograph. The vertical scaling must therefore be corrected with a minus.
How do I calculate the correct height of the polygon?Divide the width by the aspect ratio of the image. With a ratio of 3:2 and a width of 10,000 cm, the result is a height of about 6,666.67 cm.
Why does the "Multiply" blend mode make the scene brighter?The blend mode combines the texture with the background differently than the Normal mode. As a result, the backplate looks much brighter in the render and the reflections become more visible.
Can I adapt the texture to my own scene?Yes, the PSD file can be recolored in Photoshop and its brightness changed. You can implement your own ideas, as long as they fit the mood of your scene.

