

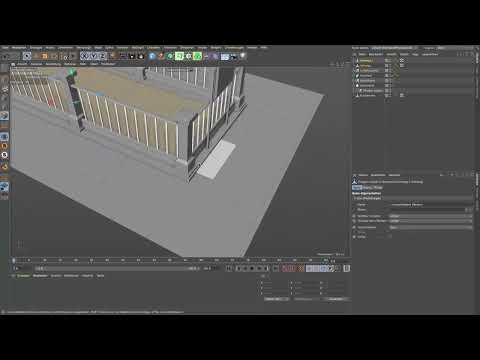
An entrance that ends in the middle of empty space immediately gives away to every viewer that it is just a set piece. This is exactly where this chapter picks up. You build a sidewalk that frames the subway access, cut the opening for the stairs going down out of it, and then use the brush to shape a worn stone threshold. In the end, the scene no longer looks like a model, but like a place that thousands of people enter every day.
The video is only loaded from YouTube when you play it – data (including your IP address) is then transmitted to YouTube/Google. More in the privacy policy
Key Takeaways
- A sidewalk can be created from a single plane. If you position copies numerically, they fit together exactly.
- The opening is created by selecting the appropriate faces in Polygon mode and deleting them.
- For the threshold, a finely subdivided cube is suitable, which you bring into shape with tools.
- The brush is more versatile than the Magnet tool because you can control falloff and effect (smear, pull, smooth) in a targeted way.
- Small irregularities and signs of wear make a model believable.
Step 1: Turn the Plane into a Sidewalk
Begin with a simple plane. It is sufficient for a sidewalk, but it should extend about one meter beyond the width of the future entrance. This measurement proved suitable in the tutorial, but you can make it wider or narrower to your taste. Then convert the plane into a polygon object and immediately give it a unique name such as "Sidewalk". This makes the overview in the Object Manager much easier later on.

Step 2: Copy and Align Numerically
A single sidewalk is usually too short. So copy it with Ctrl+C and Ctrl+V (Command+C and Command+V on a Mac) and enter the value 400 for the copy under the Z coordinate in the Attribute Manager. Make sure to enter it numerically and not move it with the mouse, then the second section will sit exactly against the first. Then select both objects and choose the Move tool. Drag the combination a bit in the desired direction until it leaves about one meter of space in front of and behind the entrance. The copy saves you work and prevents gaps at the transitions.

Step 3: Cut Out the Opening for the Stairs
Now comes the actual access. Switch to Polygon mode and choose the "Live Selection" tool. Use it to select all the faces located in the area of the entrance, and extend the selection while holding the Shift key until even the last polygons at the rear edge are captured. Check the back side once more so that no selection is overlooked there. A gap at this spot would hardly be visible, but clean work pays off. Then delete the selected polygons. The sidewalk now has an opening through which one can descend underground.

Step 4: The Idea of the Worn Threshold
An edge that is cut this precisely looks unnatural. At many subway entrances, you find a granite or masonry stone threshold at this spot that is worn down in the middle by constant traffic. This is exactly the effect you will create now. Since in reality the threshold and the sidewalk do not develop independently of each other, you use a separate body for this, which you will later connect to the sidewalks.
Step 5: Shape the Cube into the Threshold
Take a cube, move it to the position in front of the entrance, and adjust its dimensions. The threshold should be narrower than the sidewalk, the height significantly lower, and the depth must also be adjusted. Make sure the body visually matches the scale of the scene. A threshold that is too thick quickly looks like a concrete block.

Step 6: Finely Subdivide the Cube
So that you can deform the object later, you need many subdivisions. Increase them primarily in the X direction, since most of the deformation takes place here. In the Y and Z directions, significantly fewer segments are sufficient. A simple rule of thumb helps here: when you look at the cube from above, the polygons should look roughly square. Then the subdivision in the lengthwise and crosswise directions is about equal, and the surface can be deformed evenly.

Step 7: Magnet or Brush? Choosing the Right Tool
You could first try the Magnet tool, which can be found in Cinema 4D under the Move menu. Although it allows different types of pulling, it offers only limited possibilities. The Brush tool is much more versatile. With it, you determine not only how the deformation falls off, but also what happens in the process: smearing, pulling, repelling, rotating, and much more. For an organic-looking threshold, the brush is therefore clearly at an advantage. In the basic settings, set it to the falloff bell and the "Smear" mode.

Step 8: Creating the Wear in the Middle
Reduce the radius of the brush, to about 30 cm, so that you can work in a targeted way. Then carefully press down in the middle of the threshold. This creates a slight hollow located exactly where the most people walk over it. Work with small, gentle movements. The deformation should be recognizable at first glance, but should not feel exaggerated. A slightly skewed, crooked impression gives the object additional character.

Step 9: Rounding Edges with the Smooth Mode
Switch to the "Smooth" mode and reduce the strength, for example to 15 percent. Go over the edges of the threshold that you want to be softer. You should round the upper edge thoroughly in particular, since the wear is strongest here. The underside, on the other hand, you can work on less, since it is barely visible in the finished image. Make sure that the entire shape does not become blurred in the process. Finally, you can pull lightly once more with a smaller brush radius so that small, stretched surfaces are created. These details will look especially realistic later when texturing.

Step 10: Merging and Organizing Everything
Connect the threshold with the sidewalk so that everything exists as one coherent element. Then group the objects with Alt+G so they stay clearly organized in the Object Manager. Name the group appropriately, for example "Sidewalk" with threshold. With that, the access to the subway station is modeled, and the scene is coming significantly closer to your vision.

Summary – Cinema 4D: Modeling a Sidewalk and Worn Threshold for the Subway Entrance
In this chapter, you built a sidewalk from a single plane and duplicated it numerically to obtain a seamless run. The opening for the stairs was created by targeted selecting and deleting in Polygon mode. For the threshold, you used the Brush tool to turn a subdivided cube into a worn, organic-looking shape. These techniques can be transferred to many other components where realism arises from small irregularities.
FAQ
How wide should the sidewalk be in relation to the entrance?An overhang of about one meter on both sides proved suitable in the tutorial. However, you can adjust the width to suit your subject.
Why should I move the copy numerically instead of with the mouse?Numerical input ensures that the parts connect exactly to one another. When moving freely, gaps or overlaps easily occur.
Can I use the Magnet tool instead of the Brush?Yes, that is possible. However, the Brush offers more setting options, such as for smearing, pulling, or rotating, and is therefore better suited for organic deformations.
Why is the subdivision of the cube so important?Without enough polygons, the shape cannot be deformed cleanly. A coarse surface also prevents edges from being rounded off softly.
What do I do if the deformation looks too strong?Reduce the strength of the brush and work with smaller movements. You can also reduce the radius to make finer adjustments.

