

A bathroom with glossy tiles, a reflection on the wall and fine grout lines can be recreated surprisingly quickly in Cinema 4D without loading external textures. All you need is the Material Manager, the Tiles shader and a few channels that you adjust specifically. In this tutorial, you create a tile texture for a floor step by step. Along the way, you learn how to control grout lines, height differences and surface details, and how the "Multiply" blend mode refines your result.
The video is only loaded from YouTube when you play it – data (including your IP address) is then transmitted to YouTube/Google. More in the privacy policy
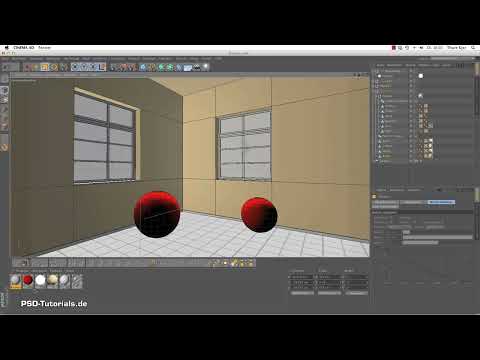
A small test scene with a room, two windows, several light sources, a sky object and two spheres serves as the starting point. The spheres are only there to make reflections visible.
Key Takeaways
- A tile structure is created in the Cinema 4D material via the Tiles shader in the Reflectance channel, whose height values are controlled via the color value.
- The Delta value determines the accuracy of the calculation in the depressions. A low value makes the grout lines finer.
- The Diffusion channel adds contrast and irregularities to the grout lines, which would otherwise get lost in the light.
- With the Fresnel effect and the "Multiply" blend mode, a reflection can be controlled without the surface looking like chrome.
- The interactive render region shows you changes immediately and saves you many test renders.
Step-by-Step Guide
Creating and naming a new material
The first step is creating a new material. To do this, double-click an empty area in the Material Manager, then open the material by double-clicking it to see the Material Editor. At the top, in the "Name" field, assign a unique name, for example "Bathroom Tiles". This way you keep an overview when you have several materials in the scene later.

Disabling Specular and activating the Reflectance channel
In the "Specular" channel, disable the option so that no unwanted highlights appear on the tile surface. Then you switch on the Reflectance channel. It is the foundation for the tile structure, because this is where you create height differences and patterns.

Selecting the tile pattern in the Reflectance channel
In the Reflectance channel, open the "Texture" tab. There, you can load various effects via the "Surface" area. Click the selection and choose the Tiles shader, that is, the pattern with the tiles. There are other patterns too, for example for studded PVC, but for a bathroom tile the checkered pattern fits best. The preview in the editor immediately shows you what the structure looks like.

Adjusting the height of the tiles via the color value
The height of the individual tiles is generated via the color value. In the preview image you can therefore quickly see when a tile sits higher or lower than the others. Adjust the color values of the two fields so that they are at the same height. In addition, you can use the tile values to set the structure so that a uniform grid is created.

Assigning the material to the floor and setting the mapping
Drag and drop the material onto the object on which it is to be displayed, in this example the floor. As the mapping, choose "Flat Mapping". Then copy the texture from the Reflectance channel into the Color channel. To do this, click the shader in the channel, choose "Copy Shader Image" and paste it again in the Color channel. This way you see the pattern directly in the editor.

Correcting the orientation with the Rotate tool
Now switch to Texture mode. There you can see that the orientation of the pattern is still not right. Rotate the texture by 90 degrees with the Rotate tool until the tiles point in the right direction. The tool can also be activated via the selection in the toolbar.

Scaling the texture with the Transform tool
With the Transform tool (key T) you enlarge or shrink the tiles. Adjust the size so that the pattern fits the room size and the windows. A tile that is too large quickly looks unrealistic. By comparing it to the windows, you can tell whether the size is right.

Adjusting the grout width and the rounding
Open the Reflectance channel again and delete the Tiles from the Color channel so that you can edit the settings in a targeted way. In the Reflectance channel, you will first notice that the grout lines are much too strong. Reduce the values for the grout width and the rounding. In the video, a value of about 0.2 for the grout lines turned out to be suitable for a floor. You can then set the rounding to a higher value, around 5. This divides the pattern much more finely.

Using the Delta value for finer grout lines
At a Delta value of 100 percent, Cinema 4D works quite imprecisely in the recesses, which is exactly where the grout lines are. If you lower the value significantly, to about 10 percent, the grout lines become noticeably finer. The Delta value works independently of the grout width and the rounding, but only works in the Bump channel. If you use the shader via the Diffusion or Color channel, it has no effect.

Fine-tuning with the Interactive Render Region
Use the Interactive Render Region to check the settings in real time. With the slider you can increase or decrease the quality. A higher quality delivers a more accurate result, but needs more computing time. In the video, the Delta value was finally set to 5 percent, and the grout width to 0.1. With these values, the result looked nicer overall. If the texture still seems too large to you, you can scale it again.

Using the Diffusion channel for contrast in the grout lines
The Diffusion channel controls irregularities such as dirt, scratches, or small bumps. Without it, the grout lines quickly get lost in areas without direct light. Copy the texture of the Reflectance channel into the Diffusion channel. Then set the mix strength to about 25 percent so that the Color and Diffusion channels are blended gently with each other. At 100 percent, the grout lines look as if they were drawn with a fineliner. You can also adjust the brightness of the overall image via the "Brightness" channel.

Matching the Diffusion to Specular, Luminance, and Reflection
Below the Diffusion channel you will find three options: Specular, Luminance, and Reflection. With them you determine what the unevenness should influence. Since you want to add a reflection later, you activate the option for Reflection. This way, the unevenness also influences the reflections.

Activating the reflection and controlling it with Fresnel
Activate the Reflection channel. At 100 percent, the surface is reminiscent of chrome or stainless steel. If you push the value down, the Color channel with the Diffusion channel comes back to the fore more strongly. To dose the reflection without creating the metal look, you use the Fresnel effect. It creates a black-and-white gradient that fades the reflection out towards the edges. To do this, check the box for "Physical" and choose a refractive index from the presets, for example Titanium with 2.616. The choice is a matter of taste, so you can also try other values.

Setting the blend mode to Multiply
If you reduce the mix strength and set the brightness to 100 percent with this setting, you get back to the chrome look. However, if you set the mode to "Multiply", the reflection and color are blended with each other. This preserves the desired appearance, and you can still influence the reflection. Test it in the Interactive Render Region by aiming at the sphere. You will then see the reflection of the sphere on the floor.
Dosing the mix strength of the reflection
The mix strength determines how strongly the reflection runs back into the distance. In the video, the value was increased step by step: from 30 through 80 to 70 percent. Make sure that the reflection looks neither too weak nor too dominant. At zero percent, it disappears completely.

Creating Slight Waves with an Additional Layer
If you also want a slight waviness in the surface, add another layer in the Reflectance channel. To do this, click the option in the "Texture" area to add further shaders, and choose a shader that creates waves. Set the blend mode to "Multiply" again so that the Tiles shader is preserved. A sphere in the preview helps you judge the effect. If the waviness is not sufficient, increase the reflection. If it is too strong, reduce the strength, decrease the global size, or adjust the clipping. However, don't overdo it, otherwise the image will look restless.

Softening the Surface with a Matting Effect
Finally, you can add a matting effect in the reflection channel. It creates a slightly roughened surface, so it looks less like a perfectly clean reflection. In the video, the value was set to 5 percent. Then check the result using the section in the interactive render region.

Choosing the Renderer and Anti-Aliasing Settings
Before you start the final rendering, open the render settings. In the video, the Physical renderer was used. It calculates matting effects faster and more accurately than the Standard renderer, and the anti-aliasing looks cleaner. For Global Illumination, cache settings of low were used.

Emphasizing the Corners with Ambient Occlusion (Inclusion)
With "Inclusion" you can create small dirt edges at corners and baseboards. The maximum length should not be too large. In the video, 3 cm with a light gray tone was used so that the effect stays subtle. Check the corners of the room and the baseboard in the section. If the effects are too strong in certain places or cause artifacts, reduce the density or increase the ray depth. In the video, increasing the ray depth and the sample density largely eliminated the artifacts.

Excluding Artifacts with a Render Tag
For certain areas, such as the wall and the ceiling, you can apply a Render tag. There you specify that Inclusion should not be visible. After that, the area renders separately, and the effect is still retained at the baseboard. This gives you a clean overall image.

Starting the Final Rendering
Once you have matched all the settings, start the rendering. Then zoom to 100 percent and check the image spot by spot so that you discover errors in the grout lines or at the windows in time.

Summary ??? Creating Tiles in Cinema 4D: Floor Texture with Built-in Tools
You have seen how to create a realistic-looking tile texture using Cinema 4D's built-in tools. You created the material, set up the Tiles pattern via the Reflectance channel, and fine-tuned the grout lines with grout width, rounding, and the Delta value. With the Diffusion channel you bring contrast into the grout lines, and you can control the reflection via Fresnel and the "Multiply" blend mode. Complemented by matting, Inclusion, and a clean render configuration, a coherent bathroom floor material emerges.
FAQ
How do I create a tile pattern in Cinema 4D?You create a new material in the Material Manager, activate the Reflectance channel, and select the Tiles shader in the Texture area.
Why are the grout lines too wide?The grout width is set too high by default. Reduce it significantly in the Reflectance channel, to about 0.2 in the video.
What does the Delta value do?The Delta value determines how precisely the calculation is performed in the depressions. Lower values make the grout lines finer, but only work in the Relief channel.
What is the "Multiply" blend mode for?It combines two layers with each other so that the reflection remains, but the original appearance of the surface is preserved.


