
If your texture appears mirrored, distorted, or criss-crossed on the model, it is almost always due to the UV layout. This tutorial shows you how to create a clean UV layout for an architectural cube in Cinema 4D without plug-ins, which you can then edit in Photoshop.
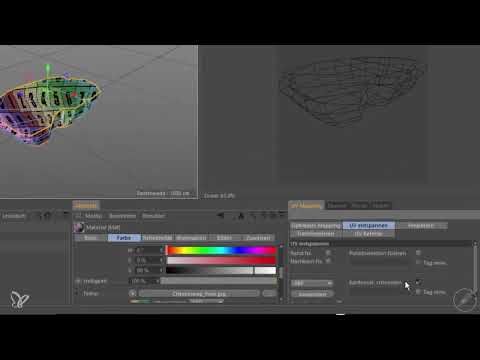
The video is only loaded from YouTube when you play it – data (including your IP address) is then transmitted to YouTube/Google. More in the privacy policy
Introduction
Before you start with the UV layout, you should understand how a texture behaves on your model. For this, it is best to use a Checker Map, i.e. a checkerboard pattern. With it, you can immediately see where the texture is stretched, compressed, or mirrored. Then you break your model down into edges and cuts, project it onto a plane, and arrange the pieces so that they lie as evenly as possible on the surface. Finally, you export the layout as an image file, on which you can later adjust your textures in Photoshop.
Key Takeaways
Key Takeaways
- A Checker Map quickly shows you where the texture is distorted.
- You define the cuts in edge mode using Loop Selection. You remove the top and the bottom so that the model can be unfolded.
- The UV Peeler function in Cinema 4D arranges the UV islands automatically and can only be used in edge mode.
- With Relax UV, Optimal Mapping, and Equalize Island Size, you get an even result.
- Via BodyPaint 3D Edit, you create a texture and save the UV mesh as a layer for Photoshop.
Step 1: Testing the Texture
The starting point is a Checker Map. Download such a texture from the web and save it on your hard drive. Also save your scene first, for example as Island Cinema 4D and the folder for it as Island 01. Then create a subfolder named Tex. Cinema 4D automatically stores all textures you use in the project there.

Now create a new material in the Material Manager by double-clicking. Open the color properties and load your Checker Map into the color channel. Cinema 4D asks whether it should create a copy. Confirm with Yes so that the texture ends up in the texture folder and your original image remains untouched.

When you drag the material onto the model, you will initially see a rather blurry display. To fix this, open the texture editor in the material and set the preview size to 16 MB. Depending on your graphics card, you can also choose a different value here. The texture becomes significantly sharper as a result.

Now you can see the problem: The top appears mirrored, the sides are distorted, and the texture is partly upside down. These are exactly the distortions you want to eliminate with the UV layout.

Step 2: Selecting Edges for the Cuts
Switch to edge mode and activate Loop Selection, which you call up with the U key and then L. Alternatively, you can find it in the menu under Selection. First select the top edge of the cube. Then hold down the Shift key and click the bottom edge so that both are marked together. With an additional cut in the middle of the back, you determine where the model will be cut open later.

With Loop Selection, you reach the cut faster than if you click each edge individually. You also set the cut on the back using Loop so that the model can unfold cleanly.

Step 3: Separating the Top and Bottom
Now you remove the top and the bottom from the cut. To do this, hold down the Control key while you deselect the side faces. This leaves only the side walls. Your model now practically consists of a middle section with one cut, so that everything can be unfolded into a single plane.

Step 4: Preparing the Projection
Switch to BodyPaint UV-Edit in the layout. So that Cinema 4D knows which surfaces the projection should be applied to, select the Polygons mode at the top. Make sure that all polygons are selected. If you only select individual parts, the action will only affect those. Confirm the selection with Control and A so that it is really applied.

Next, open the Cuts menu and select Projection there. Cinema 4D offers several methods, such as Frontal or Surface. For this example, choose Frontal. At first you won't see anything in the UV-Edit window yet, because you need to turn on the display of the UV mesh. With the projection, you are effectively defining a starting line that helps Cinema 4D with the later cutting.


Step 5: Relaxing the UVs
In the next tab at the bottom right, you will find the Relax UV function. There, activate the option that takes edge selection and cutting into account, and select all the parts you want to edit. Then click Apply. Cinema 4D now arranges the mesh in the UV window. The top and bottom initially lie on top of each other, which is why you will improve the arrangement in the next step.

Step 6: Sorting the Islands
So that the individual surfaces no longer lie on top of each other, you use optimal mapping. Select the Arrange or Equalize Island Size function and click it several times. In this way, Cinema 4D distributes the islands more evenly across the surface. The top already looks very good afterward, while the bottom still appears mirrored, which you will correct later. The side surfaces are still arranged haphazardly, because the UV mesh is distorted by the curvature of the projection.

Step 7: Using the UV Peeler
For the side surfaces, Cinema 4D has a very helpful function: the UV Peeler. You can find it under Edit UV. Note that you can only activate it in edge mode. Leave everything selected as it has been so far, and start the UV Peeler. Move the mouse pointer over the UV window until the tool's icon appears, and click with the left mouse button. The UV islands are then automatically aligned straight.

Using the tool's options, you set how straight the lines should run. This gives you a clean and clear layout.

Step 8: Checking and Adjusting the Texture
Now look in the editor at how the Checker Map behaves on the layout. To do this, use the sliders of the texture editor until the squares look even. Remember: the larger you make the UV island, the smaller the texture is displayed on it. Conversely, the texture becomes larger if you shrink the island. So you always have to find a balance between the individual areas.

To readjust the top side, select the affected UV points with the Rectangle Selection. Then scale them slightly until the size roughly matches the other surfaces. After that, move the islands so that they do not overlap and appear as equal in size as possible. Finally, run optimal mapping once more and rearrange the polygon surfaces. In this way, you get an even result.


Step 9: Exporting the UV Layout for Photoshop
So that you can edit the layout in Photoshop, switch from BodyPaint UV-Edit to BodyPaint 3D-Edit. In the Texture tab, go to File and select New Texture. Give the texture a name, for example Island Texture, and set the desired size. You have a lot of freedom with the size, but make sure it is sufficient for your application.


In the Layers area on the right side, you then create a new layer for the UV mesh. To do this, click on Layer, then on Create UV Mesh Layer. The white lines you now see show your layout. Save the file via File and Save. Keep the name and the suggested file format, unless you have a specific reason to change them.


With this file, in the next step you can adapt your textures exactly to the UV layout in Photoshop. Afterwards, you will see what the result looks like in Cinema 4D.
Summary ??? Mastering UV Layout in Cinema 4D: Step-by-Step Guide
You have learned how to make the distortions of your texture visible with a Checker Map and then define the cuts for the model in Edge mode. With Projection, Relax UV, Optimal Mapping, and the UV Peeler, you get a clean layout without having to resort to plug-ins. Via BodyPaint 3D-Edit, you export the UV mesh as a layer so that you can edit your textures precisely in Photoshop.
FAQ
Do I absolutely have to use the Checker Map?No, you can use any texture. However, the Checker Map is particularly helpful because you can immediately recognize distortions and mirroring.
Why can't I apply the UV Peeler?The UV Peeler only works if you are working in Edge mode. Switch to this mode and select the affected edges.
Why are my UV islands on top of each other after relaxing?This is normal if you projected the top and bottom together. Then use Optimal Mapping and Equalize Island Size to sort the islands.
Why is my texture mirrored after the projection?The projection is done from a specific viewing angle. As a result, individual faces may appear mirrored. It is best to correct these via the UV points or in Photoshop.
What file size should I choose for the texture?The size depends on your project. For visualizations with fine details, you should choose a higher resolution.
Can I also create the UV layout without Cinema 4D?That is possible, but this workflow shows that you can create the entire layout directly in Cinema 4D without needing additional software.


