
Cinema 4D quickly feels overloaded at first launch: large windows, countless buttons and menus that at first glance have little to do with each other. This is exactly where this introduction comes in. You will learn the basics you need to follow the tutorial "360° Architecture Views with Unity and Cinema 4D" without detours. You will move around in the viewport, create and edit basic objects, understand the difference between parametric and editable objects, and work with tags that control properties. I will also show you the most important modeling tools, including the Polygon Pen, Knife and Splines, as well as generators and deformers.
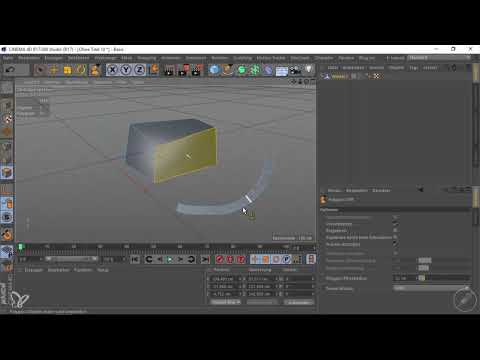
The video is only loaded from YouTube when you play it – data (including your IP address) is then transmitted to YouTube/Google. More in the privacy policy
This guide does not replace complete training. However, it gives you solid orientation so that you don't get stuck on every second command in the main course.
Key Takeaways
- The viewport is controlled with key combinations: Alt plus left mouse button to rotate, middle mouse button to move, right mouse button to zoom.
- Basic objects are parametric. Their size and segments can be changed afterwards via the Attribute Manager.
- With the C key, you convert an object into editable polygons, points and edges. In doing so, the parametric settings are lost.
- Tags define properties such as display, visibility or rendering. They can be passed on to child objects through inheritance.
- For modeling, the Polygon Pen, Knife tool and Extrude are the most important tools, and the selection should be set deliberately.
Step-by-Step Guide
Navigating in the Viewport
The large area in the center of the program is the viewport, i.e. your three-dimensional workspace. Before you create anything, you should be able to move around in it confidently. Hold down the Alt key and drag with the left mouse button to rotate the view. The middle mouse button moves the image section, and with the right mouse button you zoom in or out. With these three movements you will quickly find your way around.

Creating Basic Objects
At the top in the toolbar you will find the button for basic objects. One click on the cube is enough to place it in the scene. Hold the button down a little longer if you want to see all available basic shapes. The cube then appears in the Object Manager, and via its orange points you can modify it directly in the viewport.

Adjusting Size and Segments in the Attribute Manager
As soon as an object is selected, the Attribute Manager at the bottom of the program shows its settings. There you define size, segments and other values precisely. You can enter the size for each axis individually, that is X, Y and Z. The number of segments determines how finely the object is subdivided. If you want to make this subdivision visible, switch the mode in the viewport under Display to Gouraud Shading (Lines). Then you see the mesh lines and immediately recognize how your changes take effect.

Understanding Parametric Objects
An object with a checkmark in the Object Manager is parametric. This means that Cinema 4D calculates the geometry from formulas based on your inputs. So change the size, segments or roundings, and the object is recalculated. You can deactivate the checkmark at any time to interrupt the calculation for the object. This flexibility is a great advantage because you can adjust properties afterwards without having to start from scratch.

Converting Objects
If you want to edit individual faces, edges or points, you have to convert the object. To do so, select the object and press the C key or click the icon for Make Editable (Convert Basic Object). Afterwards the parametric controls disappear, and the object consists of real polygons. The icon in the Object Manager changes in the process, which shows you that the conversion was successful. Keep in mind that this conversion cannot be undone without losing the changes. It is therefore best to work with a copy.

Moving Faces with Tweak Mode
On the left side of the viewport, the modes for points, edges and faces are available. If Tweak Mode is activated, you can click a model directly and pull out or move faces without having to laboriously select them beforehand. If it is switched off, you must first select the element before you can move it. Tweak Mode is active by default in most cases and is a good starting point for spontaneous shape changes.

Controlling Properties with Tags
The basic principle of Cinema 4D is this: properties are controlled via tags. Right-clicking on an object opens the menu with the available tags. A render tag, for example, determines whether an object should cast shadows, receive shadows, or be visible to the camera. You can find the settings in the Attribute Manager as soon as you click on the tag. This keeps properties organized, and you don't have to search through each object individually.

Using Display Tags and Inheritance
A display tag is an example of working with tags. Create it via the right mouse button, activate the shading mode, and switch the display to lines. The object is then shown only as a wireframe, while other objects appear normally. The traffic-light control of the visibility in the editor and rendering is also important. Red means off, gray is neutral, and green is activated. A group passes its settings on to child objects as long as these are set to neutral. If you set the parent object to red, the child objects also disappear from the viewport.

Using the Polygon Pen
The Polygon Pen is particularly well suited for modeling. It is very extensive, but for your first steps it is enough to use it to move points. Switch to points mode and drag the points to the desired position. For more complex shapes, you draw your own polygons with the tool. Click point by point, and double-click for the last point to complete the polygon. You adjust the brush size by holding down the middle mouse button. Working in orthogonal views is easier because you can align the shape exactly.

Making Cuts with the Knife Tool
The Knife tool cuts polygons at any point. With a simple cut, you create a single line, and the tool exits afterwards. If the tool remains active, you can make several cuts in succession. The Loop tool, on the other hand, automatically searches for connected lines and cuts through the model at these points. This quickly gives you even subdivisions that you can edit further later.

Setting Up Selection Correctly
Selection is a common source of errors. In selection mode, the option "Select Visible Elements Only" is often active. Then hidden points and polygons are not selected, and you wonder why parts of the model remain unchanged. Deactivate this option if you want to edit the back side. Tolerant selection is also important. With it, it is enough to mark a small area of an edge so that the entire edge is selected. Without it, you have to mark the complete edge.

Extruding Surfaces
Extruding means pulling a surface outward or inward. To do this, select the desired polygons and choose the Extrude command via the right mouse button. It is even faster with the keys: D extrudes outward, I inward. This way you can build up volume step by step, such as windows or protrusions in a building model. The command is one of the most important in the entire program.

Drawing Splines
The Spline Pen creates curves that you later use as the basis for other objects. Since version 17, drawing has been much more convenient. Hold down the left mouse button to create tangents, and look at the preview before you place the point. Clicking on the start point closes the shape. Via the type, you can switch between Bezier and linear. For straight-lined shapes such as floor plans, linear is particularly well suited.

Using Generators and Deformers
You often use splines with generators. An Extrude generator takes a curve and turns it into a volume. To do this, drag the spline under the generator and set the direction in the Attribute Manager. The result remains parametric, and you can adjust the settings at any time. Deformers deform objects without directly editing their geometry. With the FFD cage, you bend and pull an object via a lattice frame. Hold down the Shift key when creating it so that the cage automatically adapts to the selected object.

Summary – Cinema 4D for Beginners: Navigation, Modeling and Tags
You have now learned the basics that make it easier for you to get started with Cinema 4D. You can navigate in the viewport, create basic objects and adjust their parameters. You know when an object is parametric and when you need to convert it. With tags, you control display, visibility and rendering, and you understand inheritance via the traffic light control. In addition, you have tried out the most important modeling tools: Polygon Pen, Knife, Extrude and splines. With generators and deformers, you are already one step further. That is enough to follow the tutorial. However, Cinema 4D offers much more, so it is worth deepening your knowledge of individual tools step by step.
FAQ
Do I need prior knowledge of 3D software to learn Cinema 4D?No, you can start without any prior knowledge. What matters is that you master the basic operation in the viewport and can understand terms such as object, tag and polygon.
Why can I no longer adjust my object using the size controls?The object has probably been converted. After converting to polygons, the parametric controls are no longer available. You then work via points, edges and faces.
How can I undo a conversion step?Use the Undo command with the keyboard shortcut Ctrl plus Z. As long as you haven't changed anything else right after the conversion, this restores the parametric state.
Why are some points or polygons not selected when I try to select them?The option "Select only visible elements" is probably active. Deactivate it if you also want to edit hidden areas of the model.
What is the difference between tags and generators?Tags control properties of an object, for example display or rendering. Generators, on the other hand, create new geometry, for instance by turning a spline into a volume.


