
An architectural model often only appears convincing when the viewer can focus entirely on the building. Sometimes, however, elements such as a tree can get in the way, blocking the view of the façade or distracting from the actual design. This is exactly where a dedicated button is worthwhile, with which the tree can be shown and hidden at the push of a button.
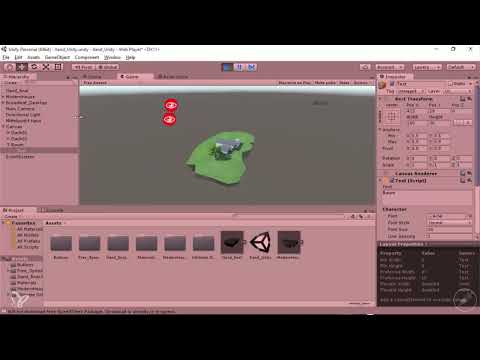
The video is only loaded from YouTube when you play it – data (including your IP address) is then transmitted to YouTube/Google. More in the privacy policy
In this tutorial, you will create a third button in Unity, modeled on the existing roof buttons. Along the way, you will learn how to duplicate a button, use a text field as a label, fix the canvas size for web output to 800 x 600 pixels, and control the Level of Details Group via a toggle script.
Key Takeaways
- A button can be quickly duplicated from an existing roof button if you use Ctrl + D and then rename it.
- The text element must be subordinate to the toggle script, otherwise the control will not work.
- The canvas scales depending on the window size. With the 800 x 600 aspect ratio in the Game View, you keep the position of the buttons under control.
- Showing and hiding the tree is done via the "Level of Details Group" component and its "Enabled" property, not via the Mesh Renderer.
Step-by-Step Guide
Step 1: Duplicate the roof button
Begin by selecting the existing button for Roof 2 in the Hierarchy window. Then press Ctrl + D to duplicate it. You probably already know this approach from copying with Ctrl + C and Ctrl + V, but Ctrl + D is considerably faster because the copy is created directly next to the original.

Step 2: Rename the new button
The copy still bears the name of the roof and would cause confusion later. Therefore, rename it to "Baum" (Tree). A clear name helps you especially when you manage several buttons in the same canvas and want to quickly find the right entry in the toggle script later.
Step 3: Replace the image with a text
The duplicated button still contains an Image element that was intended for the label of a roof button. Delete it, since you need a text instead. Then go via the Hierarchy menu to your tree object, right-click the button, select the UI section in the menu, and add a simple Text element there. A plain text is entirely sufficient for this purpose.


Step 4: Set the text content
Select the newly created text object. In the Inspector, you will find the field for the text content on the right. Enter the word "Baum" (Tree) there. This way, the viewer will immediately recognize later which function the button performs.

Step 5: Make the text subordinate to the toggle script
The text object must be created as a child element of the toggle script, otherwise the button will not respond to the click. So drag the text via drag and drop in the Hierarchy window onto the toggle object until it appears indented beneath it. This step is inconspicuous, but it determines whether the entire function works later.

Step 6: Align the canvas and position the text
So that you can arrange the buttons comfortably, select the canvas and press the F key. Unity then zooms to the object so that you can see and move the text. Move the button to the place where it should appear later.

Step 7: Understand the canvas scaling
When you shrink the window, you will notice that the canvas changes as well. This is because the canvas works independently of resolution, since it is displayed together with a 3D model. The buttons therefore scale along with it. However, since you want to output the application for the web at a fixed size of 800 x 600 pixels, you must not rely on this scaling. Instead, you have to set the aspect ratio.

Step 8: Set the aspect ratio in the Game View to 800 x 600
Switch to the Game View and open the dropdown menu, which is set to "Free Aspect" by default. There, select the entry for the web resolution 800 x 600. The display will then match your target size. The text area on the right side, which had previously disappeared, becomes visible again. Now you can drag the button to the desired position and check the result with Play.


Step 9: Assign the tree to the Toggle script
Now select the tree object in the scene and drag it into the field of the Toggle script. Make sure not to select the roof, but the tree. Then, in the Toggle script, open the "No Function" dropdown menu. There, first select the Game Object and then the "Level of Details Group" component. The function you then select is "Enabled".
The reason for this choice is important: the control is not done via the Mesh Renderer of the geometry, but via the Level of Details Group. Only this way can the object be reliably switched on and off.


Step 10: Test the function
Start the scene with Play and click the "Baum" button. The tree should then disappear. Another click makes it visible again. If that works, you have fully implemented the function.

Step 11: Fine-tune the layout
Finally, you can move buttons and texts around a bit until the arrangement matches your design. In this example, the button was placed on the right side. However, you can choose the position freely, as long as you check it in the Game View with the specified resolution.

Summary – Unity button for the tree in the 360° architectural model
You have learned how to duplicate an existing button with Ctrl + D, rename it, and replace it with a text element. You have also seen why the text object must be subordinate to the Toggle script and how to set the aspect ratio to 800 x 600 so that the buttons stay in the right place. By assigning the Level of Details Group in the Toggle script, you can now show and hide the tree.
The next part deals with another element: an advertising sign, for example for a real estate agent, which can be shown via a button. For this, you create a model in Cinema 4D, prepare a texture in Photoshop, assign a layout via a box projection, and import everything into Unity.
FAQ
Why does my tree button disappear after I shrink the window?The canvas is resolution-independent, so it scales with the window. Set the aspect ratio in the Game View to 800 x 600, and the arrangement will remain stable.
Why does the button not respond when clicked?Often it is because the text object is not subordinate to the Toggle script. Drag the text onto the Toggle object in the Hierarchy window until it appears indented beneath it.
Why is the Level of Details Group chosen in the Toggle script instead of the Mesh Renderer?The visibility of the tree is controlled via the "Level of Details Group" component. The Mesh Renderer is not intended for this function.
Why should I use a text object instead of an image?A text labeled "Baum" makes the function of the button immediately understandable, and you save yourself the effort of creating a separate image.
Why should I use Ctrl + D instead of Ctrl + C and Ctrl + V?Ctrl + D creates the copy directly after the original and thus saves several steps.


