

A main light is often already in the right place and still looks too weak, too harsh, or too flat. This is exactly where fine-tuning comes in. In this tutorial, I'll show you how to adjust an already placed light source in Cinema 4D step by step: You'll control intensity, visibility, outer distance, spread angle, falloff, and shadows, and finally add the noise that carries the atmosphere.
The video is only loaded from YouTube when you play it – data (including your IP address) is then transmitted to YouTube/Google. More in the privacy policy
Introduction
The light source is set, the position is right, and the image is open in a larger view. Still, something is missing. This tutorial picks up directly from the placement and focuses on the settings with which you tune the main light precisely to your scene. Instead of randomly turning knobs, you proceed systematically: first you identify the problem, then you change one parameter at a time in a targeted way and check the result each time.
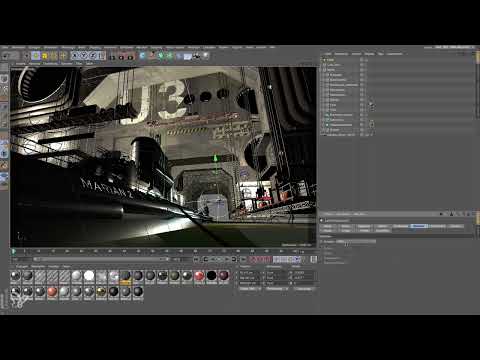
The scene shows a harbor with a dark boat in the foreground, several archways, and a bright light source in the background. This very constellation makes the tuning interesting, because every change affects several areas of the image.
Key Takeaways
Intensity alone is often not enough, because it also boosts the specular highlight in an uncontrolled way. Visibility (volumetric light) is the better lever for making the light beam visible without blowing out highlights. The outer distance must extend beyond the camera, otherwise the light beam ends in the middle of the image. A spread angle of 20 degrees instead of 30 degrees limits the brightness in unwanted areas. Falloff and shadows can often be omitted for light coming in at a shallow angle and save render time. Noise with wavy turbulence looks more natural than soft turbulence. After adding noise, you have to raise the brightness of the visibility again. GI and Ambient Occlusion bring back lost details such as the archways.
Step-by-Step Guide
Checking the Starting Point and Naming the Problem
Before you change anything, you should clearly name what bothers you. In this case, the main light source is too weak. The image looks too dark overall, and the light does not reach the foreground sufficiently. The obvious solution would be to increase the intensity of the light source, but we'll get to that in a moment. First, you should consider which areas of the image may change and which may not.

Increasing Intensity, but with Care
In the Attribute Manager you'll find the intensity of the light source, which is set to 100 percent by default. If you increase the value, the light becomes stronger. However, you also boost the specular highlight, that is, the direct reflection on glossy surfaces. It would quickly blow out, and you could hardly retouch it cleanly in Photoshop later. A separate channel for the specular highlight is an option, but if you want to solve as much as possible in Cinema 4D already, this route is cumbersome. So in this case, you leave the intensity untouched.

Activating Visibility and Raising Brightness
The better adjustment is visibility. With it you make the light beam itself visible, and that has two advantages at once. First, the light source looks much brighter and purer in the image, since a direct light source should look exactly like that. Second, the specular highlight remains unaffected. Activate visibility and raise its brightness by a factor of ten, i.e. from 100 to 1000 percent. This changes the image noticeably without the reflection on the boat being blown out.

Increasing the Outer Distance so It Extends Beyond the Camera
The outer distance determines how far the visible light beam extends into the space. In the example, the value is initially 2900 centimeters. You can best tell whether that is enough by clicking the light source and changing the value. It's important that the light beam extends a good way beyond the camera. Only then does it truly reach the foreground and create a separation between the dark boat and the atmospherically lit background. If the value is not yet sufficient, you increase it step by step until you get past roughly 3000 centimeters.

Check the result and assess the separation
Now it's worth taking a look at the overall picture. The scene has become significantly brighter, and the light beam separates the dark elements in the foreground from the background. Thanks to its reflective surface, the boat even looks slightly hit by the visible light, because the material also reflects the visibility. At this point, take a close look at whether the effect fits your concept before you change any further parameters.

Reduce the beam angle from 30 to 20 degrees
By default, the light source emits at an angle of 30 degrees. As a result, the upper area of the scene becomes too bright. Reduce the beam angle to 20 degrees, which limits the light cone and spares the areas that should not be lit so strongly. You can find the angle in the Details section of the light source.

Deliberately omit falloff
Falloff ensures that the light becomes weaker with increasing distance. In the example it is deactivated, and that's fine. The light source sits at the back of the image and falls very flatly onto the boat. The light cone hits there only at a very small angle, so it doesn't produce strong brightness anyway. Falloff would therefore have hardly any effect here. If you have a light in your own scene that should fall off strongly with distance, however, you can activate falloff deliberately.

Weigh shadows deliberately
A light source normally needs a shadow to make the scene look more three-dimensional. Here you deliberately do without it, because the shadow costs additional render time and does not greatly improve the result in this particular case. As a result, the light source does shine through some objects, which you should check in the renderer, but for this scene that is acceptable. Feel free to try it out if you like, and then decide based on the render result.

Add noise for more atmosphere
The noise, that is, the grain, disrupts the rather uniform light rays and creates a lively atmosphere. You add the noise via the visibility. When choosing the turbulence, make sure not to use soft turbulence, because it quickly looks artificial. Wavy turbulence, on the other hand, delivers a much more natural result and fits better with fog or haze in the harbor.

Readjust the brightness after the noise
The noise projects a three-dimensional pattern into the beam path and thereby takes away some brightness. To compensate for this, you increase the brightness of the visibility by a factor of 1.5. So 1000 percent becomes 1500 percent. This way the brightness is roughly preserved, and the atmosphere still looks significantly more lively.
Deliberately leave out lens effects
You could additionally add lens effects such as Lens Flares, but they are not strictly necessary for this light source. You can also add such effects later in another program if the project requires it. If you stay in Cinema 4D, you don't need to do anything further here.

Activate global illumination and ambient occlusion
After rendering, you notice that the archways in the foreground disappear because they are outshone by the bright fog. To preserve the structure of the image, you activate global illumination (GI) and ambient occlusion. To do this, open the render settings and choose the renderer with effects. This process takes somewhat longer, but it brings the archways back into the image. Pay attention to the values for samples and density. They are deliberately kept low in the example, and higher values will deliver a cleaner result later.

Compare results
A direct comparison shows the difference most clearly. The image without effects looks flatter, while the image with GI and ambient occlusion gains more depth. The archways in the background become visible again, and the entire image looks better structured. View both renderings at a sufficient size, because fine details are hard to recognize in a small preview.

Finalizing the result and assessing the fog
In the end, you have a scene with a bright light source, a clear separation between foreground and background, and an atmospheric fog effect created by the noise. If you like the result, you can leave the settings as they are. The light source in the background can stay exactly as it is.
Summary ??? Adjusting the Main Light in Cinema 4D: Brightness, Distance, and Noise
You have seen that a main light cannot be perfected with a single slider. What matters is the interplay of several settings. Visibility brings brightness and atmosphere without overexposing the highlight. The outer distance ensures that the light beam reaches the foreground. The spread angle limits unwanted brightness, while falloff and shadow can be unnecessary with light coming in at a shallow angle. Noise gives the beam life, and adjusted brightness compensates for the loss. Finally, GI and Ambient Occlusion bring the fine structures back into the image.
FAQ
Why don't you simply increase the intensity of the light source?The intensity also strengthens the highlight, which quickly becomes overexposed and is difficult to retouch later in Photoshop.
When should the outer distance be greater than the camera?Whenever the light beam should reach into the foreground. If it does not extend beyond the camera, it ends in the middle of the image.
Why is wavy turbulence preferred over soft turbulence?Soft turbulence often looks artificial, while wavy turbulence delivers a more natural result.
Do I need to adjust anything after adding noise?Yes, the noise takes away some brightness. Therefore, increase the brightness of the visibility by a factor of 1.5.
Do I always need a shadow for a light source?No, with light coming in at a shallow angle or if the shadow has hardly any effect, you can leave it out and thus save rendering time.

