

You probably know the problem: you place a new lamp in the scene, and suddenly the whole picture looks different from what you expected. To judge this, you have to render again and again. This tutorial shows you how to create two render presets that you can switch between with one click: one for quick test renderings without effects and one with Global Illumination (GI) and Ambient Occlusion (AO) for a more realistic result.
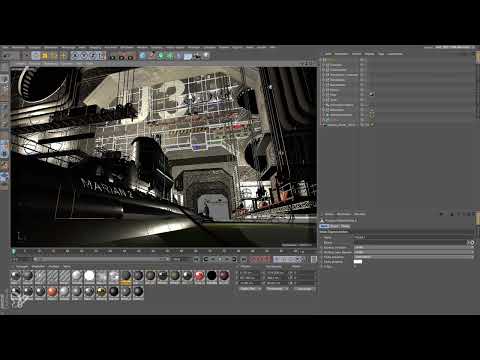
The video is only loaded from YouTube when you play it – data (including your IP address) is then transmitted to YouTube/Google. More in the privacy policy
Key Takeaways
Lighting and rendering go hand in hand. You need two render presets that you can use alternately at any time. The preset without effects gives you quick results, while the preset with GI and AO shows you the realistic light distribution. With the interactive render region and the Picture Viewer, you keep track of all intermediate results. Only increase the GI quality settings if the preview shows visible errors.
Step 1: Understanding the Starting Situation
Imagine a scene with wall lights distributed as instances. You have switched off the parent object so that the instances themselves remain visible. If you switch the parent object back on, you may need to click once so that all instances are actually displayed. In the viewport, the scene looks very bright because of these lights. However, this is deceptive: in the rendering, significantly less light comes out. Therefore, never rely on the viewport alone, but check your light sources by rendering.

Step 2: Using the Interactive Render Region
The interactive render region is the fastest way to see changes to the scene. You can open it, place it where you want, and adjust its size. As soon as you change something in the scene, it re-renders. The speed slider determines how finely the image is calculated. If you pull it up, it renders quickly but coarsely. If you pull it down, the quality gets better, but it takes longer. For a rough impression, the fast setting is perfectly sufficient.

Step 3: Saving Test Renderings in the Picture Viewer
The interactive render region has one disadvantage: the results disappear as soon as you close it or restart it. You therefore can't compare them with each other. That's why I personally like to work with the Picture Viewer. Render the test images there as usual so that all results are preserved. This way you keep track of the progression of your lighting setup.
Step 4: Keeping an Eye on Stray Light
With each additional light source, the image often becomes brighter and softer until it looks washed out. In photography, this is called stray light. To spot this effect early, you should keep older render results, at least for the duration of your work session. Some intermediate results you even save as an image file. For this, of course, you need suitable render presets, which you will create in the next step.

Step 5: Creating the Render Presets
You don't always need full quality. Sometimes, though, you want to see what the scene looks like with all effects. That's why you create two renderers that you can use alternately. Open the render settings and set the resolution to 320 × 200 pixels. Make sure the aspect ratio checkbox is ticked. The size is small, but it is enough to see how the light is distributed in the image. In return, it renders in a few seconds.

Step 6: Setting Antialiasing to Geometry
In the antialiasing section, you can select the Geometry option. At such a small resolution, higher antialiasing brings you hardly any benefit but is significantly slower. Without Geometry, the geometry is also not smoothed, which is hardly noticeable in this case. The default value Geometry is therefore just right for your test purposes. You don't need to change anything else here.

Step 7: Naming the First Renderer
The first renderer should work without effects. Give it a meaningful name by renaming it with a double-click. A name like "320x200_no effect FX" or, shorter, "no FX" shows you at a glance which preset you have currently activated. Then activate the renderer so that it is available for your test renderings.

Step 8: Create the Second Renderer with Effects
So that both presets have exactly the same size, you copy the first renderer. Select it, press Ctrl or Control, and copy it. Then rename the copy, for example to "320x200_FX". Activate this copy. The output does not change in the process, but now you can add the required effects in the render settings.

Step 9: Set Up Ambient Occlusion and Global Illumination
First add Ambient Occlusion. It creates nice shadow edges and structures the image significantly better. Then add Global Illumination. It largely determines how the light is distributed in the scene. So that the calculation doesn't take too long, set the samples to Low. For the Irradiance Cache, the calculation method of the GI, you also choose a lower level. For the record density, set Preview. With these low values, rendering is significantly faster.

Step 10: Increase the Quality Only When Needed
The low settings are surprisingly sufficient for many scenes. However, if you see unsightly shadow spots or blotches, a higher level is worthwhile. Especially with fine, detailed surfaces, errors often go unnoticed. Therefore, always check the preview first and only increase the record density to High when it is really necessary. For your test renderings, the preview is usually completely sufficient.

Step 11: Test and Compare Both Presets
Now you can start the test run. Click the render button and shrink the image window so that you can see the result well. If you first activate the renderer without effects, the rendering takes only a few seconds, often under 20 seconds with a small number of light sources. If you then switch to the renderer with effects, you need more time, in this example about 25 seconds. For evaluating your lighting, anything under a minute is usually fast enough.


Step 12: Close the Picture Viewer and Keep Working
Finally, close the Picture Viewer and the render settings again. You have now seen how to create multiple renderers and switch between them. With these two presets, you can test light sources quickly and still have a realistic result calculated when needed.

Summary – Cinema 4D: Creating Render Presets for Quick Light Tests
You have learned how to create two render presets: a fast preset without effects for intermediate tests and a preset with GI and AO for realistic evaluation. Use the interactive render region for a rough overview, the Picture Viewer for saved intermediate results, and adjust the quality only when the preview shows errors. This way you don't lose time when trying out light sources.
FAQ
Why should I create two render presets?A preset without effects renders very quickly and is suitable for intermediate tests. The preset with GI and AO shows you the realistic light distribution, but takes longer.
Why does the scene look brighter in the viewport than in the rendering?The viewport often displays the light sources more strongly than they actually appear in the rendering. Therefore, you should always check your lighting setup by rendering.
What is the interactive render region for?It displays changes to the scene directly. With the speed slider, you control how quickly and how finely rendering is done.
Why should I save test renderings in the Picture Viewer?Results in the interactive render region disappear when you close it. In the Picture Viewer they are retained, so you can compare old and new versions.
What does stray light mean?This refers to the light that makes the image brighter and muddier with each additional light source. Old render results help you recognize this effect early.
Do I always have to set the record density to High?No. The preview is sufficient for many scenes. Only increase the level if shadow spots or blotches are visible.
Why should antialiasing be set to Geometry?For small test renderings, a higher level brings hardly any visible advantage but significantly increases the render time.
How do I create the second renderer quickly?Copy the first renderer with Ctrl or Control, rename the copy, and then add the Ambient Occlusion and Global Illumination effects.

