

You render a scene, everything looks coherent, and suddenly a spot of light appears on the floor of a closed room where it doesn't belong. This phenomenon is called a light leak, meaning light that shines through a surface. In Cinema 4D this happens more often than you might think, and the cause often lies not in the light itself, but in the geometry.
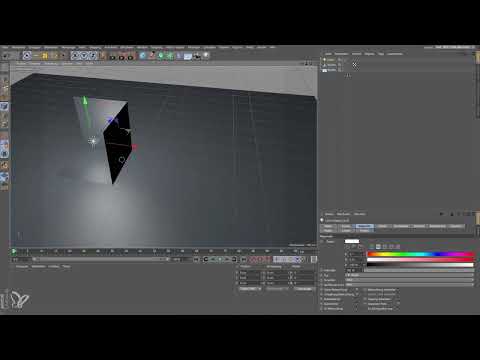
The video is only loaded from YouTube when you play it – data (including your IP address) is then transmitted to YouTube/Google. More in the privacy policy
In this tutorial, you will use a simple cube to see why polygon objects without thickness let light through, how to give them a wall thickness, and why the distance of the light source plays an equally important role. All you need is a standard scene, a point light source, and some patience with test renders.
Key Takeaways
Key Takeaways
- A polygon object without physical thickness is permeable to light, even if it visually looks like a closed wall.
- A wall thickness is created by extruding the surface, resulting in a real, multi-layered wall with an inside and outside.
- The position of the light source also determines whether light escapes. A lamp close to the wall or just below it produces light leaks more quickly.
- You must consider the wall thickness and the light position together. A thicker wall often helps more than simply moving the lamp.
- With Global Illumination, desired floor light can be produced in a more controlled way than with an unwanted light leak.
Step-by-Step Guide
Step 1: Prepare the Cube
Create a cube and raise it slightly above the floor so you can better judge the scene later. Then convert the cube into an editable object, because that is the only way you can select individual polygons. Afterwards, switch to Polygon mode.

Step 2: Remove Sides and Open the Cube
To open the cube, use the "Live Selection" tool to select the sides you want to remove. Press the Delete key to delete the selected polygons. In the end, you are left with a cube with open sides, similar to a box without a lid.

Step 3: Optimize the Geometry
After deleting polygons, loose points may remain. Go to the Mesh commands and choose "Optimize" to remove these points. In this example the step is not strictly necessary, but it is part of a clean workflow whenever you have deleted polygons.

Step 4: Place the Point Light Source
Now add a point light source to the scene and position it slightly above the cube. Slowly pull it downward until it pierces the bottom of the cube. You will see that the light source illuminates not only the floor but also the inner walls, even though it is actually located inside a closed body.

Step 5: Activate the Shadow
For the cube to cast a shadow at all, you must activate the shadow in the light source settings. To do this, select the "Area" option under "Shadow" in the Attribute Manager. Only now is a shadow created that traces the shape of the cube.

Step 6: Identify the Anomaly in the Rendering
Render the image and look closely at the floor. Besides the correct shadow, a bright light reflection appears exactly where it shouldn't be. The light has therefore penetrated the wall of the cube, even though it looks closed visually. This behavior is exactly the anomaly you want to fix.

Step 7: Build the Wall with Physical Thickness
The reason is that a surface without extent does not represent a real barrier for the render engine. Even in reality, a foil would have a measurable thickness. To replicate this, select the top face of the cube, go into Polygon mode, and use the "Extrude" function from the Mesh menu. Extrude the surfaces far enough that a hollow, multi-layered wall is created.

Step 8: Finish the wall cleanly
To keep the corners from forming an unsightly step, you adjust the angle. To do this, click the cap surface in the Attribute Manager and set the maximum angle to 90 degrees. This makes the wall look cleanly closed at the edges, and you have created an actual wall with thickness.

Step 9: Render again and check the result
Render the scene again and compare the result with the previous image. The light reflection has become noticeably weaker, but on closer inspection a bit of light is still visible on the floor. This shows that wall thickness alone is not always enough.

Step 10: Evaluate the light position in relation to the wall
Now move the light source downward and render again. The light leak becomes more clearly visible as a result, because the lamp is closer to the wall and shines more strongly onto the floor surface. It follows that not only the wall, but also the distance between the light source and the wall determines how much light gets through.

Step 11: Increase the wall thickness further
Select the cube again, extrude the wall a little further, and render again. The light at the bottom becomes less, but has not disappeared completely. Either you pull the light source further up or you make the wall a bit thicker. In this example, the second option is the key to success, because after another thickening no light is visible on the floor anymore, even though there is still enough air between the cube and the floor.

Step 12: Evaluate the result and weigh your options
Look at the final result. There is now no light leak visible on the floor anymore. This shows that the combination of light position and wall thickness is decisive. If you want a bit of indirect light in the dark area, you should rather control it via Global Illumination. An uncontrolled light leak through the wall, on the other hand, can hardly be adjusted in a targeted way.

Summary ??? Avoiding Light Leaks in Cinema 4D: Setting Wall Thickness and Light Position Correctly
Light leaks occur in Cinema 4D when polygon objects without thickness serve as walls. By extruding, you create real wall thickness and thus prevent light from shining through unintentionally. In addition, the distance of the light source from the wall influences how strong the light leak is. Therefore, always pay attention to both factors: sufficient wall thickness and a suitable position of the light source. For desired indirect light, it is best to use Global Illumination, because that way you keep control over the result.
FAQ
Why does light shine through my cube even though it looks closed?A polygon object without physical thickness is only a surface to the rendering program. Light can therefore pass through, because there is no real barrier.
How do I create wall thickness in Cinema 4D?Select the faces in Polygon mode, use the Extrude function in the Mesh menu, and pull the face apart until a multi-layered wall is created.
Why is the angle at the edges important?An unfavorable angle creates an unsightly step on the wall. With a maximum angle of 90 degrees, you close the edges cleanly.
Is a thick wall alone enough to prevent all light leaks?Not always. The position of the light source also plays a role. If the lamp is very close to the wall, light can still get through despite a thick wall.
How can I place the light source correctly?Keep the light source sufficiently far from the wall. If it is too close, the light leak intensifies, especially on the floor surface.
Should I rather create light under the cube via Global Illumination?Yes, in most cases that is the better choice. Global Illumination can be controlled in a targeted way, while a light leak through the wall remains hard to control.

