

A light source that hardly anyone notices in the image is of little use to you. This is exactly the problem the wall lamp in this tutorial has: from the later camera perspective, it is only a tiny point of light. Before you duplicate it, you need to make sure it actually has an effect. Afterwards, you distribute several copies throughout the scene. The guide shows you how to set up the light via falloff and visibility, bundle it in a null object, and work with instances. The times given in seconds refer to the video's running time of 394 seconds.
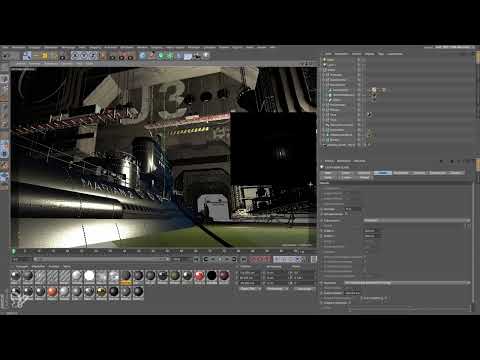
The video is only loaded from YouTube when you play it – data (including your IP address) is then transmitted to YouTube/Google. More in the privacy policy
Key Takeaways
- Without visibility, a light source is often barely recognizable in the image. Set the visibility to "Visible", not "Volumetric", if you want to depict a wall lamp, because the volumetric variant is intended for atmospheres and is computationally expensive.
- The radius of the visibility and its brightness determine the look. Increase the radius significantly and reduce the brightness strongly until only a slight hint remains.
- With a null object as a light folder, you keep all light sources under control and can switch them on and off at any time.
- Use instances instead of copies. Changes to an original affect all instances.
- Render instances do not support embedded light sources. For wall lamps, you therefore have to use full instances.
Step 1: Check the initial situation and zoom in on the lamp
Before you start adjusting the settings, you should take a close look at the initial situation. To do this, render the lamp from a distance that roughly corresponds to your later camera position. Unrendered, the light still looks quite bright, but as soon as you zoom into the section, the actual problem becomes apparent: the lamp is only a very small point of light. With a falloff that you view from the camera position without any adjustments, you can hardly see anything of it. This step helps you directly assess the difference later.

Step 2: Activate visibility on the General page
By default, the visibility of a normal light source is set to "None". That makes sense, because a real light bulb does not show its own cone of light. For the wall lamp, however, you need exactly this effect. Therefore, open the General page of the light source and change the visibility. You have the choice between "Visible", "Volumetric" and "Inverse Volumetric". The volumetric variants are intended for fog, atmospheres or planets and calculate shadows in the ray path, which costs unnecessarily much computing time with such a small light source. Therefore, choose "Visible", i.e. normal visibility.

Step 3: Adjust the radius and extent of the visibility
On the Visibility page, you can define how far the visible light cone extends. You can recognize this in the editor by concentric circles that mark the range. Since there are two light sources in the scene, you see two circles each. The default values are usually too small, so the light cone ends abruptly and looks rather uninteresting. Therefore, increase the extent significantly, to about 1000 cm in the example. This gives the light cone a soft, generous gradient.

Step 4: Reduce the brightness in a targeted way
After the enlargement, the visibility is often too bright and looks overexposed. Look in the lower area of the visibility settings for the brightness value and reduce it. A factor of about 10 is a good starting point, because it allows you to make big steps in the adjustment. If you see no difference after a change, it is usually due to another problem in the scene and not the value itself. Afterwards, fine-tune the value until only a slight hint of the light cone remains. In the example, you end up at about 3 percent, so roughly a third of the previous value. It is best to view the result from the camera perspective, because only there can you properly judge the effect.

Step 5: Alternative via intensity and falloff
You can also make the wall lamp appear stronger in another way. On the General page, the intensity can be increased so that the light gets more power. Another option is offered by the outer distance on the Falloff page. If you increase it, the light source shines farther, but also brighter. In the example, the value is set to just under 190. The effect is not huge, but it is noticeable and worthwhile for an initial fine-tuning.

Step 6: Move the light source into a null object
Now you need to make sure that the settings can later be transferred to all instances. A null object that acts as a light folder is ideal for this. You can collect all light sources in it and show or hide them with a single switch. This way you can return to the default light at any time. Simply drag and drop both light sources into the null object of the wall lamp. It makes sense to do this already during modeling so that the scene stays clear and organized.

Step 7: Create instances and distribute them in the scene
Instead of copying the wall lamp multiple times, you create instances. This is much more efficient and has a major advantage: if you later change the color or other properties on the original, all instances automatically adopt these changes. Create the instances via the menu and select the original. Afterwards, you can move the instances into position with the Move tool. Hold down the Ctrl key if you want to create a new instance directly while dragging. In this way, you distribute the lamps step by step across the entire scene and can align each instance more precisely if needed.


Step 8: Recognize render instances as a dead end
Many render instances save memory because they do not fully duplicate objects. However, this does not work for wall lamps. As soon as you switch on render instances, the light goes out in the editor and is also not taken into account when rendering. Render instances simply do not support embedded light sources. You must therefore use full instances, even if they require more memory. With a small wall lamp, this additional overhead is hardly significant.

Summary – Making a wall lamp visible in Cinema 4D and distributing it with instances
You have seen how a small wall lamp becomes clearly visible with just a few settings. First, you activate normal visibility and enlarge its extent, then you reduce the brightness to a subtle hint. Alternatively, intensity and outer distance of the falloff can help you. Afterwards, you bundle the light sources in a null object, which allows you to switch to the default light at any time. With full instances, you distribute the lamp across the scene, while render instances are not suitable here. With this approach, you can apply the same principle to all other light sources.
FAQ
Why is my lamp barely visible in the editor?Visibility is set to "None" by default. Change it to "Visible" and then adjust extent and brightness.
Should I use volumetric visibility for wall lamps?No, normal visibility is better suited for a simple wall lamp. The volumetric variant calculates shadows in the light path and is intended for atmospheres, which unnecessarily costs computing time for small light sources.
The light cone ends abruptly. What can I do?Increase the extent of the visibility on the Visibility page. In the example, a value of about 1000 cm is used.
The visibility is too bright. Which value helps?Reduce the brightness significantly, for example by a factor of 10, and then fine-tune. It is best to view the result from the camera perspective.
Why do I see no difference after a change?Then the cause is often a different problem in the scene. Check whether the setting is really effective and whether the light source is active.
Can I create instances with the Ctrl key?Yes, hold down the Ctrl key while moving to create a new instance while you move the object.
Why does the light disappear with render instances?Render instances do not support embedded light sources. Use full instances instead.
How do I keep track of all light sources?Collect them in a null object as a light folder. This way you can show or hide all lights with one switch.

