

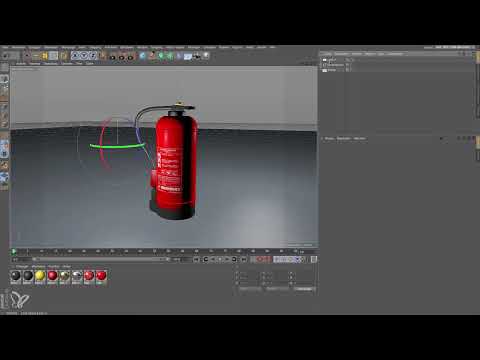
A fire extinguisher floats in the render image, and the floor stays dark. This happens quickly when you light in Cinema 4D without knowing the light source types. In this tutorial, you will get to know the most important variants, from quick working lighting to glowing materials, and learn how to deliberately adjust shadows, emission angles, and Global Illumination.
The video is only loaded from YouTube when you play it – data (including your IP address) is then transmitted to YouTube/Google. More in the privacy policy
Key Takeaways
- Cinema 4D offers the default light as pure working lighting that is not part of the final result.
- The point light radiates in all directions and is the simplest real light source, but it has no extent.
- The area light source creates soft gradients and shadows. You should adjust the emission angle so that no disturbing stripe appears on the floor.
- Any object can be turned into a light source using a glowing material.
- Glowing materials require Global Illumination in order to actually emit light into the scene. With area light sources, you have to activate the reflection separately.
Step-by-Step Guide
Step 1: Understanding the Default Light as a Working Light
Before you place a real light source, it is worth taking a look at the default light. You can find it in the Options menu of the viewport. It consists of two invisible lights that make the scene visible in the first place. You can move them with the mouse via the reflections and thus change the light direction in the viewport. The default light is not part of the final rendering. It only serves to let you work in the working window without black areas, because without these auxiliary lights the shadows in the viewport would be deep and hardly assessable.

Step 2: Selecting and Placing the Point Light
For real lighting, you choose a light source. You can find the selection at the top in the toolbar: Click and hold the light icon, and a list of all available light types opens. The simplest of these is the point light. From a physical perspective it is an idealization, because a light source without any extent does not exist in reality. For most scenes, however, it works excellently. Drag the light upward, slightly to the left and a bit forward to get a classic main lighting.

Step 3: Setting the Shadow Casting to Area Shadow
A point light does not cast shadows without any settings. You therefore have to ask the light to generate shadows. To do so, open the settings of the light source and select Area Shadow under the shadows. This shadow type is the most physically correct of the available options. When rendering, you will notice that the calculation takes a little longer, but the shadows look significantly more natural. Render the scene to check before you continue.

Step 4: Adding a Rim Light from Behind
A single light source often makes objects look flat. For more depth, you copy the existing light source and place the copy behind the object, as a rim light. This creates edges that stand out from the background. The copy acts like a second accent and emphasizes the shape of the object. Make sure the rim light does not become too strong, otherwise it will overpower the main light.

Step 5: Turning the Point into an Area
The black, hard shadow that results from the point light can be significantly softened by converting the light source into an area light source. For this, it is best to view the scene from above so that you can clearly see the positions of the lights. Then you rotate the area to fit the object. As soon as the area has extent, the lighting becomes softer. Render again and compare the result with the previous state. The hard shadow edge should now have clearly disappeared.

Step 6: Adjusting the Emission Angle
After the conversion, a dark stripe can appear on the floor. This occurs because the area light source also radiates downward and leaves an edge there. Open the details of the light source and change the emission angle. A value of about 95 degrees is usually enough so that the light only falls forward. Then render the scene once more and check whether the stripe has disappeared. This combination of area light and adjusted angle is a solid foundation for many shots, but it is only one of several possibilities.

Step 7: Turning an Object into a Luminous Source
The second basic method works completely differently. Here, any object itself becomes the light source, for example a simple cylinder serving as a neon tube. Drag the cylinder into the desired shape and then create a new material in the Material Manager. Double-click it to open the Material Editor and activate the Luminance channel there, which is also referred to as Luminance. For pure lighting you don't need a reflectance channel or a color, because the Luminance channel already generates the light. Then drag the finished material onto the object in the Object Manager.

Step 8: Using Applications for Luminous Objects
Luminous materials are especially suitable where the object itself is meant to glow. Typical examples are sculptures, stylized neon tubes, or lettering. The object's shape becomes the light source at the same time, so you don't have to place any additional lamps. As a result, the outcome often looks more authentic, because the light comes exactly from the visible shape.
Step 9: Activating Global Illumination
When you render the result, you may notice a reflection on the object, but no real light falling on the surroundings. This is because the object initially only shines and does not act as a light source for the scene. To make the light actually emitted into the surroundings, you activate Global Illumination. You can find it in the render settings under the effects. Rendering takes longer afterward, but in return you get realistic indirect light.

Step 10: Controlling Reflection and Brightness
One advantage of luminous materials is that they automatically appear in reflections. With an area light source, on the other hand, you have to set this visibility separately. If the light of the luminous material seems too weak, you can increase the brightness. A value of 200 percent doubles the luminosity and is a good starting point. Watch the result in the preview and adjust the value until the intensity suits the scene.

Step 11: Using Physical Falloff
Luminous materials with Global Illumination behave in a physically correct way. You neither have to set a shadow nor define a falloff. The light automatically becomes weaker with increasing distance, and in far-off areas the scene stays dark. You can clearly see this gradient in the floor when it darkens toward the edge.

Step 12: Combining Both Methods with Exclusion
It gets interesting when you combine both approaches. For example, add a normal light source as a small rim light from behind and use the luminous material as the main light. To prevent the rim light from illuminating the floor, you exclude the floor in the light source's Project settings. The rendering then shows both the main light from the neon tube and the rim light from behind. Thanks to Global Illumination, a colored glow additionally appears on the floor, which makes the scene look coherent.

The two basic principles can therefore always be combined. What matters is which effect you want to achieve, and the combination of soft area lighting and luminous objects offers you many possibilities for this.
Summary ??? Light Sources in Cinema 4D: From the Default Light to the Luminous Material
Cinema 4D offers you two fundamental ways of lighting. The first uses real light sources such as point lights and area lights, which you place deliberately, provide with shadows, and control via the emission angle. The second turns any objects into light sources via luminous materials, with Global Illumination taking care of the light propagation. The default light remains purely an aid for working in the viewport. If you master both methods confidently, you can create scenes that look both technically clean and artistically convincing.
FAQ
Why doesn't my point light cast shadows?A point light only creates shadows if you activate the shadow option in the light source's settings. It's best to choose the area shadow there.
How do I remove a dark stripe on the floor with an area light source?Adjust the emission angle in the light source's details. A value of about 95 degrees directs the light forward and prevents the stripe on the floor.
Why does my object glow but not emit light onto the surroundings?A luminous material only produces real light in the scene if you activate Global Illumination in the render settings.
How do I prevent a rim light from illuminating the floor?Exclude the floor in the light source's Project settings, and then it won't be affected by the light.

