

Your skull is ready, but without light it looks flat and lifeless. In this tutorial, you'll learn how to position it on a pedestal, equip it with a camera and material, and then set the scene with three light sources. At the end, you'll adjust the render settings for Ambient Occlusion and Global Illumination so that the depth of the bone structures and the slight translucency of the material become visible.
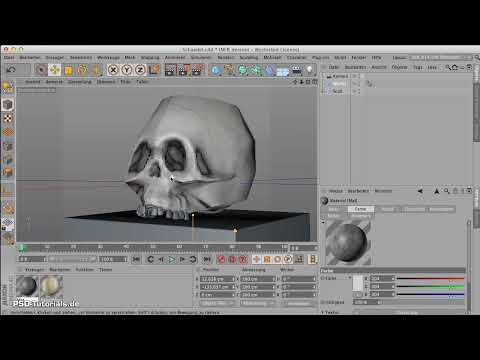
The video is only loaded from YouTube when you play it – data (including your IP address) is then transmitted to YouTube/Google. More in the privacy policy
Key Takeaways
- A simple cube serves as a pedestal and anchors the object in the image.
- A camera with an 85 mm focal length gives a classic portrait perspective.
- Two point lights and a spot light with a target object create dramatic lighting that you can realign at any time.
- Ambient Occlusion is indispensable for deep wrinkles and indented shapes.
- Global Illumination combined with Subsurface Scattering (SSS) gives the material vividness, but costs render time.
Step-by-Step Guide
Step 1: Create the cube as a pedestal
You start with a cube that will later serve as the base for the skull. It's important that its size matches the skull. If it fits, you can continue directly with the alignment.

Step 2: Align the skull on the pedestal
Pull the skull forward so that the teeth don't protrude unattractively from the jaw. Then use the Move tool to place it exactly in the center of the cube. Make sure it rests cleanly at all points.
Step 3: Group the skull and tilt it slightly
Select all three objects of the skull and combine them into a group with Alt + G. Name the group "skull". Then tilt it very slightly so that the skull sits a bit askew on the pedestal. This looks more natural than a perfectly straight alignment.

Step 4: Fine-tune the cube
Move the cube up a bit until the proportion between base and skull is right. With the Move tool, this usually takes just a few movements.

Step 5: Create the camera with 85 mm
Create a camera and set the focal length to 85 mm. This focal length is considered the classic portrait focal length and is well suited for objects that are meant to be viewed from some distance. Then activate the camera and move it back a bit until the entire subject is within the frame.

Step 6: Round off the edges of the cube
The sharp edges of the cube quickly look busy in the image. Round them off with a value of about one to two centimeters. This makes the base more pleasing and fits better with the organic shapes of the skull.

Step 7: Build the material using texture and bump
Load the image you saved as a texture and place it in the color channel (Diffusion). Then copy the texture into the bump channel and set the strength to around 80 to 100 percent. Also reduce the specular value so the material doesn't look too artificial.

Step 8: Secure the camera and cube with a protection tag
So that the camera isn't accidentally moved, you create a protection tag. In the Object Manager, you'll find the tags via the menu. Then move the protection tag to the top so that it takes effect. Afterwards, switch the camera off again and move the setup further away from the scene, because you need space for the lighting.

Step 9: Set the Main Light with Shadow
Create a point light as the first light source and place it in front, slightly elevated from above. Activate an area shadow for the light. Since the model doesn't have an excessive number of polygons, this shadow type looks clean and is calculated quickly.

Step 10: Color the Backlight Blue
Copy the main light with Ctrl + C and Ctrl + V. The copy already inherits the shadow. Tint it a bit bluer and place it on the opposite side, a good distance further back. This creates a contour along the edges of the skull.

Step 11: Add the Spot from Above
As the third light source, you place a spot above the subject. To keep the overall image from being overexposed, you reduce the brightness of the main light to about 67 percent. The spot makes the top of the skull glow in a targeted way.
Step 12: Align the Lights with a Target Object
Create a target object and drag it into the lights onto the cube, the skull, or a sphere. After that, the light always stays aimed at the desired point, no matter where you move it. This is the fastest way to refine the lighting.

Step 13: Activate Ambient Occlusion
Open the render settings and activate Ambient Occlusion in the Effects section. For an object with deep wrinkles and indented areas, this effect is particularly important. Without it, the recesses quickly look unnaturally flat.

Step 14: Set Up Global Illumination
Then add Global Illumination. It is especially important in combination with Subsurface Scattering. Increase the ray depth to a value of 2 and set the sample density to Preview for now. This keeps the render time reasonable while you test the settings.

Step 15: Hide the Teeth and Test SSS
The teeth are very small and have not been given a material so far. You can therefore hide them for the test run and apply the same material to them later. Then deactivate the SSS in the options if the render takes too long. Once you have finished the settings, you activate it again.

Step 16: Render and Evaluate the Result
Start the render and wait a moment, as the SSS needs some computing time. The result should let the bone shine through slightly. If the transparency still seems too low to you, increase the Subsurface Scattering value a little. This makes the skull look less like plastic and more like a living material.

Step 17: Assign the Material to the Cube and Adjust the Mapping
Assign the material to the cube. Switch the mapping to Cubic mapping. Since the texture is very large, you should tile it more generously. This way you avoid visible repetitions in the X and Y directions.

Step 18: Create the Final Render
Render the image one last time to check the overall result. If light, material, and shadow work together harmoniously, your scene is finished.

Summary ??? Cinema 4D Lighting Setup for a Skull: Point Light, Spot, and Render Settings
In this tutorial, you positioned a skull on a cube pedestal, captured it with an 85 mm camera, and equipped it with texture and relief. With two point lights and a spot controlled via a target object, you created dramatic lighting. The render settings for Ambient Occlusion and Global Illumination with Subsurface Scattering round off the result. If you work through these steps in this order, you will get a coherent scene with depth and vividness.
FAQ
Why should I enable Ambient Occlusion?Ambient Occlusion emphasizes depressions and creases that would otherwise look flat. Especially with indented shapes, the effect is indispensable.
Can I test Global Illumination in the preview?Yes, setting the sample density to preview speeds up the render significantly. For the final image, you should increase the density again.
Why do I copy the main light for the backlight?The copy inherits the shadow settings of the original. You only need to color and position it.
What does the target object do for the spot?The target object ensures that the light always points at the same spot, even if you move it. This saves a lot of time when aligning.
Why should I secure the camera with a protection tag?The protection tag prevents you from accidentally moving the camera while working on the scene.
