

The upper jaw is a challenge where you quickly lose track. This tutorial shows you how to work an upper jaw out of a rough basic shape, give it the typical parabolic form, and prepare it for the later tooth placement. You only need a few sculpting tools, which you combine again and again in Cinema 4D.
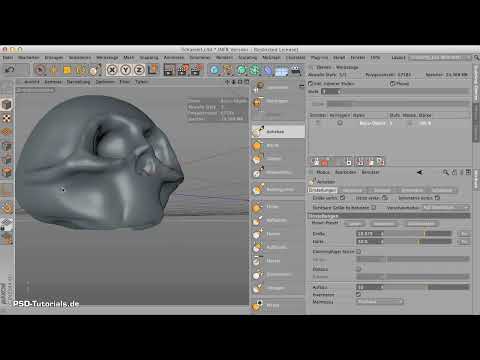
The video is only loaded from YouTube when you play it – data (including your IP address) is then transmitted to YouTube/Google. More in the privacy policy
Key Takeaways
The upper jaw is not built as a round arch, but parabolically. With the Grab tool and the Raise tool (inverted), you can get far with rough shapes. You do the fine work with Smooth, Pinch, and a low tool hardness. You place the root canals last, so that you can insert the teeth cleanly later.
Step-by-Step Guide
Recognizing the Parabolic Shape
Before you carry out the first deformation, look at the upper jaw from below. There you will notice that the dentition is not round, but forms a parabolic shape. This feature is typical in humans, so your model should have it too. Keep this curve in mind, because it determines all the following steps.

Shaping the Palate Inward
Select the Raise tool and activate inversion in the settings. This pushes the bone inward instead of outward. Work with a fairly large brush and gradually shrink the model. In this way you build up the parabolic dentition step by step toward the inside. This already creates the typical curvature that you can see on the underside.

Checking and Balancing the Shape
Look at the result from different perspectives. The impression that one side looks rounder often arises only from the viewing angle. Since you are working with symmetry, the model should be balanced. If the basic shape is right, you are on the right track. You do not need to work out the area directly under the roof of the palate in detail, as it will hardly be visible later.
Evening Out the Height of the Upper Jaw
Now the upper jaw looks too high or too low in some places. For this, take the Grab tool with a somewhat larger brush. Pull the affected areas downward and in other places slightly upward again. The goal is an even height, because the teeth should later sit on a straight jaw ridge. Then reduce the brush size to carefully shape the corners that have formed in the process.

Making the Bone Slimmer
The upper jaw contains too much bone mass. Therefore, you shape it further inward, again with the inverted Raise tool. Also work below the cheekbone, because the bone is too massive there as well. Take care not to make the upper jaw too long. It helps to set the brush a bit smaller each time and to regularly check the result from the side view.

Correcting the Front and the Edges
Grab the upper jaw at the front and pull it slightly forward again. This creates an arching that may look unintended. You remove these irregularities with the Smooth mode, which you activate via the Shift key. Then check that no large edges have formed. A slight tilt is no drama, as long as the overall shape is right.

Sharpening the Upper Jaw
The upper jaw still looks too round and not bony enough in the front area. The Pinch tool helps here. Run it along the edges, and the bone mass visibly decreases. Proceed cautiously, because at this stage this processing is done only very gently. If the jaw appears thinner as a result, you have achieved the desired result.

Creating the Root Canals
For the root canals, you use the Raise tool with a relatively small tip. Count beforehand how many canals you need. In an adult, it is usually six per side. First pull the canals up very gently, not inverted. If the effect is too strong, reduce the tool hardness significantly, for example from 50 percent to about 20 percent. Even at low pressure, 50 percent often seems too strong. Avoid the drop at the lower end, as it is not needed.

Finishing the Root Canals
The root canals extend quite far up. The molars usually have different roots than the incisors, so the canals should vary in length and thickness depending on their position. Pull them further down accordingly and check the symmetry again. Once the canals are placed correctly, the upper jaw is ready for the teeth.
Preparing the Teeth
With the root canals created, the spots where you will place the teeth later are marked. Make sure that the tooth positions match the canals. This way you prepare the next work step cleanly.

Summary – Modeling the Upper Jaw Parabolically in Cinema 4D
You built the upper jaw in several stages. First, you worked out the parabolic shape using the inverted Lift tool. Then you adjusted the height with the Grab tool and made the bone slimmer. With Smooth and Pinch, you corrected the edges and the sharpness. Finally, you created the root canals with a low tool hardness. If you stick to this sequence, you will achieve a coherent upper jaw that is well suited for tooth placement.
FAQ
Why should the upper jaw be modeled parabolically and not round?In humans, the dental arch is parabolic, so a round arch looks unnatural.
What is the inversion for with the Lift tool?With the inversion, you push the bone inward, which is necessary for working out the palate.
Why should you create the root canals before inserting the teeth?The root canals indicate the position of the teeth and make later placement easier.
How can I tell that the tool hardness is too high?If the effect spreads too much when pulling or structures are distorted unnaturally, you should reduce the hardness.
Can I undo mistakes in the upper jaw?Yes, with the Smooth mode via the Shift key, unwanted curves and edges can be removed again.

