

A believable face rarely comes from a single detail. Only the interplay of upper jaw, chin, and nose gives a character its expression. This tutorial from the series "Creative Training Sculpting in CINEMA 4D" takes up exactly this relationship. You work step by step on a face nose, which you shape out of the existing volume using the inverted Lift tool.
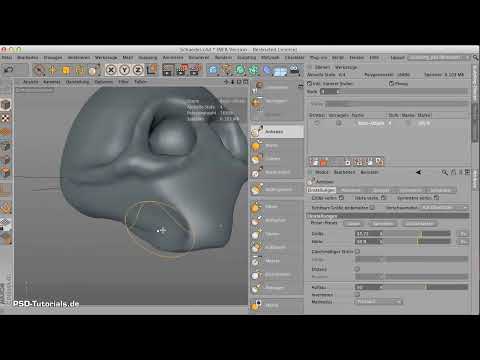
The video is only loaded from YouTube when you play it – data (including your IP address) is then transmitted to YouTube/Google. More in the privacy policy
The workflow is deliberately thought out: First you bring the upper jaw into position, because it sets the framework for the nose. After that, you can place the upper facial area much more easily. Over the course of the guide, you will also see why the tool size affects precision and why a higher resolution is indispensable for small details.
Key Takeaways
Key Takeaways
- Model the upper jaw first, since the nose and upper jaw are closely related spatially.
- Work roughly with the Grab and Lift tools and smooth intermediate stages as soon as the shape becomes confusing.
- Remember that the tool is a sphere: With large tool tips, the entire surrounding area is moved along with it.
- With the inverted Lift, you shape the nose out of the volume instead of adding material.
- Increase the resolution via Subdivide before you work on small structures such as the nostril opening.
- The nasal bone is the only bony part of the nose; the rest consists of skin and cartilage.
Step-by-Step Guide
1. Preparing the Upper Jaw as a Foundation
Begin with the upper jaw, because it determines where the nose will sit later. In the initial state, this area is still too inclined. A realistic upper jaw stands significantly more upright, so you push it further into the object. Use the Grab tool for this, with which you model roughly and quickly.

2. Developing the Rough Shape with Grab and Lift
A large part of the work is done with Grab and Lift. The Lift tool is usually the most important for fine-tuning. Switch regularly between the tools until the upper jaw sits roughly in the right place. Make sure you don't linger too long on one shape, because bumps are easier to correct later than areas that have been pressed in too deeply.

3. Smoothing Confusing Areas by Holding the Shift Key
As soon as the surface becomes uneven, it makes sense to smooth intermediate stages. To do this, hold down the Shift key while working with the Smooth tool. This way you remove disruptive outliers without losing the basic shape. This method prevents small errors from escalating into bigger problems.

4. Choosing the Tool Size Deliberately
This is a common source of errors. With a large tool tip, the behavior changes noticeably: The surface does appear softer, but you can hardly judge the exact position. The center of the tip determines where the effect takes place, and because the tool is a sphere, it pulls the entire surrounding area along when moved. Therefore, choose the size to suit the detail. For the upper jaw, a larger tip makes sense; for the nose, you need a smaller one.

5. Correcting the Chin and Face Width
The chin still looks unsuitable in the first version. It has to be pulled downward, preferably again with the Lift tool, so that the surface stays evenly smooth. Then you reduce the overall width of the face with the Grab tool. Pull from both sides, because the change always has a symmetrical effect.

6. Moving the Upper Jaw Forward
An upper jaw must sit far enough forward, otherwise the teeth will visually fold away backward later. Therefore, push it forward carefully and at the same time shape it slightly pointed. A larger tool tip helps you keep the movement even. Check the side view after each step, as the impression shows most clearly there.

7. Pre-shaping the nose with inverted Lift
Now comes the actual core of the tutorial. The nose is best worked out using inverted lifting, because it gives the face considerably more contour. Choose a smaller tool tip so that you can work close to the surface. Leave the hardness at about 50 percent. Place the tool at the spot where the nose should sit, and shape the volume out step by step.

8. Increasing the resolution via Subdivide
With the fine structures of the nostril, jagged protrusions quickly appear because the resolution is insufficient. Therefore, go up one level and use the Subdivide function. The object is thereby resolved more finely, but the memory requirement rises noticeably. In this example, the object is just under 25 MB, which is still easily manageable.

9. Working out the center of the nose with inversion
After subdividing, an unwanted bone remnant often still sits in the middle. To remove it, you activate inversion. You can either switch it permanently or briefly hold down the Command key. On Windows, this corresponds to the Ctrl key. This way you shape out the disruptive volume in a targeted manner without altering the surrounding area.

10. Shaping the nasal bone in a targeted way
The nasal bone is still too weakly pronounced in the model; it has to stand out much more strongly. First work with the Lift tool and compare the result with the reference. If you go too far, simply undo the step, because with small areas neighboring tissue quickly gets pulled along as well. For the nasal bone itself, the Grab tool is better suited, because it shapes the area more narrowly and precisely.

11. Distinguishing bone, cartilage, and skin
The largest part of the nose consists of cartilage and skin; only a small portion is actually bony. Therefore you do not have to build up the nose entirely from bone shape. Pull the upper area slightly outward and forward so that an appealing silhouette emerges. Afterwards, smooth the disruptive edge in the middle so that the transition looks calm.

12. Finishing the rough proportions and preparing details
You will work out the precise edges of the nose later with the Pinch tool and the Knife tool. At this stage, it is only about setting the proportions roughly right. With the nostril and the transition to the cheekbone, you are already quite far along at this point. If the transition to the cheekbone is still too prominent, you can readjust it later with the Grab tool.

Summary ??? Modeling a nose in Cinema 4D: Tutorial with the inverted Lift tool
The nose is created in Cinema 4D through the interplay of several tools. You begin with the upper jaw, because it determines the position of the nose. Then you shape the nose out with inverted lifting, increase the resolution if needed, and work out the nasal bone in a targeted way. You always keep the tool size, the hardness, and the smoothing under control and in view. The fine work on edges and transitions follows later with Pinch and Knife. With this sequence you obtain a solid base shape on which every further refinement can be built.
FAQ
Why should you model the upper jaw before the nose?The upper jaw sets the framework for the nose. If it is in the right place, the nose can be placed much more easily afterwards.
What does it mean that the tool is a sphere?The tool tip acts spatially. With large tips, areas of the surface that are farther away are also moved along, so you should choose the size to suit the detail.
What is the purpose of inversion when lifting?With inversion, you push material inward instead of pulling it outward. This way the nose can be worked out of the existing volume.
When should you increase the resolution?As soon as small details such as the nostril emerge and jagged protrusions appear, subdividing makes sense. Keep an eye on the increasing memory requirement.
Does the nose have to consist entirely of bone?No. Only a small part of the nose is bony. The majority consists of skin and cartilage, so a rough shaping of the nasal bone is sufficient.

