

Before you press the first indentation into an object in Cinema 4D, it is worth taking a quick look at the display settings. By default, the view is designed for general work and not for modeling from primitive objects. Some markings that help you in everyday work tend to be distracting during sculpting, because they make the image look cluttered. In this tutorial, you will learn which displays these are, where to find them, and how to turn them off. You will also switch to the appropriate layout afterwards. The whole process takes only a few minutes, but later prevents unnecessary distraction when working with millions of polygons.
The video is only loaded from YouTube when you play it – data (including your IP address) is then transmitted to YouTube/Google. More in the privacy policy
Key Takeaways
- The orange outline always shows the active object. It is of no use during sculpting and should therefore be turned off.
- The white grid lines of a parametric primitive object are not necessary for working on the model. They too should be deactivated in the options.
- You make the changes in the view preset. They then apply to all views.
- A dedicated sculpting layout keeps the window clear and adapts the workspace to your monitor.
Step-by-Step Guide
Step 1: Check the Initial Situation
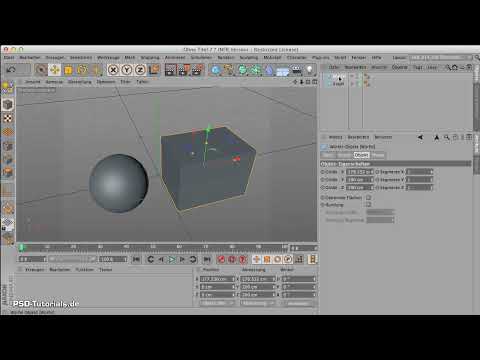
Start Cinema 4D and get a primitive object from the menu, for example a sphere. Then take a close look at how it is displayed in the editor. When you first open the software, you may see some additional markings that you don't expect. This is completely normal and depends on the default settings, which may already be set somewhat differently on your system. What matters is that you recognize the differences before you deliberately change them.

Step 2: Understand the Orange Outline
The orange border you see around your object always marks the currently active object. To test this, you can add a cube and move it slightly to the side. The orange outline immediately switches to the cube. If you then go back to the sphere, the marking moves back. This function is practical for object selection, but unnecessary when modeling, since you are focusing on the object you are currently working on anyway. You can therefore safely turn it off.

Step 3: Recognize White Grid Lines
Next, you should pay attention to the grid lines surrounding the object. With a still-parametric primitive object, these lines are white. As soon as you convert the object into an editable object, they turn light blue, and the corresponding modes come into play. As long as you sculpt from primitive objects, you don't need this grid display. It is not active at the moment, but it can still be switched on again later if you need it. That's why it is worth adjusting the setting deliberately now rather than only when it bothers you.

Step 4: Open Options and Adjust the View Preset
Now open the options in the menu. There you will find the View Preset section. Choose the setting so that it applies to all views. This way you don't have to configure each view individually, and you have the same display in all windows. Here you can control the individual displays that are relevant to your workflow.

Step 5: Turn Off the Selection Outline
In the view settings, look for the selection outline, that is, the orange border around the active object. Remove the checkmark or turn the option off. The marking then disappears from the viewport immediately. Your object of course remains selected; you just no longer see it highlighted in color. For sculpting, this is exactly right.

Step 6: Deactivate the Selected Wireframes
Next, you deactivate the display of the selected wireframes. In Cinema 4D versions up to R13, these settings were already turned off by default, and you should definitely keep them turned off in R14 as well. Imagine you are working with millions of polygons: with wireframes turned on, the model becomes a single white surface in which you can hardly make out details, even when you zoom in very close. After turning them off, the object appears in a clear, calm gray. Outlines and lines have disappeared, and you can start modeling right away.
Step 7: Switch to the Sculpting Layout
The view is now ready, but a dedicated layout is worthwhile for an optimal workspace. You can find the layouts at the top of the software. Select the Sculpting layout there. It is set up so that the window does not fill the entire monitor, but stays within a manageable area. The switch may take a moment until the display is fully bright and clean again.

Step 8: Check the Result
When the image is bright again, you are in the Sculpting layout, and your preparation is complete. Quickly check once more that no orange outline and no grid lines are visible anymore. Only then are you ready to go. You can now edit the object without any additional displays distracting you.

Summary – Preparing Cinema 4D Sculpting: Setting Up the View and Layout Correctly
With just a few settings, you create a working environment tailored to sculpting. You turn off the orange selection outline and the wireframes in the view presets and then switch to the Sculpting layout. This keeps your model clearly recognizable, and you can concentrate fully on shaping. You can reset the settings at any time if you need the grid lines or outlines again.
FAQ
Why should I turn off the orange outline when sculpting?The orange outline only marks the active object and helps with selection. When modeling, it is unnecessary and rather distracting.
Why are the grid lines on my object white and not blue?White grid lines indicate that it is still a parametric primitive object. Light blue lines only appear after converting it into an editable object.
Do I have to change the settings for each view individually?No. If you set the view preset for all views, the changes apply uniformly to all windows.
What happens if I leave the selected wireframes turned on?With a very large number of polygons, the model becomes a white, confusing surface. Details can then hardly be recognized.
Can I undo the settings later?Yes. You can open the options again at any time and reactivate the outlines or grid lines if you need them.
Why should I use the Sculpting layout?The layout is set up so that the work window stays at a suitable size and does not occupy the entire monitor.

