

Placing eyes into a skull seems like a detail at first glance, but it determines whether a face looks convincing later on. In Part 04 of the creative training on sculpting in CINEMA 4D, you shape the orbita, i.e. the bony eye socket, using the Grab tool. You will learn where the eyes actually sit, how to invert the tool, which brush size is suitable, and when it is better to stop shaping. The timestamps in this tutorial refer to seconds in the video.
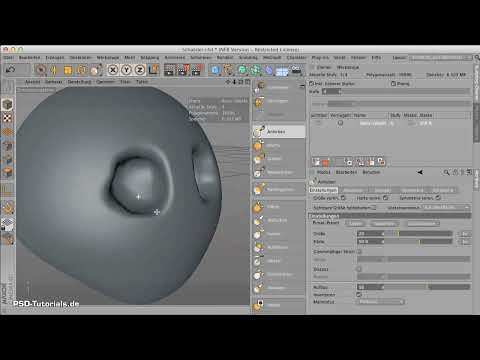
The video is only loaded from YouTube when you play it – data (including your IP address) is then transmitted to YouTube/Google. More in the privacy policy
Key Takeaways
- The eyes sit much lower than you might initially assume. They belong in the lower area of the skull, not directly under the forehead.
- The Grab tool can be inverted so that you create indentations instead of elevations. This saves time and strain on your hand.
- A small brush tip is enough to cleanly work out the depth of the eyes and the shape of the socket.
- You lift and reapply the tool several times instead of going too deep with a single stroke.
- The polygon density limits how deep you can work. Before you continue, you should subdivide the object more finely.
Step-by-Step Guide
Step 1: Check the position of the eyes on the skull
Before you even pick up the tool, get an overview of the head. Look at where the face is located in relation to the skull. This orientation is important because it makes the proportions visible. Don't forget that the facial skull with eyes, nose, upper jaw and lower jaw takes up only a comparatively small part of the head. If you place the eyes too high, the face will quickly look distorted later on.

Step 2: Place the eyes at the right spot
Many beginners place the eye sockets right at the top, directly under the forehead. This is a common mistake. The eyes sit significantly further down, roughly at the height you see marked in the video. Set your first impression there and work from that point onward. This gives you a coherent relationship between the forehead, the bridge of the nose and the cheek area.

Step 3: Invert the Grab tool
To shape indentations instead of elevations, you invert the Grab tool. To do this, click the "Invert" option in the tool settings until a checkmark is set there. Alternatively, you can use a modifier key that activates the inversion only while drawing. The short description mentions the Shift key; in the video, the Command or Control key is also mentioned. The advantage of the key is obvious: you don't have to constantly switch between modes. Whether you prefer the checkmark or the key depends on how often you switch back and forth between raising and lowering. In the video, the instructor works with the checkmark because he spends a longer time with the tool and this spares his fingers.

Step 4: Choose the right brush size
For the eye sockets, you need a comparatively small tip. In the video, a value of 20 is used, which doesn't seem particularly large, but is enough to shape the form and depth precisely. With a larger brush, you would unintentionally deform entire areas of the face. So make sure you keep your focus not on the ridges, but mainly on the depth and the contour of the eye socket.
Step 5: Work with multiple strokes
Apply and lift the tool several times instead of working with a single long stroke. Each application deepens the spot a little, and after each pass you can check whether the shape is right. If, on the other hand, you dig deep in one go, you quickly overdo it and have to laboriously correct it. By the way, the orbita is not as deep as you might assume at first glance. Its edges are slightly pronounced at the rim, but not round like a bowl.

Step 6: Refine the shape of the eye sockets
Now it's time for the fine work. The eye sockets should protrude somewhat more at the outer edge, while the inner edges fall away gently. Make sure the shape is not perfectly round, because real bone structures have irregular contours. If the eyes are still too far apart, move them a bit closer together with a few corrections. This fine-tuning creates a believable facial expression.

Step 7: Keeping an Eye on the Polygons
Switch to the line display for checking. There you can immediately see how far you have pushed the eye sockets inward. If you work too deep, there are hardly any polygons left on the inside, and clean editing becomes impossible. In the video, work is stopped at exactly this point. The problem can be mitigated by subdividing the object more finely afterwards. So that you don't constantly struggle with too low a resolution, you should plan this step anyway.

Step 8: Recognizing the Limit and Returning to the Normal View
When you notice that the polygons on the inside are running short, the limit has been reached. Continuing to shape then brings hardly any improvements. Switch back to the normal view so that you can judge the result without distracting lines. Only then will you see whether the eyes are actually convincing. Feel free to take a moment to look at the result, because the eyes are a central component of the entire character.

Summary – Shaping the Orbita in Cinema 4D: Modeling Eye Sockets with the Raise Tool
In this tutorial, you have learned how to place the eye sockets correctly in the skull, invert the Raise tool, and work with a small brush tip. Several short strokes keep you from overdoing it, and the line display shows you when the polygon density reaches its limit. If you subdivide more finely afterwards, you can refine the shape further. This creates an eye area that is proportionally correct and looks alive.
FAQ
Why aren't the eyes located directly under the forehead?The eyes are located in the lower area of the skull. The facial skull with eyes, nose, and jaw takes up only a relatively small part of the head, which is why people place them too high if they don't check the proportions.
How do I invert the Raise tool?You can click the "Invert" option so that a checkmark is set. Alternatively, you hold down a modifier key. The short description mentions the Shift key, and the video also mentions the Command or Control key.
Which brush size is suitable for the eye sockets?In the video, a value of 20 is used. This small tip is sufficient to shape the depth and form of the eye sockets precisely without unintentionally deforming the entire face.
Why should I lift off several times instead of working in one stroke?Several short strokes allow you to check the shape after each pass. If you dig deep in one go, you quickly overdo it and then have to laboriously correct it.
How can I tell that I'm working too deep?In the line display, you can see how far you have pushed the eye sockets inward. If there are hardly any polygons left on the inside, the limit has been reached.
What can I do if the polygons are not sufficient?Subdivide the object more finely. After that, more polygons are available again, and you can continue to work on the shape cleanly.

