

Anyone who has already worked with the classic color channel in Cinema 4D will initially be puzzled by the physical material. The color is no longer where you expect it, and a specular highlight that you would normally adjust as a matter of course suddenly can't be used sensibly at all. But that is precisely the advantage: with a physically correct material, you create realistic surfaces in which Ambient Occlusion and Global Illumination are partly already calculated in the material itself. This tutorial guides you step by step through the settings, shows you why the specular highlight should be set to zero, and demonstrates how a color radiates onto neighboring objects.
The video is only loaded from YouTube when you play it – data (including your IP address) is then transmitted to YouTube/Google. More in the privacy policy
Key Takeaways
- A physical material works with the reflectance channel, not with the color channel.
- You define the color in the Diffuse channel within the reflectance.
- Specular is a separate channel in which you can layer multiple layers on top of each other.
- The specular highlight strength should be set to 0%, because a real highlight only occurs where a light source is visible.
- Roughness determines how soft or hard reflections appear.
- Sampling controls the graininess: the higher the value, the cleaner the image, but the longer the render time.
- Without light, a scene stays black. A physical sky provides the necessary lighting.
- A physical material passes color on to neighboring surfaces, which makes scenes look significantly more realistic.
Step 1: Creating the physical material
Open the Material Manager and click the entry for a new material in the Create menu. Make sure you are using a version of Cinema 4D newer than R18, as older versions do not know this material type in this form. The entry is actually called "New Physically Correct Material," but in everyday use it is usually simply referred to as the physical material.

Then double-click the new material to open the Material Editor. You will notice that the preview looks a bit grainier than with the standard materials. This is normal and has a reason, which we will look at shortly.
Step 2: Forget the color channel and understand reflectance
The first point is important: the color channel no longer plays a role with this material type. Instead, the color is defined in the reflectance channel. So open this channel, which is usually already expanded.

There you will find two channels. The first is the Diffuse channel. "Diffuse" stands for the base color, that is, for the part of the light that is scattered by the surface. Here you define which color the material has. The second channel is the specular. Its advantage is that you can layer as many reflections on top of each other as you like. Imagine a car paint: first comes a primer, then a layer of color, then a protective coat, then a gloss coat, and perhaps a metallic effect. All of these layers can be recreated in Cinema 4D. For this tutorial, however, the default is sufficient.

Step 3: Setting the Diffuse default
In the Diffuse default, click the small black triangle to choose the color. You can change it just as you are used to from the color channel. As a rule, you don't need to touch anything else in this area.
One setting should make you suspicious, though: the specular highlight strength is set to 100% by default. This is problematic for a physically correct representation, because a highlight is really only genuine when it reflects the light source. The highlight created here, by contrast, is always visible as soon as a light source exists anywhere, and it has neither the shape nor the size of the light source. Therefore, please set the specular highlight strength to 0%. This step is crucial for a correct result.

Step 4: Controlling graininess with sampling
The graininess that you already noticed when opening the material is related to sampling. Cinema 4D sends measuring rays into the scene for each surface. The more rays are used, the cleaner the reflection is displayed. The rule of thumb is: low subdivision means a grainier material, high subdivision means less grain, but also longer render times.
You will find the sampling value at the bottom of the Diffuse default. The value 4 is considered a good middle ground. With this setting, the grain is still visible, but rendering remains pleasantly quick. For a final image, you should set the value to 8, A, or even higher, depending on the lighting situation.


Step 5: Fine-tuning the reflection
Now you turn to the second channel, the reflection. Click on it. You will see a roughness of 30%, a reflection strength of 100%, and a specular highlight of 100%. Here, too, the same applies: you set the specular highlight to 0%. After that, the reflection can only be vaguely made out, but it is still there.
Now reduce the roughness. You will see that a small, hard specular highlight appears. The rougher the surface is supposed to be, the softer and wider the reflection looks. So you determine how hard the specular highlight should be via the roughness value. This is the key lever for the surface appearance, for example with metal, paint, or plastic.
Step 6: Building a test scene
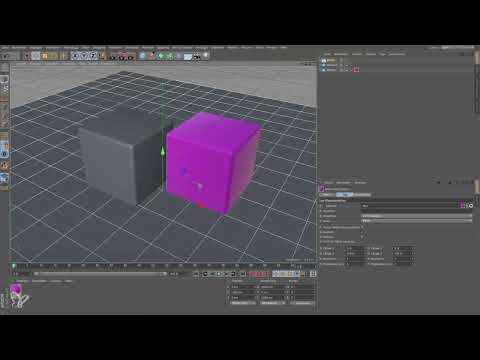
To show the advantages of the material, you build a small scene. Create a cube with a small rounding of about 10 cm. Copy it so that you have two identical cubes. You set one of them aside and move the other one downward. Also add a floor and set its Y position to -100 so that it lies exactly at the bottom edge of the cubes.

Assign the physical material to the first cube. For the second cube and the floor you need a second material. Copy the material with Ctrl+C and paste it with Ctrl+V, in order to then adjust it in the Material Editor.
Step 7: A neutral gray for the floor and the second cube
For the second material, change only the color in the Diffuse channel. Set it to a neutral gray. The specular strength remains at 0% in the Diffuse channel and in the Reflection channel. Pay particular attention to setting these values to zero in both channels, because this is exactly what is crucial for understanding the material.

Then assign this material to the floor and the second cube.
Step 8: Rendering with light
A first test render of a region initially shows a disappointing image: the scene stays black. This is completely normal, because in a physically correct world, a material sees nothing without light. That is why you create a physical sky via the Create menu and place it in the scene.


The overall brightness of the scene hardly changes as a result. It just looks lit differently. If you now render a small region again, you can finally recognize objects and colors.
Step 9: Observing the color bleed
Now take a closer look at the floor and the surfaces around the colored cube. There you will find a slight color bleed of the magenta, even though the floor itself is gray. The same bleed can also be seen on the cube itself. The astonishing thing: this color bleed remains even if you turn off the reflection.

Step 10: Increasing the sampling for a clean result
If you want to reduce the graininess, increase the sampling from 4 to 6 both in the Diffuse Standard of the colored material and in the Diffuse Standard of the gray material. Rendering now takes a little longer, but the grain disappears significantly, and the color bleed on the floor can be clearly seen.

Conclusion: Why the effort is worthwhile
The result shows what makes a physically correct material. The color cast that falls from the magenta cube onto the gray floor arises without any additional tricks. If you stick to this principle and work consistently with physical materials, your scenes will look noticeably more realistic than with the normal color channel.

Summary ??? Setting up a physical material correctly in Cinema 4D
You have seen how a physical material is built in Cinema 4D. The color resides in the reflectivity channel, the reflection can be built up in several layers, and the specular highlight should be set to 0% because otherwise it looks unrealistic. With roughness you control the hardness of the reflection, and with sampling the graininess of the image. A physical sky provides the necessary lighting, and the color bleeding between objects gives your scenes a natural look. Practice the procedure on a simple test scene, and you will quickly notice how much more believable your materials look.
FAQ
Why does my scene stay black after rendering?Without a light source, a physical material sees nothing. Add a physical sky, and the scene will become visible.
Why should the specular strength be set to 0%?A real specular highlight reflects the light source and has its shape and size. The default specular highlight, on the other hand, is always visible and therefore does not correspond to a physically correct representation.
Which sampling value should I choose for a final rendering?A value of 4 is enough for test renderings. For a final image, you should go to 8, A, or an even higher value, depending on the lighting situation.
Where do I set the color of a physical material?You set the color in the diffuse channel within the reflectivity channel. The color channel itself no longer plays a role with this material type.
What does roughness do?Roughness determines how hard or soft the reflection appears. Low values result in a small, hard highlight, high values in a broader, softer reflection.

