

A test rendering often reveals errors that get lost in the viewport. This is exactly where this tutorial starts, and from there it guides you through material corrections and camera setup to depth of field and the finished output.
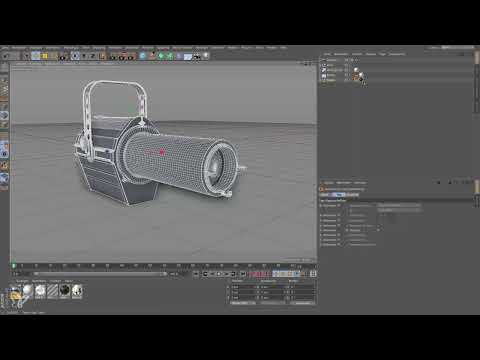
The video is only loaded from YouTube when you play it – data (including your IP address) is then transmitted to YouTube/Google. More in the privacy policy
The Physical Renderer is the right choice in Cinema 4D if you want to render blurred areas like depth of field. Before you adjust the render settings, you should tidy up your scene: fix faulty materials, create a camera, and organize the lighting so that you stay flexible.
Key Takeaways
A test rendering uncovers material errors that often remain invisible in the viewport. An aluminum material with a Vertex Map, for example, can make objects almost disappear. Place cameras and lights in their own groups and secure them with protection tags so you don't move them by accident. The Physical Renderer renders materials more cleanly than the Standard Renderer and allows depth of field via aperture and focus object. Set the quality via the sampler with a medium level instead of blindly increasing values. For the final output, render in the Picture Viewer so you keep an eye on size and aspect ratio.
Step-by-Step Guide
1. Check the Scene with a Test Rendering
Before you work on the final settings, render the scene once as a test. You will notice that the screw is barely visible. The reason lies in the aluminum material: it works with a Vertex Map, and every object that is supposed to use this map needs its own material. The screw also has the Vertex Map, but the alpha channel is set up so that it becomes almost completely transparent.

2. Copy the Aluminum Material
The solution is simple: copy the aluminum material with Ctrl+C and paste it with Ctrl+V (on a Mac with Command+C and Command+V). The copy does not need an alpha channel because you don't need any scratches or chips here. At this spot, you simply want clean aluminum.

3. Drag the Copy onto the Material Tag
Do not drag the new material onto the object or onto the screw itself, but directly onto the material tag. As soon as a small plus appears, the old material is replaced. The other material remains in the Material Manager and doesn't cause any further disturbance.
4. Repeat the Material Replacement on the Cap
The same process also works for the cap at the top of the camera. Replace the material there in the same way. Then render the scene again, and the screw should be fully visible again.

5. Turn the Front Lens Back On
While making corrections, you noticed that the front lens is not being rendered. You had turned it off earlier and forgot to activate it again. So be sure to turn it on at the traffic light switch in the Object Manager before you continue. Finding this error later costs unnecessary time.

6. Create and Enable a Camera Object
Just in case, you want a camera position that you can call up again at any time. To do this, create a camera object and adopt the focal length that you already like. A disabled camera can be moved without the view jumping. If you enable it again, Cinema 4D jumps back to exactly this position.

7. Secure the Camera with a Protection Tag
Once the camera position is right, protect it. To do this, go to Tags in the menu, then to Cinema 4D Tags, and select the Protection tag. After that, the camera can no longer be moved accidentally. Switching it off and on still works.

8. Group the Light in a Null Object
When organizing the scene, a clear structure is recommended. The floor and the background can stay as they are. The sky, light, and light target, however, belong in their own null object, which you might call Light, for example. That way you keep the lighting completely under control when needed.

9. Turning off lights with the traffic light switch
If you still want to model, shadows and reflections often get in your way. One click on the traffic light switch of the null object turns off the lighting. With another click, you activate it again. This way you can work without light and switch back at any time.

10. Turning off reflections selectively
If reflections still bother you while modeling, open the options of the material in question and deactivate the reflectivity. However, the object will then look black. Therefore, this method is not always ideal. Test it on your scene and decide for yourself whether you want to keep it.

11. Using the Display tag for undisturbed modeling
A more elegant solution is the Display tag, which you also create via Cinema 4D Tags. You then don't have to delete textures on each object and reassign them later. One checkmark on the Display tag turns the materials off, another checkmark turns them back on. With this technique you model in peace and only restore the materials shortly before rendering.

12. Selecting the Physical Renderer
Now you can switch to the render settings. You can choose between the Standard Renderer, the Pro Render, and the Physical Renderer. The Pro Render is a GPU-based renderer that was newly added in Cinema 4D R19. It is not yet fully mature, but is worth a look. For depth of field and fine materials, the Physical Renderer is recommended. It avoids artifacts and moiré patterns that occur with the Standard Renderer, for example with fine textures such as brick structures.

13. Setting quality via the sampler
In the Physical Renderer, you control quality centrally via the sampler. The value of the reflectivity samples in individual materials then no longer plays a decisive role. You can choose between adaptive, fixed count, and progressive. Progressive renders until you consider the result good enough. With the adaptive method, you set the subdivisions: the higher the values, the finer the rendering. For getting started, it is usually sufficient to select a medium quality. The sample values then adjust automatically.

14. Setting depth of field via aperture and depth of field
If the focus should be in the front, first select the camera. In the section for the Physical Renderer you will find the aperture. Set a wide open aperture, for example 1.4, as is available on many 50 mm lenses. Then activate depth of field so that Cinema 4D calculates the blur.

15. Defining the focus object
By default, the focus lies in the depth of the scene. The focus object shifts it deliberately. To do this, open the Object tab of the camera and drag an object, such as the headlight, into the field for the focus object. The focus then lies on this spot. You can also set the lens itself as the focus object, in which case the focus moves to the front. You can additionally adjust the distance via the focus distance.

16. Performing a test render in the viewport
Reduce the size of the display in the viewport so that the renderer works faster, and start a test render. The front of the headlight should now be blurred, while the area at the focus object stays sharp. For a more detailed view, you can render a region. The Physical Renderer takes more time than the Standard Renderer, but delivers the depth of field you need.

17. Setting the output size in the Picture Viewer
For the final output, do not render in the viewport but in the Picture Viewer. There you can see how large the image will be. Open the render settings and under Output select the unit Pixel. Activate the lock for the proportions, set the width, and let the height be calculated automatically. A width of 1600 pixels results in a height of 900 pixels with an aspect ratio of 16:9. For social media this is often enough; for a large print you need significantly higher values.

18. Rendering and Saving the Image
Click the Render button in the Picture Viewer. Depending on the settings, the Physical Renderer needs some time, and the result then appears in the Picture Viewer. Save the image via File and Save As in a format of your choice, such as TIF or JPG. After that, you can open it in Photoshop and edit it further.

Summary – Physical Renderer in Cinema 4D: Camera, Sharpness and Render Settings
With a test rendering, you find material errors such as the invisible screw and fix them by dragging the aluminum material onto the material tag. A camera with a protection tag, a null object for the light, and a display tag for undisturbed modeling ensure a well-organized scene. The Physical Renderer delivers the depth of field, which you control via aperture, depth of field, and focus object. With a medium sampler quality and output in the Picture Viewer, you get a clean result that you can process further in Photoshop.
FAQ
Why is the screw barely visible after rendering?The aluminum material works with a vertex map, and the alpha channel makes objects that use this map almost transparent. Solution: Copy the material without the alpha channel and replace the old material on the material tag.
What is the protection tag on the camera for?The protection tag prevents you from accidentally moving the camera. Turning it off and on remains possible nonetheless.
Which renderer is suitable for depth of field?The Physical Renderer is best suited for this. It calculates blur and avoids artifacts with fine materials.
How do I set the focus on a specific object?Drag the object in the camera's Object tab into the field for the focus object. The focus will then be on this object.
Why should I render in the Picture Viewer?In the Picture Viewer, you see the actual output size and the result at full resolution. In the viewport, Cinema 4D only renders a preview.
