

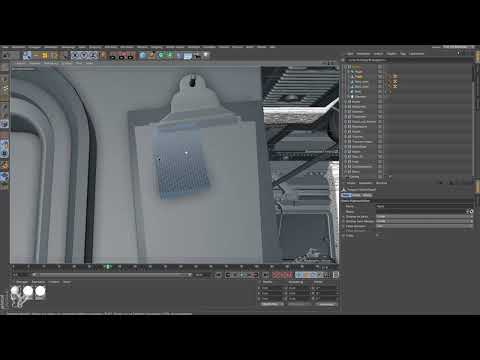
Before your space station looks believable, it needs surfaces that people enjoy looking at and touching. This is exactly why the Textures folder comes with a whole collection of ready-made materials. In this tutorial, you will learn the standard procedure: you load a material, assign it to an object, and correct the orientation if the result is mirrored or upside down. I will also show you how to control the tiling behavior and how to edit the layers of a PSD material directly in Photoshop. The example is a note (Posted) on a clipboard hanging from a nail.
The video is only loaded from YouTube when you play it – data (including your IP address) is then transmitted to YouTube/Google. More in the privacy policy
Key Takeaways
- Materials are located in the Textures folder (tex) and can be loaded via the Material Manager in Cinema 4D.
- A material is assigned to an object by dragging it onto the object name via drag & drop.
- You correct mirrored or upside-down textures using the Length U and Length V values in the Texture tab by placing a minus sign in front of the value.
- You also control tiling and offset in the Texture tab so that the image sits exactly on the geometry.
- You open PSD materials by double-clicking or via "Edit Image" in Photoshop and modify individual layers there.
Step-by-Step Guide
Step 1: Check the object and its geometry
Before you touch a material at all, you should know how textures are applied to a geometry. If mapping is still unclear to you, it is worth taking a quick look at the basics. In the example, the clipboard is on the left in the scene. It consists of the board itself, the upper and lower notes, and a clip made of two parts that was joined together using a Symmetry object. Select the note via the Object Manager so that you know right away which element the material will affect later.

Step 2: Create a new material and name it clearly
Create a new material in the Material Manager by double-clicking. Give it a clear name right away, for example "Posted". This sounds trivial, but it saves a lot of time. Many materials quickly accumulate in the Material Manager, and after a few weeks you no longer know what they were for. If you tidy up in between using the "Delete Unused Materials" function, all materials that have not yet been assigned to an object will disappear. So make sure that your materials are assigned beforehand or that you deliberately keep them.

Step 3: Load the color with the image from the Textures folder
Open the material's settings and activate the color channel. There you load the image, in the example the file "Posted.psd" from the Textures folder. Even though it looks like a simple image at first glance, a PSD file usually contains more: the text and the dirt layer are stored in it as separate layers. In this case, you can leave the reflectivity unchanged, because the specular setting hardly matters for a note.

Step 4: Edit PSD layers in Photoshop
If you don't like the text or the dirt in the material, you don't have to reach for another program. In the material area, click the "Edit Image" button or double-click directly on the image. Since it is a PSD file, the image opens automatically in Photoshop and not in the preview. There you can move, hide, or modify individual layers. If you save the file afterwards, the change is applied in Cinema 4D.

Step 5: Assign the material to the object
Drag the material via drag & drop directly onto the object's name in the Object Manager. This assigns the material immediately. Afterwards, check in the viewport whether the texture sits in the right place. In the example, the note initially appears mirrored, which is a typical sign that the orientation needs to be readjusted.

Step 6: Correct mirrored textures via Length U
Click the material again so that you land in the Texture tab. There you will find, among other things, the values "Length U" and "Length V". If the texture appears mirrored, simply enter a minus sign in front of the value of 100 percent. This reverses the direction, and the image lies correctly on the surface again. The setting is quickly done, but requires a bit of feel, because you should observe the effect directly in the viewport.

Step 7: Rotate upside-down textures via the length V
If the texture is upside down, proceed in the same way, just with the value for the length V. Here, too, you put a minus sign in front of the value. U and V are the two coordinate directions used to assign materials to a surface. If you know both directions, you can adjust any orientation precisely.
Step 8: Use tiles and offset deliberately
The texture can also be repeated multiple times. In the example, I set ten tiles in the U direction and ten in the V direction. The result looks funny, but it doesn't make sense for a single piece of paper. For objects that need a texture across the entire surface, however, tiles are ideal. So only use the values if they really suit the motif. With the offset, you shift the texture directly on the surface. In the example, it stays at 0 percent so that the image is mapped exactly onto the geometry of the piece of paper.
Step 9: Check the result and experiment with more materials
Once the orientation, tiles, and offset are right, check the result in the Picture Viewer or in a rendered view. There you can see how all the materials behave together. The textures folder contains numerous other materials you can practice with. Most of them are PSD files, which you can open and adjust in Photoshop in the same way.
Step 10: Outlook on dirt and chipping
So that the space station doesn't look too clean, you can add signs of wear, such as dirt on the edges or paint chips. The example shows that the result already looks good before these details are added. How to paint such traces directly without Bodypaint and without additional programs is covered in the next part of the series.

Summary – Assigning materials correctly in Cinema 4D: Step by step
You have seen how to load materials from the textures folder, name them, and assign them to the right object. You correct mirrored or upside-down textures via length U and length V with a minus sign. With tiles and offset, you adjust the position, and you edit PSD layers by double-clicking in Photoshop. With this basic workflow, you can use any material from the collection and make your scene more believable step by step.
FAQ
How do I load a material in Cinema 4D?Create a new material in the Material Manager, open the color channel, and load the image from the textures folder there.
How do I assign a material to an object?Drag and drop the material onto the object's name in the Object Manager.
How do I correct a mirrored texture?Click the material, go to the Texture tab, and put a minus sign in front of the value for the length U.
What do I do if the texture is upside down?Put a minus sign in front of the value for the length V in the Texture tab.
How do I edit the layers of a PSD material?Click "Edit Image" or double-click the image. The PSD file then opens in Photoshop, where you can move or change the individual layers.
When should I use tiles?Tiles are useful when a texture should repeatedly cover the entire surface. With a single object such as a piece of paper, multiple tiles usually look inappropriate.
What does the offset do?The offset shifts the texture on the surface. At 0 percent, the image lies exactly on the geometry.
Why should I delete unused materials?Many materials quickly accumulate in the Material Manager. With the "Delete Unused Materials" function, you tidy up, but make sure to assign materials beforehand so they are not lost.

