

When two materials blend into each other on an object via the alpha channel, the edge often looks as if it had been drawn with a ruler. This is exactly the problem that the technique in this tutorial solves. First you paint directly onto the geometry of a space station, build an alpha control from it, and then use the blend mode Levr. The result is hard, irregular edges that look like chipped paint. The process is more involved than a simple material swap, but it can be followed step by step. If the complexity of the column seems too high to you, you will find a practice suggestion with a simple cube at the end.
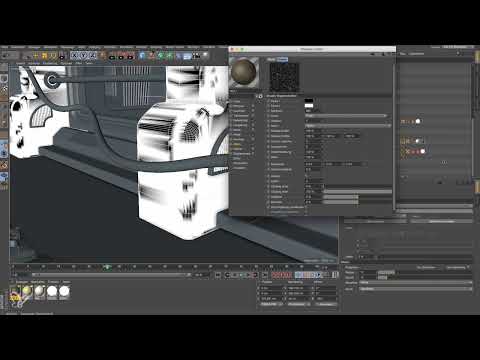
The video is only loaded from YouTube when you play it – data (including your IP address) is then transmitted to YouTube/Google. More in the privacy policy
Key Takeaways
- The Vertex Map stores your painting and forms the basis for the alpha control.
- With projection turned off, the tool tip aligns with the polygon normals, which helps in hard-to-reach places.
- Between a black and a white color shader sits the Vertex Map, which controls the transitions as a layer mask.
- An organic-looking noise shader placed over the Vertex Map breaks up the artificial boundaries.
- The blend mode Levr works like a hard tonal correction and makes the edges significantly sharper.
- The intensity and clipping of the noise shader determine how strong and how bright the transitions turn out.
Step-by-Step Guide
Step 1: Make the painting visible in the alpha channel
First open your material by double-clicking and switch to the alpha channel. There you will find the Vertex Map in which your painting is stored. Expand the small arrow next to the entry and select the alpha entry. Now you can see exactly where you painted, especially on the edges and on the simpler polygons. This view is important because it shows you which areas will be affected later at all.

Step 2: Subdivide the geometry and understand the projection
It is hard to paint precisely on coarse polygons. So if necessary, add extra knife cuts to subdivide the surfaces further. While painting, you will then notice that the tool tip aligns with the normals of the polygons. In the Character paint tool you can turn projection on and off. When it is on, the tip stays parallel to the monitor, similar to a brush in a 2D program. If you turn projection off, the tip follows the surface. This is particularly helpful when you reach a corner or edge that is difficult to reach with the normal view.

Step 3: Critically check the result
Before you continue, render the painting so far. The results often seem disappointing at first, because the transitions are soft, even, and therefore unnatural. These are exactly the boundaries you now want to break up. It is worth looking closely at this state so that you can later recognize the difference from the final result.

Step 4: Build the alpha control with two color shaders
The Vertex Map must no longer sit directly in the alpha, but must be embedded in a shader structure. In the alpha, select a shader as the texture. The Vertex Map is then still contained within it, just at a different place in the hierarchy. Now create two color shaders, one with black and one with white. You place the black shader in the upper position and the white one in the lower position. You arrange the Vertex Map in between. As long as you have only built this structure, nothing about the appearance of the edges should change yet.

Step 5: Put the Vertex Map in a folder and use it as a layer mask
So that you can conveniently blend further layers later, put the Vertex Map in a folder. Drag this folder between the two colors and set it to layer mask. This setup has the advantage that you can add further layers at any time without destroying the basic structure. Then render a small section to check whether everything works. At this point the result still looks exactly the same as before. This is normal, because so far you have only created the basis for the blending.

Step 6: Apply an Organic Noise Shader Over the Vertex Map
Now the element that breaks up the artificial look is still missing. Above the Vertex Map, click on a new shader and select a Noise shader. Do not use the default entry, but a shader that looks organic and not schematic. Then go back up one level. The new Noise shader now sits there. Since the layer mask adopts the luminance values of the noise, irregular brightness gradients are created that break up your painting.

Step 7: Assign the Levr Blend Mode
This is exactly where the crucial step comes in. Assign the Levr blend mode to the layer that contains the Noise shader. This mode decides for each pixel, in a hard manner, whether the material is displayed or not. It thus acts like a hard tonal correction. The soft transitions disappear, and clear, sharp edges emerge in their place. Render the result again. The transitions now look more organic and actually resemble paint that has peeled off in individual spots.
Step 8: Adjust the Intensity of the Levr Mode
The strength of the Levr mode can be adjusted. At 50 percent, a mixture of soft and hard transitions is created, which sometimes works well. However, you will notice that the full effect at 100 percent often looks more convincing. Also test intermediate values such as 80 percent to find the balance. What matters is that you do not judge only by the impression of a single render image, but compare the values one after another.
Step 9: Clip the Noise Shader and Fine-Tune the Transitions
With clipping, you can control which areas of the Noise shader become visible at all. Start with a value that changes only a little, and then work your way up slowly until the area becomes clearly brighter. Then render again and observe how the transitions have shifted. The distribution between the lower and the upper alpha material changes noticeably as a result. When you are satisfied with the result, set the values for intensity and clipping back to 0 and 100 percent so that the Noise shader retains its gray values completely. Afterwards, you can set the intensity back to the value you like best.

Step 10: Practice the Technique on a Cube
If the column with its complex geometry contains too many influences at once, start in a new file with a cube. Subdivide it, for example, into 10 × 10 × 10 segments. Then repeat all the steps on this simple object. This way you get to know the sequence of painting, Vertex Map, shaders, layer mask, noise and Levr at your leisure before applying it to a detailed space station. Painting directly on the geometry is a worthwhile method that can be internalized quickly with a bit of practice.

Summary – Cinema 4D Tutorial: Creating Organic Material Edges with Levr Mode
You have seen how to transform material transitions in Cinema 4D from an artificial-looking boundary into an organic-looking edge. The path leads through painting directly on the geometry, the Vertex Map in the alpha channel, and a setup of black and white color shaders. In addition, there is a Noise shader in a layer mask, to which you assign the Levr blend mode. Finally, you fine-tune the result with intensity and clipping. The decisive effect is the hard action of the Levr mode, which turns the soft transitions into sharp, irregular edges. If you first practice everything on a cube, getting started with the more complex space station will be much easier for you.
FAQ
Why do my edges still look soft despite the Levr mode?Check whether the intensity is set too low, and check the clipping values of the Noise shader, because only both together determine the hardness of the transitions.
Do I absolutely have to put the Vertex Map into a folder?The folder is not mandatory, but it has the advantage that you can later blend further layers with the Vertex Map more easily without changing the basic structure.
Why should I turn off projection in the Character paint tool?When turned off, the tool tip aligns with the polygon normals, which makes painting in corners and hard-to-reach places much easier.
Which intensity of the Levr mode is the right one?There is no fixed value, but in the video 100 percent is the most convincing. Test intermediate values such as 50 or 80 percent and decide based on the render result.
Can I also use the method with other textures?Yes, you can fill the alpha content with a different color, a different relief, or a photographed texture in the color channel once the setup is in place.

