

A window without a frame quickly looks like a mere hole in the wall in a space station. The glass surface alone hardly creates any effect, because light refraction and reflection arise primarily where glass and air meet. For that, you need a stable, technical-looking frame that holds the glass and lends credibility to the scene.
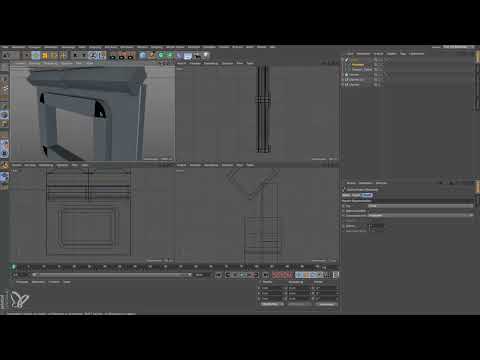
The video is only loaded from YouTube when you play it – data (including your IP address) is then transmitted to YouTube/Google. More in the privacy policy
In this tutorial, you will build exactly this frame. You derive the path directly from the edges of an existing window, design your own profile with a rectangle spline, and combine both with a Sweep object. Afterwards, you reduce the polygon count so that the scene stays smooth later on. The technique of adapting newly created objects to already existing geometry is one of the most commonly used methods in modeling, so it is worth following along closely.
Key Takeaways
- The path for the frame can be taken directly from the edges of the window by converting a loop selection in edge mode into a spline.
- A rectangle spline serves as the profile, which you can freely deform via its points.
- A Sweep object combines the path and profile into a continuous frame.
- Too many polygons produce dark, faulty surfaces and put a strain on the scene. With a higher degree value for the roundings, you reduce them significantly without any visible loss of quality.
Step-by-Step Guide
Step 1: Understanding the Starting Situation
Before you get started, look at the window as a pure opening. It still lacks any stability, and the glass simply looks incomplete without a surround. Your task is to build a frame that encloses the glass. For this, you use two splines: a path that runs around the outside of the opening, and a profile that determines the shape of the frame.

Step 2: Duplicating the Window and Converting It into a Spline
The direct way to obtain the path is via the edges of the existing window. The points of the original are unsuitable because the outer points remain even if you delete them. Therefore, duplicate the window with Ctrl+C and Ctrl+V. You then convert the duplicate into an editable object with the C key. This detour protects the original and gives you a clean copy to work with.

Step 3: Taking Over the Edges as a Spline
Switch to edge mode on the duplicate. Using the Loop Selection, select the outer edge loop that forms the window border. Make sure you are really selecting edges and not points. Then you transfer the selection via the menu Mesh, Commands, Edge Selection to Spline. A new spline is created that follows the course of the edges exactly. Incidentally, the roundings of the window are procedurally generated. They can therefore be changed at any time via the extrusion, an advantage you will appreciate later.

Step 4: Removing Unnecessary Objects
Move the new spline until it reaches the desired position, and then delete the window duplicate. You only need the path. Therefore, keep only the window spline so that your scene stays clear and you don't accidentally work on the wrong object.

Step 5: Creating the Profile with a Rectangle Spline
The second spline determines the cross-section of the frame. Switch to the four-view layout and create a rectangle via the Spline menu. A size of about 40 x 40 centimeters is sufficient to start with. If the object does not appear in the Object Manager, click on the blue dot in front of it or press the O key to make it visible. A rectangle at the origin is ideal for the profile, because you will later move it along the path into the appropriate position.

Step 6: Adjusting the Size and Determining the Position
Drag the rectangle near the window so that you can better judge the dimensions. It is initially too wide and needs to become narrower. The exact shape is not yet decisive, because you will deform the profile later anyway. What matters is that it roughly matches the width of the frame and that you can reach it easily.

Step 7: Converting the Splines into a Sweep Object
Before you build the Sweep object, convert both the rectangle and the window spline into polygonal objects. You can convert the rectangle right now, since it will be needed later anyway. Then create a Sweep object and drag the window spline into it as the path. Place the rectangle underneath it as the profile. So that the frame doesn't look like an overly coarse object, you then swap out the profile until the result looks usable. You will see that the sweep works well right away.

Step 8: Identifying Dark Surfaces and Reducing the Size
After the first sweep, dark, unattractive surfaces may appear. This is a warning sign: something is wrong with the polygon mesh, usually because too many polygons lie on a surface that is too large. Scale down the spline in Object mode until the result looks more civilized. A profile that is too coarse or a path with unfavorable dimensions quickly leads to such artifacts.

Step 9: Shaping the Profile with Points
Now you design the profile. First hide the Sweep object so that you can see the rectangle again. Switch to Edge mode, select the rectangle, and then work in Point mode. Via Mesh, Create, Create Point you add new points to the rectangle. Move them individually to create recesses and protrusions. When moving them, make sure the direction behaves correctly: a point that is pulled inwards can invert the shape. Afterwards, show the Sweep object again to check the result directly.

Step 10: Adding More Points and Giving the Profile Variety
Now add several more points until the profile takes on a technical, varied character. With the Live Selection tool, you pull the points out one after another or push them inwards. A good profile doesn't look smooth, but has steps, edges, and grooves. This very variety conveys that the frame was built to be functional and not merely decorative.

Step 11: Rounding the Corners of the Profile
The corners of the profile initially look somewhat harsh. So select the affected points using the Live Selection tool and round them off via Mesh, Spline, Chamfer. The default value of 1.8 centimeters is too large and should be reduced to about 0.8 centimeters. This value creates smooth transitions without making the profile look blurred. The rounding does cost additional polygons, but it noticeably improves the overall look.

Step 12: Finishing the Frame and Naming It
The frame is now finished in its basic form. It looks technical and fits a space station. If you like, you can pull the outer points out a little further so that the frame stands out more strongly to the outside. Then give the object a clear name, for example Window Frame. A clear name will save you a lot of searching time later in the Object Manager.

Step 13: Checking Fine Roundings and Increasing the Angle Value
Zoom in close to the frame and check the roundings. You will notice that in some places they are subdivided far too finely. This burdens the scene unnecessarily. To see the segmentation, switch to the lines display. Then increase the angle value in the rectangle spline. This significantly reduces the number of rounding segments. In this example, the polygon count dropped from about 8,400 to around 3,600 without any visible loss of quality. This saving will be strongly noticeable as your project progresses.

Step 14: Checking the Result with Gouraud Shading and SSAO
Switch back to the normal Gouraud display. Additional shading via SSAO emphasizes the depth of the frame and shows whether the profiles blend cleanly into one another. If the frame also convinces in this view, you have created a solid segment that you can reuse for other components.

Summary ??? Modeling a Window Frame in Cinema 4D with Sweep and Splines
You have learned how to derive a path from the edges of a window, shape your own rectangle profile, and combine both with a Sweep object into a stable frame. The key steps are duplicating and converting the window, the edge selection to spline, deforming the profile via points, and the targeted reduction of polygons via the degree value. With this method, you reliably adapt new objects to existing geometry while keeping an eye on the performance of your scene.
FAQ
Why do you duplicate the window before creating the spline?The original remains unchanged, and you work with a copy from which you can cleanly take over the edges as a path.
What is the difference between path and profile in the Sweep?The path is the spline along which the profile moves. The profile is the cross-section that gives the frame its shape.
Why do dark areas appear on the frame?This is usually due to too many polygons on a surface that is too large or an unfavorable dimensioning of the spline that distorts the mesh.
Why should you increase the degree value for the rectangle?A higher degree value reduces the number of rounding segments and thus the polygons, without the appearance visibly suffering.
How much does reducing the polygons really help?In the example shown, the polygon count dropped from around 8400 to about 3600, which noticeably relieves the scene.
Why is the spline partially hidden after the Sweep?Hidden objects make it easier to work on the profile so that you can edit points precisely without the Sweep result getting in the way.

