

A space station only looks credible when its interiors are designed not just functionally, but also atmospherically. That is exactly where this tutorial comes in. You will learn how to shape a simple cube into a sober office lamp that fits perfectly with the science fiction look. The contrast between an everyday ceiling light and the spectacular space outside is precisely what gives this concept its appeal.
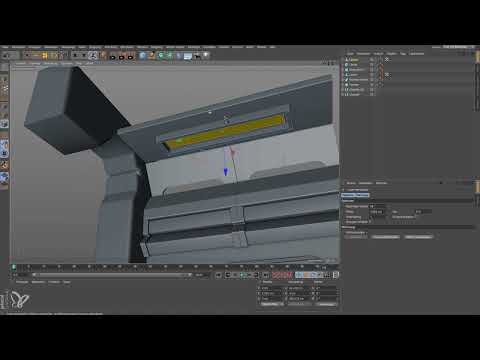
The video is only loaded from YouTube when you play it – data (including your IP address) is then transmitted to YouTube/Google. More in the privacy policy
You work with a segment construction method in which you can move components and adjust their size at any time. The video also shows you how to use a frozen selection to restrict a glowing material to specific areas, and how the Bevel deformer rounds off unbeveled objects non-destructively. The guide follows the flow of the video and supplements the steps with tips you should keep in mind.
Key Takeaways
- A cube can quickly be reshaped into a ceiling segment or a lamp. You don't have to build every detail perfectly right away.
- Segments stay flexible. You can adjust size and position at any time later if the room geometry or ventilation pipes require it.
- A frozen selection assigns the glowing material exactly to the faces that should glow. This is usually clearer than assigning it to the entire object.
- The Bevel deformer rounds off edges non-destructively. The settings for subdivision, offset, and angle limit determine the result.
- You should deselect selections immediately once you no longer need them. Otherwise, later changes will only affect the old selection.
Step-by-Step Guide
Step 1: Create the ceiling segment from a cube
Start with a cube that you use as a ceiling element. You don't need to work with complicated shapes right away. In the video, the height is set to 15 cm and the depth to the tried-and-tested 454 cm. Make sure the dimensions fit your room, because a ceiling that is too tall quickly looks out of proportion.

You then adapt the length of the segment to the available space. In the video, around 145 cm is perfectly sufficient. You can enlarge or shrink the cube at any time later when you assemble the individual segments. That is exactly what makes the segment construction method so practical.
Step 2: Position segments and check connections
Place the ceiling element so that it sits flush against the adjacent components. To do this, move it into position bit by bit and check the connections from all sides. Pay particular attention to the places where the ceiling meets the room divider or technical equipment. This is where it is decided whether the overall picture looks coherent.

Step 3: Set the rounding of the ceiling element
The ceiling element needs a slight technical rounding. It doesn't have to be strong, since you can hardly see the upper edges of the ceiling anyway. In the video, the decision is made to round off the entire cube at once instead of working on individual edges. This saves time and ensures a uniform appearance.

Step 4: Shape the lamp from the cube
For the lamp, you take another cube and reduce its height and width. The shape is reminiscent of a typical office lamp, like those found in real spacecraft. The lamp doesn't have to look spectacular. Its simplicity is precisely what makes the contrast with the surroundings interesting. In the video, the height is increased to about 20 cm so that the lamp looks well proportioned.

You should initially remove the rounding on the lamp. You don't want to see rounded edges at all the corners, and you will still need access to the inner workings of the lamp later anyway.
Step 5: Convert to a polygon object and work out the interior
Name the cube "Lampe" (lamp) so that you keep track of it later. Then you convert it into a polygon object. Only now can you edit faces in a targeted way.

In the next step, you extrude the inner faces. Shrink the inner face with the Extrude Inner tool until only a narrow border remains. You don't have to remove the inner area completely. A small distance from the outer edge is enough. Then you shrink the face a little more. The result is a lamp with a cavity that will later serve as the light surface.
Step 6: Assigning the Light Material with a Frozen Selection
Now you define the surface that will glow later. To do this, create a selection of the inner faces and freeze it as a selection tag. You can then assign this tag to the light material. This is the cleaner approach, because the material then appears only where you want it, and not on the entire lamp.

Afterwards, deselect the selection again. This is an important point you should remember: as soon as a selection is active, all further changes only affect that area. Many beginners are therefore surprised that suddenly nothing happens, even though they want to edit something.
Step 7: Using the Bevel Deformer
Instead of rounding the edges manually, you use the Bevel Deformer. Simply drag it under the lamp object so that it affects it as a child. The advantage: the object remains unchanged, and you can adjust the rounding at any time. At first only a single segment is created, so you need to adjust the settings.

First increase the subdivision so that the rounding becomes smooth. In the video, a value of about five is chosen. Then you set the offset to the classic size of 0.8 cm. This gives you a clean, technical rounding.

Step 8: Avoiding Unwanted Lines with the Angle Limit
After the rounding, unwanted lines can appear in Gouraud shading because the deformer also creates segments on faces with a flat transition. This is often barely noticeable from a distance, but can be distracting from certain viewing angles. The angle limit provides a remedy. Activate it in the Bevel Deformer and set the angle so that only the desired edges are rounded. It's best to test the result from several perspectives before you continue.

Step 9: Checking the Result and Adding Optional Details
After these steps, you have a well-usable lamp. You can now insert it into the scene and assess the light. Additional reflectors or struts are possible, but don't necessarily suit every style. In the video, they are deliberately omitted so that the lamp doesn't look too much like an office lamp.

Step 10: Adjusting the Column So a Ventilation Pipe Can Pass Through
If you later want to run a ventilation pipe through the opening in the ceiling, it may collide with the lamp or the column. You have two options: you can reduce the width or height of the column, or you can move it. In the video, the column is moved down a bit because there is still enough space there. A lower section can later be hidden by the floor anyway, so cutting it off is not strictly necessary.

Step 11: Running the Pipe Through the Cutout
With the adjusted column, you can run the pipe through the cutout. It runs directly under the lamp and thereby becomes an element that brings a lot of complexity into the scene. At the same time, it reflects light into the room, which further enriches the atmosphere. This very effect makes the difference between a plain and a credible space station.

Summary ??? Cinema 4D Space Station: Building a Lamp with the Bevel Deformer
You have learned how to form a ceiling segment and an office lamp from a cube, design the interior lighting with a frozen selection, and create clean rounding with the Bevel Deformer. With the angle limit you avoid unwanted lines, and with an adjusted column you create space for a ventilation pipe. If you carry out the steps in this order and consistently deselect selections, you end up with a lamp that looks convincing in the room and can be adjusted at any time.
FAQ
Why should I use a frozen selection instead of a direct material?The frozen selection determines which polygons receive the light material. This way, only the inner area of the lamp glows, and the rest of the object remains unaffected.
Do I need to change the Bevel Deformer again after creating it?This is usually necessary. You should adjust the subdivision, offset, and angle limit until the rounding looks clean and no distracting lines appear.
Why does everything else suddenly disappear after a selection?When a selection is active, changes only affect the selected areas. Therefore, deselect it right away when you no longer need it.
Can I still change the dimensions of the ceiling element later?Yes, that is an advantage of the segment construction method. You can adjust size and position at any time, even if other components are already connected to it.
How do I achieve a subtle technical rounding instead of a strongly rounded shape?Keep the offset small; in the video, 0.8 cm is chosen as the starting value. A small rounding usually looks more natural on technical objects than a large one.

