

Anyone who builds a space station quickly notices that many elements repeat. Instead of modeling every segment from scratch, you can copy a finished room unit and adapt it. In this tutorial, you will learn how to duplicate a unit, build a panoramic window from two splines, round the corners, and turn the whole thing into a sturdy-looking frame by means of extrusion.
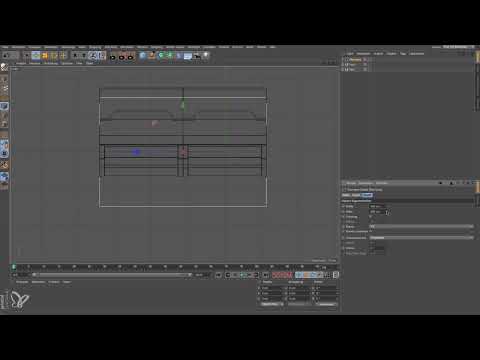
The video is only loaded from YouTube when you play it – data (including your IP address) is then transmitted to YouTube/Google. More in the privacy policy
Key Takeaways
- Duplicated objects can only be edited independently of the original if you do not create them as a render instance.
- A window is created from two rectangle splines: an outer spline for the opening in the segment and an inner one for the glass surface.
- Connecting both splines via "Connect Objects & Delete" allows Cinema 4D to extrude them as a single shape.
- Rounded corners distribute mechanical stresses over a curved surface and prevent stress peaks, as occur in vehicles and aircraft.
- After the extrusion, the Z direction must be set to zero and the depth in the X direction corrected.
Step-by-Step Guide
1. Group and duplicate the room unit
First, select all objects of your existing room unit. Press Alt+G to put them into a null object. Then copy the null object with Cmd+C (Ctrl+C on Windows) and paste it with Cmd+V (Ctrl+V). This creates a second unit, which you move in the Z direction and stretch slightly if necessary until it fits the space station.

2. Switch the view and align the connection
The camera view determines how well you can see the connections. Therefore, switch to the right or left view so that the perspective is closer to the view you worked with before. Then move the copy so that both segments connect flush with each other. To do this, activate movement in the Z direction only in object mode so that the object is not accidentally moved along another axis.

3. Create a rectangle spline for the window
The window is created below the two segments. To do this, create a rectangle spline, which you first move to the desired position in the front view. Make sure it sits centered in the segment surface and ends flush at the edges. You already checked the length beforehand: at 454 cm, i.e. 4.54 m, the surface ends cleanly.

4. Define the aspect ratio
A window looks harmonious when the ratio is approximately 2:3. Set the width and height of the spline accordingly. In the tutorial, this results in 300 cm for one side and around 301 cm for the other. That is not exact, but entirely sufficient from a design standpoint. If you reduce the height slightly, the shape fits better into the segment, and you can still readjust later.

5. Create the inner opening as a duplicate
Duplicate the rectangle spline so that you get a second, independent object. You reduce this duplicate in width so that a border is created around the opening. How large the window becomes depends on whether you want a small hatch or a generous panoramic window. For space stations, larger windows are often better suited because they make the interior feel alive.
6. Round the corners
Rectangular windows have a serious disadvantage: at the corners, localized stress peaks occur under pressure and load. That is why windows in railway carriages or aircraft are rounded. Historically, this connection became particularly clear when aircraft with square windows crashed. Therefore, create a rounding at the corners of both splines. The radius should match the size of the window. In this example, it is around 19 cm. Whether you take a smartphone as a guide or choose the value freely is up to you.

7. Connect and extrude the splines
For the extrusion, you need an Extrude object. Drag both splines into this object so that they appear as child objects. So that Cinema 4D interprets the shape correctly, you convert the splines beforehand and then use "Connect Objects & Delete". This turns the two individual objects into a single object that can be extruded cleanly.

8. Correct the position after the extrusion
After the extrusion, the window is often in the wrong place because the extrusion runs in the Z direction by default. Therefore, open the settings of the extrusion object, set the Z direction to zero, and move the object in the X direction. You choose the thickness of the wall according to your taste. For a room that stands in space, a somewhat thicker wall is recommended. In the example, around 12.16 cm is chosen.

9. Selectively round off cap faces and curves
So that the wall looks harmonious, you only round off the edges where you can actually see them. Select the cap faces and round the edges on the front side. You can leave out the back side because it is hardly noticeable in the render. Start with a low subdivision and increase it if necessary. Ultimately, the rounding should match the segmentation of the room unit so that the transitions feel coherent.

10. Fit the window and check details
Finally, you pull the window a bit further in the X direction and slightly upward so that the edge retains its function as a border. Viewed up close, you notice that light could fall in below the window. Ventilation slots or other technical details can also be hinted at there, even though you do not have to implement them for this project. To keep the scene clear, name your objects unambiguously. Use, for example, "Fenster" for the window object and "Oberteil" and "Oberteil 2" for the segments. Good names save you a lot of time in more complex scenes.

Summary – Cinema 4D space station: Modeling and rounding off a window
You have learned how to group, duplicate, and appropriately arrange a room unit. With two rectangle splines, you build a window whose corners you round off to avoid stress peaks. After connecting the splines and extruding, you correct the position and wall thickness. With cleanly named objects, you keep an overview of your space station.
FAQ
Why should I not use a render instance when duplicating?With a render instance, the copies cannot easily be edited independently of each other, and that is exactly what you need for adjustments to the segment.
Why are window corners rounded off?Rounded corners distribute loads over a curved surface instead of concentrating them at individual points, which increases stability.
What is the purpose of Connect Objects + Delete?It combines two splines into a single object, which Cinema 4D correctly recognizes as a window shape when extruding.
What do I do if the window sits wrong after the extrusion?Set the Z direction of the extrusion object to zero and then move the object in the X direction.
How do I choose the right aspect ratio for a window?A ratio of roughly 2:3 usually looks harmonious, but can be flexibly adapted to your room design.
Why is it worth naming objects unambiguously?Clearly named objects make complex scenes easier to navigate and make later changes considerably easier.

