
Before you texture an island for your Unity scene, you need clean base geometry. In this part, I'll show you how to model a rocky island in Cinema 4D that can easily be adjusted later when the client has new requests. You'll learn three approaches: the classic cube, working with polygons, and the parametric method using splines. The steps generally work in other 3D programs as well. However, the spline pen is only available from Cinema 4D version 17 onwards; you can follow the other techniques with older versions.
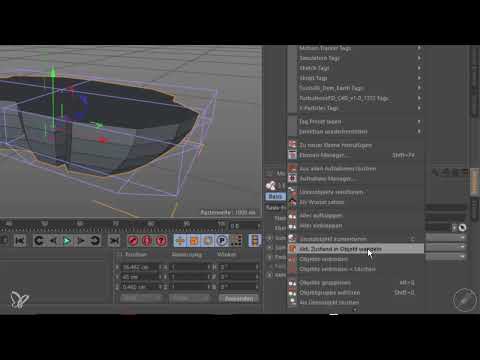
The video is only loaded from YouTube when you play it – data (including your IP address) is then transmitted to YouTube/Google. More in the privacy policy
Key Takeaways
You work with quads, extrusions, and deformers to create an island that stays flexible. Parametric splines allow you to make changes without starting over. Before exporting, you need to weld the points, avoid ngons, remove Phong tags, and cleanly triangulate the geometry in Unity using cuts. This preparatory work prevents shading errors that are otherwise often blamed on the material.
Method 1: Classic Modeling with a Cube
Start with a cube that you create via the menu. Then convert it into an editable object. With the Knife tool (key C), you roughly pre-cut the shape and arrange the individual points. The top view helps you recognize the basic shape of the island. With the rectangle selection, you select groups of points and move them.
This technique delivers clean quad geometry, but it is laborious. For every refinement, you often have to make cuts that run across both sides of the model. With larger changes, this quickly becomes tedious.


Method 2: Polygon Pen Based on a Plane
The second method is similar, but faster. Create a plane and set the segments to about four by four. Switch the display to wireframe so you can see the structure. Then convert the plane into an editable object using the T key.
With the Polygon Pen under "Create Mesh," you can then interactively push the geometry into shape. This way, the basic shape of your island is created in a short time. The result is very clean because only quads are produced, but change requests usually mean you have to start over largely from scratch.


Method 3: Parametric with the Spline Pen
If you like working parametrically, the Spline Pen is the best choice. It is available from Cinema 4D version 17 onwards. Set the type to linear and draw the outline of your island. Place points for the corners, spikes, and bays. As long as the splines remain editable, you can move them at any time when the client expresses new wishes. A simple outline is enough as a base; the details come later.


Extruding and Subdividing
To turn the spline into a volume, you use the Subdivision Surface tool. Drag your spline under the object, hold down the Alt key, and select Extrude. Make sure the extrusion runs along the Y axis. In my example, it was initially shifted in the wrong direction, so I corrected the axes. Then you subdivide the model with about four cuts so that the surface looks even later.


Tapering with the FFD Deformer
An island should become narrower toward the bottom. Instead of moving points by hand, you use the FFD deformer. Activate it under Deformers and place it over the model. Adjust the size of the grid and pull the lower part down a little. Enlarge the cage slightly, as it can otherwise cause problems during deformation.
In the next step, you switch to point mode, select the lower side of the cage with the rectangle selection, and scale it smaller in the perspective view. This gives you the desired tapering.


Organic Surface and Ruggedness
The Phong tag gives this geometry a rounded appearance, which is not suitable for rocks. Therefore, delete it. Before you continue working, create a copy of the island. To do this, hold down the Control key and drag the object downward in the Object Manager. You can hide the original version for the viewport or the rendering, depending on your needs.
For the rough surface, select all points on the copy, set a point value, and use the Crumple along Normals option. With the value, you can control how rugged the rocks look. Rather exaggerate the values at the beginning, then you will find the right strength more quickly.


Cleaning Up and Welding the Geometry
Convert the copy into an editable object via the menu by using Current State to Object. Then delete the original object. You now have top surfaces and side surfaces as separate parts. Connect them using the Connect Objects & Delete function. Afterwards, remove the Selection tag and the automatically generated Phong tag, since you don't need them.
It is important that all points are welded. By default, duplicate points often occur at the transitions. Select them with the rectangle selection, turn on welding in the Optimize function if necessary, and select all points before optimizing with a right-click.


Preparation for Unity
Unity does not handle Ngons well. You can recognize these polygonal faces by the turquoise lines in Cinema 4D. Resolve them with the Knife tool in Line mode set to single, and drag the cuts completely through the model. This triangulates the faces cleanly.
You should not skip this step. Without it, errors often occur in shading, which are then wrongly attributed to the material. Repeat the process for the underside, and then the geometry is prepared.


Fine-Tuning the Shape
As a last step, you can rework the island once more if it looks irregular. Align the top side in the front view. In Scale, set the value under Size on the Y axis to zero so that the surface really lies flat. Afterwards, use Ctrl+A to check whether all normals point in the right direction. If that is the case, your base model is finished.


The next part deals with texturing and the UV layout. This ensures that your texture sits cleanly on the island.

Summary ??? Modeling an Island in Cinema 4D: From the Basic Shape to a Unity-Ready Model
You have learned three methods for creating an island: cube, polygon pen, and spline pen. The spline pen is particularly flexible because you can easily implement changes afterwards. Then you extrude the shape, taper it with the FFD deformer, and roughen it with point values. Finally, you remove Phong tags, weld the points, and triangulate Ngons before bringing the model into Unity.
FAQ
Which Cinema 4D version do I need for the method with the Spline Pen?The Spline Pen is available from Cinema 4D version 17 onwards.
Why should I remove the Phong tag?The Phong tag smooths the surface and makes rocks look round. This is not desired for a rough island.
Why do I have to avoid Ngons in Unity?Unity does not reliably handle polygons with many sides. Shading errors are the result, so you triangulate the faces using additional cuts.
What does the FFD deformer do?It deforms the entire model via a lattice. This way you can taper the island downwards without moving individual points by hand.
How do I check whether the normals are correct?Select all points with Ctrl+A and check the display of the normals. If they all point in the right direction, the geometry is fine.


