
An HDRI image is often the fastest way in visualization to light a scene realistically. However, you don't necessarily have to make the sky or the environment visible. That's exactly what I'll show you in this tutorial: You export an HDR image from Cinema 4D, use it in Unity for global illumination, and replace the visible background with a simple solid color.
The video is only loaded from YouTube when you play it – data (including your IP address) is then transmitted to YouTube/Google. More in the privacy policy
The process seems unfamiliar at first because Unity controls the environment via materials and skybox settings. However, if you know how Global Illumination (GI) works in Cinema 4D, you'll quickly find your way around Unity. The tutorial guides you through both programs, from creating the sky object to the final setting in the main camera.
Key Takeaways
- In Unity, an HDRI can serve both as a light source and as a visible background. These two functions can be controlled separately.
- In Cinema 4D, you use the luminance channel of a material on a sky object to provide the HDR image for GI.
- In Unity, you create a material with the "Skybox/Cubemap" shader, assign the HDR image to it, and set it as the skybox in the Lighting settings.
- With the "Solid Color" setting in the Clear Flags of the Main Camera, the HDRI background disappears, but the lighting remains.
- For Unity, the HDR file should be imported with the Texture Type "Cubemap".
Step-by-Step Guide
Step 1: Create a sky object in Cinema 4D
Begin in Cinema 4D with a sky object. You can find it via the objects button, which you have to hold down a little longer until the menu opens. Then open the Material Manager and double-click the material. There, deactivate the Color and Reflectance channels and activate the Luminance channel instead. This channel determines how much light the object emits into the scene.


Step 2: Place the HDR image in the luminance channel
You now need an HDR image in the luminance channel. Cinema 4D already comes with some HDRIs, which you can find in the Content Browser. To do this, navigate via the presets to the Light Setups and open the folder with the HDRs. Drag the desired image into the slot of the luminance channel. Then switch back to the Objects area and drag the material onto your sky object.


Step 3: Increase texture quality
The preview of the HDR image initially looks pixelated in Cinema 4D. This is due to the preview size of the texture. Open the material again by double-clicking, switch to the Editor area, and set the texture preview size to 16 MB. The display becomes significantly sharper as a result. This step is not strictly necessary for the lighting, but it is very helpful for your control while working.

Step 4: Activate Global Illumination
For the HDR image to actually bring light into the scene, global illumination must be active. To do this, click on Effects in the menu and select Global Illumination. Cinema 4D offers numerous additional settings here, but for this workflow you can leave them unchanged for now.

Step 5: Export the HDR image in Cinema 4D
Now you export the HDR image so that Unity can access it. Double-click the HDRI you used in the Content Browser so that it is reloaded. Then go to File and choose Save As. You could also choose a JPEG, but for this example you stay with 32 bit and the HDR format. This shows that true 32-bit images can also be used in Unity. Then save the file directly in the Assets folder of your Unity project, for example under the name hdr005.

Step 6: Create a material for the skybox in Unity
Now switch to Unity. Open the Lighting window via the Windows menu by selecting the Lighting entry at the very bottom. There, under Scene, you'll find the settings for the skybox. For the HDR image to serve as the environment, you need your own material. In the Project window, right-click in the Assets folder, choose Create and then Material. Name it, for example, "HDR Material".

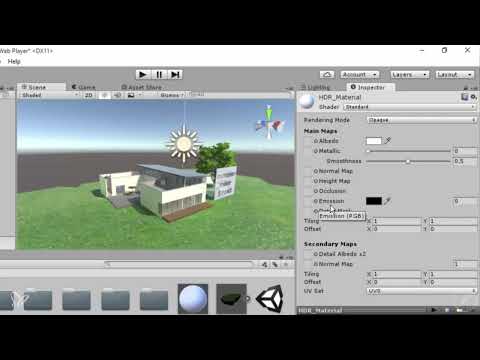
Select the new material and switch to the Inspector. Unlike in Cinema 4D, there is no luminance channel here. Instead, you have to change the shader from Standard to Skybox/Cubemap. A slot for the cubemap then appears, into which you insert the HDR image.


Step 7: Set up texture import in Unity
For Unity to process the HDR image correctly, you need to adjust the import settings. To do this, click on the saved file in the Project window. In the Inspector, set the Texture Type to Cubemap and confirm with Apply. If you don't do this manually, Unity usually converts the file automatically during import. The conversion can take a moment. Keep in mind that 32-bit HDR images are significantly more memory-intensive and the file size grows considerably. For web projects, you should keep this in mind, because loading times become longer as a result.

Then drag the texture into the Cubemap slot of your material. The preview will then show you the panorama.

Step 8: Assign the material as a skybox
The last step for the lighting is to assign the material to the environment field. To do this, open the Lighting window again and select the Scene tab. There is a field for the skybox material. Drag your HDR material into this field. The previous skybox is replaced immediately, and the scene is lit with the HDR image.

Now start the scene using the Play button. You should see that the lighting works, but the background still shows the HDRI.

Step 9: Replace the background with a solid color area
For the solid color background, select the Main Camera in the Hierarchy. In the Inspector, under Clear Flags, you will initially find Skybox. Switch this option to Solid Color. The HDRI view disappears, but the lighting remains, because it is independent of the visible background.

You can then adjust the color directly in the Camera settings. In the example, a light blue was chosen because the original dark blue looked too dark. Adjust the color so that it suits your project.

With this step, the workflow is complete. You have set up the HDRI as a light source and replaced the background with a calm color.

Summary ??? Using an HDRI in Unity as a light source and creating a solid color background
You have seen that an HDRI in Unity can take on two tasks. It provides light for the scene and can at the same time be visible as the background. With the Solid Color setting in the Clear Flags of the Main Camera, you separate the two. The workflow begins in Cinema 4D with a sky object and the HDR image in the luminance channel, continues in Unity with a Skybox/Cubemap material, and ends with the assignment in the Lighting settings. The next step covers a gradient as a background, depth of field, and a bloom effect.
FAQ
Do I absolutely have to place the HDRI in the luminance channel in Cinema 4D?Yes, the luminance channel ensures that the object acts as a light source for global illumination.
Why don't I see the HDRI despite the lighting when I change the background color?In Unity, the visible background and the lighting are separate. The Solid Color setting only replaces the display; the light from the HDRI is retained.
Which shader do I need in Unity for the HDR image?You need the Skybox/Cubemap shader, as only this one displays the cubemap texture correctly.
Why does the Texture Type have to be set to Cubemap?Unity can only use the HDR image as a cubemap for the skybox, so the import type must be set accordingly.
Is a 32-bit HDR image strictly necessary for this example?No, a JPEG works as well. However, the 32-bit format shows that high-quality HDR images can also be used, albeit with greater memory requirements.
Where do I find the skybox settings for the lighting in Unity?You can find the settings in the Lighting window via Windows, in the Scene tab.


