

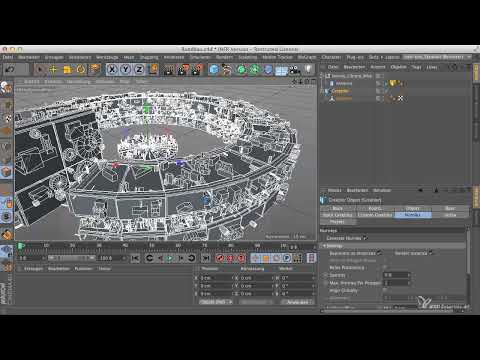
A round building that stands so close to the camera that it almost fills the entire image demands details. If they are missing, the building quickly looks empty. This is exactly where this tutorial comes in: You build your own antenna, save it as a Nurnie in the Greebler database, and then distribute it across the roof of your building.
The video is only loaded from YouTube when you play it – data (including your IP address) is then transmitted to YouTube/Google. More in the privacy policy
The included stock Greebles do not contain a shape that resembles an antenna. That is why you model it yourself. The advantage of this detour: As soon as the antenna is in the library, you can retrieve it at any time and distribute it across roof surfaces as often as you like using the Greebler's settings.
Key Takeaways
- A stylized antenna can be made from a simple cylinder without rounding. You determine the radius and height in the Object tab.
- The Greebler Library Manager only accepts antennas as an object, not as a Custom Shape.
- A null object with the right tag ensures that the antenna ends up in the Nurnies when retrieved.
- Render instances keep the amount of data low even with many antennas.
- A saved building as a null object can later be loaded cleanly into any scene.
- A check from a bird's-eye view shows whether building parts collide with each other.
Step-by-Step Guide
Step 1: Create the Cylinder as the Antenna Base
Start with a cylinder from the object menu. You do not need rounding, because with an antenna that only appears as a silhouette on the roof from a short distance, a missing fine detail is hardly noticeable. The cylinder is the quickest basic shape for your antenna.

Step 2: Set the Radius and Height Appropriately
The default radius of the cylinder is far too large for an antenna. Therefore, open the Object tab in the Attribute Manager and set the radius to 0.1 cm. Set the position to 0/0/0 so that the object sits cleanly at the origin of the scene. About 10 cm has proven effective for the height. This results in a slender, stylized antenna that fits well into the roof.

Step 3: Name the Antenna
Give the object a meaningful name in the Object Manager right away, for example "Antenne". Clear names make your work easier later when you want to keep track in the library and in the scene structure.

Step 4: Transfer the Antenna into the Greebler Library Manager
Open the Greebler Library Manager plugin. Drag the antenna from the Object Manager into it, specifically into the "Objects" area. The "Custom Shapes" area is not suitable for this, as it exclusively stores shapes. Once the antenna is stored in the library, you can delete it in the Object Manager, since you will load it again from the library.

Step 5: Retrieve the Antenna from the Library Again
A click on the saved antenna in the Library Manager brings it back into your scene. However, two things are created in the process: a null object in the "Library Miscellaneous" area and a tag that contains the antenna. This tag knows exactly where it belongs, namely in the Nurnies. To do this, select the "Nurnies" tab in the Greebler and then drag the entire null object, not just the antenna, into the "Objects" field. After a short time, the antennas appear on your building.

Step 6: Activate Render Instances
The antennas have a rather fine resolution, which may be a bit excessive with 36 segments around the circumference. However, that does no harm as long as you activate the checkbox for render instances in the Greebler's settings. This keeps the amount of data manageable despite many antennas.

Step 7: Adjust the Orientation and Size of the Antennas
On the first pass, the antennas do not yet all point in the same direction, which is why you can hardly see anything. Therefore, activate the global orientation and leave the antennas at 0°. Afterwards, you can change the size of the antennas in the "Objects" tab. This change takes effect immediately, so you can adapt the antennas specifically to the proportions of your building.

Step 8: Handling Downward-Pointing Antennas Correctly
If the antennas grow upward, this gives the building more weight. If individual antennas point downward, that is not a problem. They disappear into the building body anyway or are cut off at the lower base. Just make sure that no antenna floats beyond the roof edge, because that is exactly where it would immediately stand out.

Step 9: Saving the Building as a Null Object
Select all objects that belong to the round building and group them in a null object with Alt+G. Give this null object a clear name, for example "Rundbau". Now you always know which object is the building. Then save the file and close it to return to the open main scene.

Step 10: Loading the Round Building into the Scene and Positioning It
Load the saved round building into your scene via "Merge File". Thanks to the null object, everything that belongs to it is present, so you don't have to search for individual parts. Move the round building to the desired spot in the foreground. So that it doesn't collide with the central base, it is worth temporarily deactivating the protective corner and zooming the view out a little.

Step 11: Checking Collisions from a Bird's-Eye View
View the scene from above so that you can reliably detect overlaps. Move the round building in small steps until the breakthrough in the background is visible again and no parts collide anymore. You often have to change the angle slightly until everything fits. Once the position looks right, you reactivate the protective corner.

Step 12: Checking the Result for Detail Density
Even without lighting and rendering, you can already see that the round building has a significantly higher detail density than the central base. That is exactly the intention. A city looks more believable when some areas are densely built up and others remain calmer. If necessary, adjust the distribution of the antennas until this impression fits your image idea.

Summary – Cinema 4D: Antennas as Nurnies for Building Details
With a simple cylinder, the Greebler Library Manager, and the right null object, you build your own antenna that you can reuse at any time. When retrieving it, pay attention to the tag and the render instances, and the scene stays clear and fast. The saved building can then be loaded into other scenes without any problem, so that you can distribute details purposefully and without great effort across your architecture.
FAQ
Why is a simple cylinder enough for the antenna?For a stylized antenna that appears only as a silhouette from some distance, curves are barely visible, so the slender basic shape is sufficient.
Do I have to save the antenna via Custom Shapes?No, Custom Shapes only save shapes. The antenna belongs in the "Objects" section of the Greebler Library Manager.
Why is a null object created when retrieving it?The null object contains the antenna together with a tag that tells the Greebler that the object belongs among the Nurnies.
What do the render instances do?They reduce the amount of data because all antennas draw on the same geometry, even if you distribute many of them.
Why should the building be saved as a null object?This way all associated objects stay together when loading, and you immediately recognize which object is the building.
How do I avoid collisions when positioning?Check the position from a bird's-eye view and move the building in small steps until no parts overlap anymore.

