
A clean rendering from Cinema 4D looks perfect at first glance, but as soon as you subsequently insert textures, signs or elements, it quickly becomes apparent where the perspective is off. This is exactly where this tutorial comes in. You will learn how to adjust the image crop in cinema format, carry the alpha channels along cleanly, and use a free Photoshop extension to create perspective guide lines that you can use as a reference for every edit.
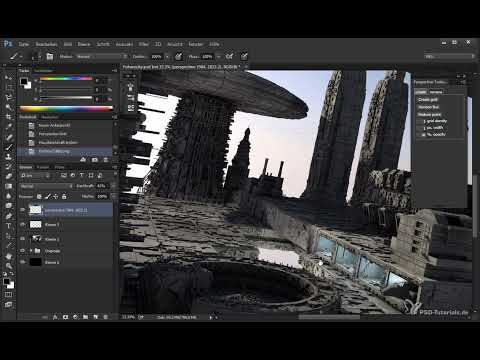
The video is only loaded from YouTube when you play it – data (including your IP address) is then transmitted to YouTube/Google. More in the privacy policy
Key Takeaways
The perspective from Cinema 4D is a starting point, not a guarantee for subsequent modifications. As soon as you insert elements in Photoshop, you need a visual reference.
Every transformation must affect all relevant layers and channels. Layers, masks and alpha channels must be edited together, otherwise the areas will no longer match.
The free "Perspective Tools" panel by Sergey Gritskiy generates vanishing lines from just a few paths. You only draw the directions, and the extension takes care of the rest.
Guide lines are managed in their own locked group. This way they stay visible without disturbing your subject, and can be shown and hidden with a single click.
Step-by-Step Guide
Creating cinema bars and correcting the image format
Before you start with the guide lines, you should bring the image to the desired aspect ratio. To do this, select any layer, hold down the Control key and mark the areas you want to cover. Then create a new layer, invert the selection with Shift, Control and I, and fill it with black. This creates the black bars at the top and bottom, which should not be changed along with the rest.

Now transform the image layers together by holding the Shift key and pressing Control-T. Make sure that the subject is not cropped and that image content is still present everywhere. If you work with the Control key, you can freely distort, rotate and move the layer. A slight tilt or compression can be corrected this way without the image losing quality.
Afterwards, compare the result with the original. Often the image looks more spacious and less compressed after the correction, which benefits the cinematic impression.
Transforming alpha channels and object channels as well
A common mistake is to edit only the visible layer. To make sure your masks continue to fit, you also have to transform the alpha channels. To do this, first activate only one layer so that you do not accidentally change several channels at the same time. Then open the Channels panel and hide all other channels.
Now select the alpha channel and, while holding the Shift key, select all other alpha channels. Then perform the same transformation as before. Make sure that you confirm the process at the end so that the changes are applied.

Then check whether the alpha channels line up exactly with the image. Minimal shifts can occur in the edge areas, which in practice usually don't matter. What matters most are the details in the center of the image.

Installing the Perspective Tools panel
For the guide lines, you need the free extension "Perspective Tools" by digital artist Sergey Gritskiy. It is cleanly programmed, used by many users, and comes from the developer's website. Download the appropriate version for your Photoshop edition. For newer versions such as CC and CC 2014, there is a separate panel that you install via the Adobe Extension Manager.
So first open the Adobe Extension Manager, if it is not yet on your computer, and load the panel's file into it. The extension will then be displayed in the list and you can install it.

If you use an older Photoshop version and the Extension Manager does not work, you can also copy the panel manually into the plugins folder of your Photoshop directory.
Opening the panel in Photoshop
After installing, restart Photoshop. Then you will find the extension via the Window menu and the Extensions item. The "Perspective Tools" panel appears there, which you can then drag to any place in your workspace. For working with the guide lines you need the "Create Grid" function. The other options are not necessary for this tutorial.

Defining the first vanishing point with two paths
The extension only needs two directions from which it calculates the lines. To do this, select a straight edge in the image that is well suited to the floor or the main direction. Take the Pen tool and set it to Path mode. Now draw a first path along the edge. Then you need a second path in a different direction, as far away from the first as possible, so that the lines intersect cleanly later.
If you accidentally set an additional anchor point while drawing, go back one step with Control and Z. By holding the Control and Alt keys you get the Direct Selection arrow, with which you can correct the path or start a new path.

In the end you have two directions that can be joined into a vanishing point in the image.
Creating the guide lines with Create Grid
Once both paths are in place, select the Create Grid option in the panel. The calculation can take a few seconds depending on the image size. Afterwards the lines appear on their own layer. You can lay them over the whole image as a grid or use them only in the area where you are currently working.

The lines are initially preset with an opacity of 30 percent. The stroke width is one pixel. It is best to leave these values as they are, even with large images. Thicker lines quickly look obtrusive and do not become more accurate.

You should also keep the density, that is, the number of lines, moderate. With very high values such as 5 or 10, you end up with just a striped area that no longer gives you clear orientation. Guide lines are meant to indicate a direction and not span the whole image.

Coloring the guide lines and making them more visible
So that the lines remain easy to see on the subject, you should color them. Choose a hue that appears as rarely as possible in the image, such as a strong magenta. With Control and U you colorize the layer. The lines thereby stand out clearly from the subject without covering it.

Note that fine lines quickly disappear at a small view size. They only show their full effect when you work in the area where you actually need them.
Recognizing the limits of the guide lines
Not every surface benefits from perspective lines. Round elements such as a concentric circle on a ceiling panel do not follow a simple vanishing line. The guide lines are therefore intended primarily for the floor and for rectangular elements. Use them where they really provide orientation, and rely on your eye and the geometry of the subject for round shapes.

Adding the second vanishing point
An image rarely has only one vanishing point. To find the second, choose another edge that lies on the other side, and draw two paths with it again. Make sure that the directions differ clearly from each other. Then run Create Grid again.

In this pass, a regular network of lines is created in which the angles are evenly distributed. Hand-drawn lines, by contrast, often look uneven. Color the new layer with a different hue, for example orange, so that you can tell the vanishing points apart. An opacity of about 30 percent is usually enough, since the lines are very fine.

Setting the third vanishing point for the verticals
The most important vanishing point concerns the vertical lines. In the image, buildings or columns lean toward the top, and you absolutely have to take that into account with textures. To do this, draw a vertical edge and a second line on the opposite side. Make sure the paths lie within the image and intersect at a sensible angle.

After Create Grid, the verticals appear as their own layer. Color them, for example, in a light green and adjust the opacity. The lines are a great help with textures because you can see right away how vertical patterns have to run.

Grouping and managing all guide lines
So that you can control the three vanishing points together, combine the layers into a group and give it a fitting name, for example "Perspective". Reduce the group's opacity to about 30 to 40 percent so the lines don't get in the way. With a click on the group, you show or hide all guide lines at the same time.

Also lock the group so that you don't accidentally work on a guide line while painting or texturing. If you want to increase the opacity later, simply unlock the group again, adjust the value, and lock it again.

With this preparation, you have reliable orientation in the image at all times. So you can ask yourself at any time how the perspective runs at a particular spot, and the answer is right in front of you. In the next step, you turn to the sky.

Summary ??? Drawing perspective guide lines in Photoshop with Perspective Tools
You have learned how to correct a rendered image in cinema format, consistently transform the alpha channels along with it, and install and use the free "Perspective Tools" panel. With two paths per vanishing point, you create regular guide lines that you color, adjust in strength, and organize in a locked group. This way, you keep the perspective in view with every further texture or element.
FAQ
Do I need Cinema 4D to create the guide lines?No, the guide lines are created entirely in Photoshop. The rendering from Cinema 4D only serves as the image basis.
Is the Perspective Tools panel free?Yes, the extension is offered free of charge by Sergey Gritskiy on his website.
Which Photoshop version do I need?The panel is available for various versions, including CS6, CC, and CC 2014. Choose the variant that fits your installation.
How do I install the extension?Install it via the Adobe Extension Manager. With older versions, you can also copy the panel manually into Photoshop's plugins folder.
Why should I reduce the opacity of the guide lines?With an opacity of about 30 percent, the lines remain visible without overlaying the subject.
Can I hide the guide lines at any time?Yes, if you combine all layers into a group, you can hide or show them again with one click.
Do guide lines also work with round objects?Only to a limited extent. Round shapes do not follow a simple vanishing line, so the lines are mainly suitable for floors and rectangular elements.


