

A building that looks like a mushroom stands out between the angular skyscrapers of your city like a deliberate break. This is exactly the contrast you will build step by step in this tutorial. The existing landscape tower gets an organic mushroom cap, which is created from a flat cylinder. You will work with copies, segments, and extrusions. The cap is prepared so that you can shape it further later and insert it into the scene.
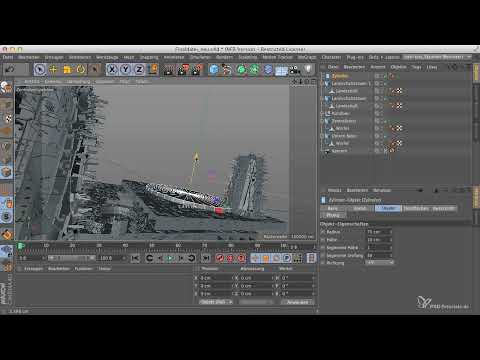
The video is only loaded from YouTube when you play it – data (including your IP address) is then transmitted to YouTube/Google. More in the privacy policy
You should have a basic knowledge of how to use Cinema 4D and know how to select objects in the Object Manager and activate tools. I will explain everything else along the way.
Key Takeaways
You can reuse a fully modeled object as a render instance, which saves memory. With a cylinder with few segments, you create a clear, almost angular mushroom shape. The organic curvature only emerges through the targeted shifting of individual polygon rings in Edit Polygon mode.
Step 1: Copy the Landscape Tower as a Base
Before you start with the mushroom cap, a small planning step is worthwhile. The landscape tower will later appear multiple times in the scene, in different views and distances. That is why you first build it completely and then turn it into a render instance. This conserves memory significantly more than if you had each copy calculated separately.
For the stem, you copy the landscape tower and give the copy a clear name, for example "Landscape Tower 1". Then move it to the desired location in the scene. An exact position is not yet decisive at this point.

Step 2: Check the Position of the Stem
Temporarily turn off the camera so that you can view the scene freely. This way you can quickly see how much space remains above and below. Move the stem slightly down or up until the proportions are right. Then turn the camera back on. You leave the stem at this spot, because the cap will be placed exactly on it.

Step 3: Create the Cylinder as a Mushroom Cap
Now you need the cap that sits on top of the tower. You can build it in various ways, such as with a combination of a cylinder and a sphere or with an oil tank. Here you use a simple cylinder. In the Attribute Manager, set the radius to a value that roughly matches the width of the tower. Feel free to try a few values until the proportions look harmonious.
Then you set the height. A value of about 10 centimeters is usually sufficient in this example. Afterwards, pull the object upward so that it sits on the stem.

Step 4: Align the Cap from Above
Now view the scene from above. This shows you whether the cap is centered over the tower. Move it accordingly until it sits exactly where the stem ends. Note that the camera works with a short focal length of 24 mm. As a result, the cap appears slightly distorted in perspective and seems farther to the right. This is not critical in the finished image, because a large part of the cap will be cut off later anyway. Cropped edges also look more lively and less constructed.

Step 5: Reduce the Segments Around the Circumference
The cylinder initially has 36 segments around the circumference. Although this looks smooth in the viewport, in the rendering the surfaces would then appear almost round. For a more realistic look reminiscent of metal plates or folded surfaces, you reduce the number to 24. As a result, the sides are visibly displayed as flat surfaces and not as a curved surface.

Step 6: Fine-Tune the Radius
With the 24 segments, the cap already looks more coherent, but the radius has turned out a bit too wide. Reduce it slightly until the shape looks elegant and not too massive. After all, the cap should look like a mushroom hat and not like a barrel.

Step 7: Setting the Height Segments
The next step deals with the height segments of the cylinder. Set them to four. This creates an intermediate level that you can use later to shape the cap inward or to create further extrusions. Keep in mind that you need intermediate levels for this, which let you work flexibly.

Step 8: Preparing the Cap Surfaces for the Curvature
The curvature on the top of the cap is the heart of the mushroom. For this you need additional segments on the cap surfaces. Set them to four, that is entirely sufficient. Before you start with the curvature, turn off the camera so that you can view the shape undisturbed. Especially with a strong view from below, this view is helpful because it shows how the curvature will look later when the entire object is moved.

Step 9: Editing the Object and Pulling the Curvature Upward
Now it gets organic. Convert the parametric cylinder into an editable object. Then switch to Edit Polygons mode. Using a loop selection, you select the second, third, and inner circle of the cap surface. With the Move tool, you pull these rings upward. While pulling, make sure you perform the movement slowly and in small steps. That way you keep control over the rounding.
Keep looking at the shape from the side. Often a small pull is enough to achieve the desired effect. It can also be a bit more, as long as the cap does not become unnaturally pointed.

Step 10: Refining the Curvature with the Live Selection
The Live Selection is well suited for fine-tuning. Hold down the Ctrl key and use the brush to remove the outer polygons from the selection. As a result, you now move them upward less strongly. The rounding becomes softer, and the impression of a real curvature slowly emerges.

Step 11: Creating the Final Rounding
In the last working step, you again remove the outer ring from the remaining selection. Then you pull the innermost circle up a little more. Check the result from below. There you can see very clearly whether the shape is harmonious. Exactly this even curvature forms the organic-looking mushroom cap, which is now prepared.

With that, you have completed your mushroom cap for now. In the next part of the series, you can shape it further, connect it to the tower, and finalize the scene.

Summary – Modeling a Mushroom Cap in Cinema 4D
You have learned how to prepare a landscape tower as a render instance and develop an organic mushroom cap from it. Starting from a flat cylinder, you adjusted the radius, height, and segments, positioned the cap correctly, and curved the top using loop selections and the Live Selection. With these basics, you can purposefully create any further mushroom object in your scenes.
FAQ
Why should I finish building the landscape tower before the cap?If you finish the object first and then use it as a render instance, it saves memory, because Cinema 4D does not have to calculate the geometry multiple times separately.
Why do I reduce the segments around the circumference from 36 to 24?With fewer segments, the surfaces appear flat rather than curved in the rendering. This looks more realistic and fits better with a technical-looking object.
Can I also build the cap from a sphere and a cylinder?Yes, that is a common alternative. An oil tank object or a combination of a cylinder and a sphere leads to a similar result.
Why does the cap look distorted in the perspective?The short focal length of 24 mm produces strong distortion at the edges. Since part of the cap will be cut away later, this is generally not critical.
Why do I need the intermediate level created by the height segments?The additional level serves as a starting point for later extrusions and indentations. This way you can continue shaping the cap afterwards.
How do I achieve the even curvature of the top?Work in small steps, switch between loop selection and Live Selection, and check the shape regularly from the side and from below.

