

A good wall shader should stand out without dominating. That is exactly what this tutorial is about: In Photoshop, you build a fine, technical-looking structure that gives the eye something to hold on to, but never distracts from the actual objects. The setup is straightforward and requires no special plugins. You work with selections, fills and layer duplicates and save the result as a PSD file. You then load this into the color channel and the bump channel in Cinema 4D.
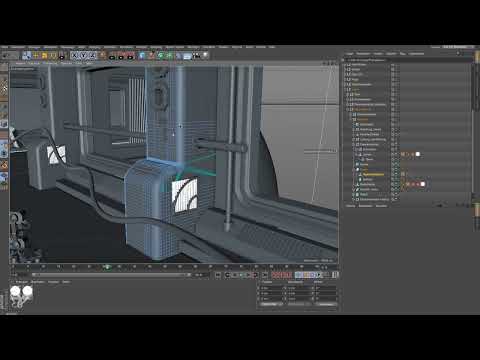
The video is only loaded from YouTube when you play it – data (including your IP address) is then transmitted to YouTube/Google. More in the privacy policy
The tutorial is aimed at designers who want to enhance their space scenes with simple, controllable means. You need basic knowledge of Photoshop and the Material Editor in Cinema 4D.
Key Takeaways
- The shader thrives on restraint: Light gray tones, low opacity and irregular patterns create a structure that you feel more than you see.
- With rectangular selections, the Alt and Shift keys, and the "Stroke" function, a pattern emerges that looks like a circuit board or a technical grid.
- Mirroring and rotating individual layers prevents a symmetrical look, which quickly appears artificial in a space station.
- In Cinema 4D, you place the PSD file in both the color channel and the bump channel. Using the mix strength with pure white, you reduce the dominance of the material.
- Mapping with cube projection and adjusted tiling ensure that the pattern sits cleanly on technical objects.
Step-by-Step Guide
Step 1: Prepare the Starting Image
You start with a background image sized 2500 × 2500 pixels. A square file with this resolution offers enough room for fine details without making the file unnecessarily heavy. Create a new, empty layer on top. All structures are created on this layer, so you can leave the base surface unchanged at any time.

Step 2: Set Rectangular Selections
Choose the Rectangular Marquee tool and drag out several rectangles. Holding the Shift key, you add further selections. Distribute them irregularly across the surface, sometimes larger, sometimes smaller. This very irregularity makes the later effect interesting. Make sure some areas remain free so the pattern has room to breathe.

Step 3: Add Cavities and Connections
With the Alt key, you subtract selections again. This creates gaps, bars and connections between the rectangles. You can deliberately place bridges between the shapes that are reminiscent of circuit boards or circuits. There is no fixed recipe here. Feel free to be imaginative, because small coincidences make the result lively. Just make sure the overall shape remains balanced.

Step 4: Round the Corners of the Selection
The sharp corners of your selections do not fit the calm, rounded atmosphere of a space station. Go to Select, then Modify, and choose Smooth. A radius of about 10 pixels already produces a clear effect at this image size. Feel free to test the value on one spot before applying it to all selections, because radii that are too large quickly make the shapes look soft and nondescript.
Step 5: Fill the Stroke with Black
Now the actual line emerges from the selections. Go to Edit and choose Stroke, not Fill. As the color, you use pure black, because you will control the strength of the line later via opacity. A width of 3 pixels yields a fine, clean line at this image size. Afterwards, deselect with Ctrl or Command and D.

Step 6: Duplicate and Mirror Lines
The first layer still looks a bit bare. Duplicate the layer with Ctrl or Command and J. Then go to Edit, then Transform, and flip the copy vertically. After that, you duplicate the layer again, rotate it 90 degrees clockwise via Transform, and flip the next copy horizontally. Through the mirroring, lines emerge that partly lie exactly on top of each other, while others leave large free areas in the middle. This very mix looks lively and avoids obvious symmetry.
Step 7: Vary Opacity Deliberately
Set the opacity of the individual layers to about 15 to 20 percent. You can leave all layers the same or deliberately choose different values. One layer may appear somewhat more distinct, while another is barely visible. These small gradations ensure that the structure does not look flat but gains depth. The base coat is essentially finished at this point.

Step 8: Fill Light Areas
Now an additional layer comes into play that brings the background to life. Flatten the document to the background layer so that all previous layers are merged. Select the Fill tool and set a very light gray color. Click into different areas, sometimes large ones, sometimes small ones. You can place areas next to each other or work with a small gap. The effect stays subtle, and that is exactly the intention. The area should not look intrusive.
Step 9: Save as a PSD File
Save the result via File and then Save As as a PSD file. Choose the highest available quality so that you don't see compression artifacts in Cinema 4D. Store the file in a place you can easily find again, for example on the desktop or in a dedicated project folder.

Step 10: Load Texture in the Color Channel
Now switch to Cinema 4D and create a new material. Open the Color channel and load your PSD file there as an image. You don't need to adjust the reflectivity much at first. The default light is sufficient for the initial assessment. You can add physically correct reflections later in a separate step.

Step 11: Adjust Mapping and Tiling
Drag the material onto the object, for example onto the central column of the station. With the standard UVW mapping, the texture does not look optimal on many technical objects. Since most components are rectangular, cubic mapping is often the better choice. The texture then becomes smaller and is distributed more evenly across the visible sides. A tiling of about 2 in both directions has proven to be a sensible starting value for this case. Feel free to test other values until the structure looks balanced.

Step 12: Adjust Mix Strength for a Subtle Impression
If the texture looks too massive in the result, you reduce its dominance via the mix strength in the Color channel. For this you need a pure white color with which the texture is mixed. Set the mix strength to around 40 percent and assess the result in the viewport. In the end, the material should look neither purely white nor gray, but like a technical surface whose structure is only perceived subliminally.

Step 13: Incorporate the Bump Channel
Additionally load the same PSD file into the Bump channel. There, the light structure creates small elevations that react to light and shadow. However, the effect is limited with flat textures with small height differences. Parallax offset would hardly make sense for such fine elevations, as it is a mix of the classic Bump channel and displacement, without creating real polygons. You are more likely to achieve a clear structural effect here via the Bump channel itself.

Step 14: Test Rendering and Fine-Tuning
Render the object to check the results. You will see some shadow and light edges that make the structure visible. Disturbing render blotches in the middle of the surface can be significantly reduced with higher Global Illumination settings. For the final quality, you should render cleanly all the way through and raise the GI values. This produces a material that calmly supports the environment and unfolds its effect in the background.

Summary – Photoshop Shader in Cinema 4D: Creating a Technical Wall Structure
You have seen how a simple Photoshop setup made of rectangular selections, outlines, and mirrored layers becomes a subtle technical structure. With low opacities, light gray tones, and deliberately irregular patterns, you achieve a shader that enlivens walls without overloading them. In Cinema 4D, you load the PSD file into the Color channel and the Bump channel, adjust the mapping to the rectangular geometry, and control the mix strength with pure white. With higher GI settings during the final render, the disturbing blotches disappear, and the material becomes a calm, credible foundation for your space station.
FAQ
Why should I fill the outline with black and not with gray?Black gives you full control over the line thickness, because you adjust the visibility later with the opacity.
What image size makes sense for the shader?A size of 2500 × 2500 pixels offers enough detail for fine lines and is still easy to handle in Cinema 4D.
Why do you mirror the layers?Mirroring creates overlaps and open areas that make the pattern look more lively and avoid an artificial-looking symmetry.
What opacity is suitable for the lines?Around 15 to 20 percent has proven to be a good starting point. You may deliberately set individual layers stronger or weaker.
Why should I use cube mapping?Most technical objects are right-angled, so cube mapping distributes the texture more evenly across the visible sides.
What does the mix strength with white do?It reduces the dominance of the texture, so that the material does not look massive, but appears as a subtle technical background.
Is the parallax offset worthwhile for this shader?With very slight elevations like in this shader, the parallax offset brings hardly any visible benefit. The relief channel delivers a more suitable effect here.
How do I remove render blotches?Increase the Global Illumination settings when rendering the final image. This significantly reduces uneven spots in the lighting.

