

Imagine you are sitting in a regional train and notice the small control panels between the compartments. LEDs glow behind glass, and buttons and switches sit in a shell of translucent plastic. You can recreate exactly such a push button in Cinema 4D, and the material is the decisive part. In this tutorial you will learn how to build a three-part push button with transparent materials, adjust the absorption, make the inner button glow, and finally place a lettering on the green glass.
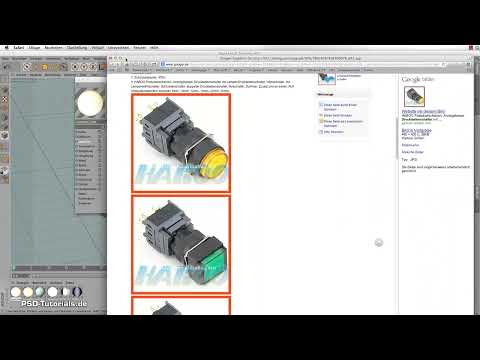
The video is only loaded from YouTube when you play it – data (including your IP address) is then transmitted to YouTube/Google. More in the privacy policy
Key Takeaways
- A push button consists of three parts: a base, a transparent head, and an inner button. Each part needs its own material.
- Transparency alone is not enough. The color of glass is created through absorption, that is, through the color and the absorption distance in the transparency channel.
- The Fresnel effect with a refractive index of 1.6 creates a glass-like reflection, and the blurriness softens the harshness of it all.
- A glow effect is created through the luminance channel. With a gradient and the Multiply blend mode, the brightness is controlled precisely.
- Without subsurface scattering, render times stay manageable, which is especially important for glass materials with many reflections.
- A lettering is applied to the material via an alpha channel and a bump channel. Flat mapping ensures that the text appears clean from the front.
Step-by-Step Guide
1. Understanding the Structure of the Push Button
Before you create materials, you should know what the button consists of. The base forms the outer ring, the transparent head sits on top of it, and in the middle lies the inner button, which is later supposed to glow. The inner button appears evenly bright on top and becomes darker toward the sides. This is exactly the gradient you want to recreate. That is why you will later divide the inner button into two selections, one for the top and one for the side.

2. Render Settings for a Fast Preview
Glass with many reflections and Fresnel effects quickly drives render times up. You can initially set the quality of the physical render settings low, turn off indirect lighting, and take over the Global Illumination from the normal renderer settings. This keeps the test runs manageable. Adjust the values later to your computer's hardware when you render the final image.

3. Creating the Floor Material
A simple material for the floor gives you a point of reference. In the color channel, choose a light, slightly bluish tone, remove the specular highlight, and add a Fresnel effect with a very low value in the reflection channel so that the floor reflects only slightly. Then you assign the material to the floor and the cove, which serves as the standing surface.

4. Dividing the Inner Button into Selections
The inner button needs two different materials: one for the top and one for the side. To do this, create two areas using the polygon selection and freeze them. This allows you to texture both parts separately later without the selection shifting.

5. The Glow Material for the Side
You control the glow in the luminance channel. Turn off the specular highlight, choose a yellowish light color, and set the brightness so that the button glows clearly. Since the glow must later act through the transparent material, the color may well be somewhat stronger than the final result. For the side, you initially leave the color channel unchanged.

6. The Color Gradient with the Multiply Blend Mode
So that the side becomes darker toward the top, you create a gradient in the texture channel. Choose the 2D projection, direction V, and set up the gradient so that it falls off to a light gray and not to a deep black. You then set the gradient to the Multiply blend mode. Only then do the glow color and the gradient interlock. Where the gradient is darker, more of the darker color comes through, and at the brighter areas the glow color is retained more strongly.

7. Fresnel and Matting for the Side
In the reflection channel, you set a Fresnel effect with the value 1.6. This refractive index corresponds to the material that will later sit on top of the head, so that both parts react the same way. In addition, you add a matting of about 40 percent. This takes the sharpness off the smooth surface and makes the button look more realistic.
8. Providing the Cap with a Circular Gradient
The upper area needs a different gradient because it should get darker toward the edge. Instead of one direction, you therefore choose the 2D projection as a circle shape. You shrink the circle in the middle a little so that there is still room at the edge for the darker tone. You take over the remaining settings from the side material.

9. Assigning the Glow Material to the Inner Head
Now you assign the two materials to the selections of the inner button. The top receives the cap gradient, the side the gradient with Multiply. For checking, you can briefly hide the outer head so that you can see how the glow looks without the glass shell.

10. Creating the Inner Material for the Button
For the inner button, you create another material that should also glow. You leave the color channel unchanged, in the reflection channel you again set a Fresnel effect with 1.6 and add the matting of 40 percent. Then you drag the material onto the inner button, onto the top and onto the side. To keep the assignment identical, you can also delete the selections and simply apply the material to the entire object. For a flexible scene, however, it is advisable to keep the selections.

11. Designing the Metal Rings
The two rings should look like cast metal. Here too, remove the specular highlight and reduce the brightness in the color channel, since the effect arises mainly through the reflection. In the reflection channel, you set a relatively high Fresnel value and add a matting of about 20 percent. As a result, the surface does not look like polished stainless steel, but rather like a cast part. A short test crop shows you whether the look fits.

12. The Green Glass: Transparency, Refraction and Absorption
The green glass is the core of the push button. Create a new material and switch off the specular highlight. In the transparency channel, you activate transparency and set the refractive index to 1.6. You do not define the color in the transparency channel, but via the absorption. Choose a strong green and set the absorption distance significantly lower, because the head is only a few millimeters thick. The value changes immediately in the preview, and you can control the color portion with the slider so that the green exactly matches your wishes.

13. Fine-Tuning Reflection and Surface Gloss
The glass should also reflect. In the reflection channel, again use a Fresnel effect with the value 1.6. You can control the transparency with a gradient or a texture that you invert so that the desired areas remain transparent. Make sure that the surface gloss in the color channel does not become too bright, because otherwise a dusty coating appears. In the example, you reduce the brightness to about 10 percent.

14. The Yellow Glass as a Variant
The yellow material is created as a copy of the green glass. If you only change the color in the absorption, you get a second variant very quickly. The absorption distance stays roughly the same, and the edge of the button can be controlled with a lower color portion. Then you assign the material to the yellow button.

15. A Test Render for Checking
A small test render shows you whether the glass effect and the colors are right. Also look at the differences compared to the higher render quality. With low settings, shadows and light gradients often look grainier; this is normal and not an error in the material.

16. The Texture Material for the Lettering
The lettering is applied to the green glass as its own material. To do this, create a new material, name it for example Texture, and set a blue tone in the color channel. The lettering should later be visible on the glass, so you need a color value that stands out from the green.

17. Alpha Channel and Bump for the Lettering
In the alpha channel, you load your lettering image, for example a PNG file with white text on a black background. Since the text in the image would otherwise be inverted, you flip the image using the invert option. In the bump channel, you load the same file again and set the strength to about 5 percent. That is usually enough to create a slight elevation. In the reflection channel, you add a Fresnel effect with the plastic preset so that the lettering looks like a glued-on plastic strip.


18. Flat Mapping and Alignment on the Head
So that the lettering sits directly on top of the head, you do not use UVW mapping but flat mapping. Reduce the size in the coordinates until the lettering no longer repeats. A value of about 12 fit well in the example. If the lettering is mirrored or upside down, you rotate it by 90 or minus 90 degrees using the rotation. Also make sure that the flat mapping is applied only to the front side, otherwise a double layer will result.

19. Adding the Second Lettering
You work with the second line of text in the same way as with the first. Copy the material, adjust the alpha channel and the bump, and set the Fresnel value in the reflection channel to about 1.6. You can take over the color by copying and pasting the color channel so that the blue tone stays exactly the same. You also select flat mapping for the front side only and adjust the rotation.

20. Assigning Materials and Final Rendering
Finally, you assign all materials to their objects: the floor gets the floor material, the base the metal, the inner button the glow material, the green head the glass with lettering, and the yellow button the yellow glass. Set the render quality back to the higher values you noted at the beginning, and start the final rendering. This takes significantly longer, but rewards you with clean glass reflections and an evenly glowing button.

Summary ??? Creating Push Button Materials in Cinema 4D
You have seen that a realistic push button consists of several materials that must be coordinated with one another. The base and the rings rely on reflections and matting, the glass relies on refraction and absorption, and the inner button needs glow color and gradients. With the lettering made from the alpha and bump channels, you also get a detail that makes the button look authentic. If you go through the steps in this order and make short test renderings in between, you keep control over every single material.
FAQ
Why should I control the color in the glass via absorption and not via the color channel?Absorption simulates how light is tinted as it passes through a material. This makes the glass look more real, especially with different thicknesses.
What role does the absorption distance play?It determines after what distance the light takes on the color strongly. For thin parts such as a push button, it should be significantly smaller than for a thick block of glass.
Why is subsurface scattering not used in this tutorial?Subsurface scattering greatly increases render times for glass materials. With the Fresnel settings and absorption, the result can still be made convincing.
What is the matting in the reflection channel for?The matting slightly scatters the reflections and takes away the surface's perfect smoothness. This makes the plastic or the metal look more natural.
Why do I have to invert the lettering?The lettering image often contains the text in white on black. Without inversion, the text would appear in the wrong places and the background would be raised.
Why do I use flat mapping instead of UVW for the lettering?Flat mapping projects the texture directly from above onto the object. This is better suited to flat surfaces such as the top of a button than UVW mapping.
How can I tell whether the glow is too weak or too strong?A short test rendering with reduced quality is usually enough. Adjust the brightness of the glow channel until the button looks distinct without burning out.


