

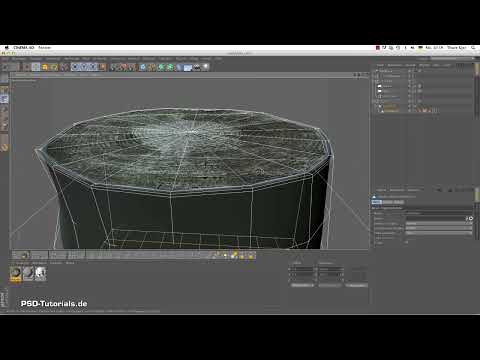
A chopping block only looks believable when the grain, the cut edge, and the bark work together harmoniously. That is exactly what this tutorial is about. You will learn how to use external textures for the end grain and the bark, crop them to fit the object, and create depth with Bump, Diffusion, and Displacement settings. In the end, you get a result that holds up even in a close-up.
The video is only loaded from YouTube when you play it – data (including your IP address) is then transmitted to YouTube/Google. More in the privacy policy
The starting point is a low-resolution polygon object with HyperNURBS, placed in a simple scene with two light sources.
Key Takeaways
- The relief is created from a grayscale image that you prepare using Hue/Saturation as well as Brightness/Contrast.
- The Diffusion channel provides dirt and uneven darkening.
- UVW mapping is not well suited to flat surfaces. Instead, you align the texture using the Texture Axis mode.
- For the bark, you wrap the texture around the object using cylindrical mapping.
- Displacement makes the relief three-dimensional. For subpolygon displacement, you need Studio or Visualize.
Step-by-Step Guide
Step 1: Prepare the Scene
Open the prepared scene. The object consists of a polygon model with HyperNURBS subdivision, plus two light sources that illuminate the chopping block evenly. Make sure the scene stays organized, because you will be creating and assigning several materials.

Step 2: Create the Material for the End Grain
Create a new material and deactivate the "Specular" channel. Wood hardly reflects, so a specular highlight would be inappropriate here. Then load your end grain texture into the scene via the "Color" channel. The texture does not have to be perfectly cropped; you can hide the excess surroundings later using scaling.

Step 3: Use the Texture in the Reflectance Channel
Copy the texture's shader via the context menu and paste it into the Reflectance channel. This way you use the same grain for surface reflections without having to load it again.

Step 4: Create a Grayscale Image for the Relief
In the Bump channel, create a new layer and paste the copied image shader there. The relief information is based on brightness values, so you need a grayscale image. To do this, add the "Hue/Saturation" effect and pull the saturation down to zero. This gives you a clean black-and-white version of the texture.

Step 5: Adjust Contrast and Brightness
Add the "Brightness/Contrast/Gamma" effect. Increase the contrast until the grain stands out more clearly. Adjust the brightness so that the recesses are dark enough to have a clear effect later. Then set the strength of the relief to about 100% to make the effect visible.
Step 6: Use Diffusion for Dirt
Copy the entire layer from the Bump channel and paste it into the Diffusion channel. This channel simulates unevenness and impurities, so it darkens the surface unevenly. Test how strong the dirt should look, and reduce it if necessary if the wood looks too blotchy.
Step 7: Assign the Material to the Object
A selection in the upper area of the chopping block has already been prepared. Drag the material onto the object and then drag the resulting texture tag onto the selection. This way, only the cut surface receives the end grain material.

Step 8: Choose Mapping for Flat Surfaces
UVW mapping is only partially suitable for a cut surface. Therefore, switch to the top view, hide the surroundings, and change the mapping to "Flat". In this view, you can immediately see whether the grain runs in the wrong direction.

Step 9: Align and Scale the Texture
Switch to Texture Axis mode to rotate the texture. Rotate it by 90° so that the grain follows the course of the cut surface. Then scale it. If scaling only works proportionally, click the lock icon at the top or the axis option to adjust the sides individually. Move the axis if the section isn't centered.

Step 10: Check the Preview and Render a Region
If the texture looks blurry, increase the preview size in the material under "Editor". This makes the display sharper and you can better judge the result. The region renderer is well suited for a first impression. Zoom in closer and check whether the relief already looks strong enough in the image section.

Step 11: Create the Bark Material and Load the Texture
Create a second material for the bark and also disable the specular highlight. Load the bark texture into the scene and copy the image shader into the Bump channel. Here too, you create a layer and add the effects "Hue/Saturation" and "Brightness/Contrast/Gamma". Adjust the values so that the grooves of the bark look distinct, but not exaggerated.

Step 12: Bump and Diffusion for the Bark
Activate the strength of the bump and set it to 100% again. Then copy the layer into the Diffusion channel so that the bark also looks unevenly dirty. Assign the material to the chopping block and drag it behind the end-grain material so that the two don't overlap.

Step 13: Cylindrical Mapping for the Bark
Change the mapping to "Cylindrical". This wraps the texture around the chopping block. By right-clicking the texture tag and choosing the "Fit to Object" option, the program automatically scales the texture to the object size. Since your bark texture is not seamless, the preview initially looks distorted.

Step 14: Correct Distortion and Edges
Adjust the length in the U direction. In the example, the value was set to about 40%. After that, the distortion largely disappears. It's best to move the seam where the texture isn't long enough out of the camera's focus. As a detail view, the bark still looks a bit flat, but that changes in the next step.

Step 15: Displacement for Real Depth
Copy the image shader from the Bump channel into the Displacement channel. Activate the preview to see how the object deforms. Set the maximum height to about 1 cm and adjust the strength carefully; in the example, the value was 8 to 10%. Keep in mind that values that are too high deform the object unnaturally.

Step 16: Use Subpolygon Displacement
Normal displacement is based on the subdivision of the model. Since the model has a low subdivision, the effect remains limited. With Studio or Visualize, you can activate Subpolygon Displacement instead. The software creates virtual polygons that represent the relief much more precisely. Rendering takes longer, but the result looks considerably more three-dimensional.

Step 17: Set the Subdivision Level
In the Subpolygon section, you set the subdivision level. A higher value delivers more detail but increases render time. Start with the default value, check the result, and then try a lower value such as 2. In the example, this value was enough for a convincing result, so you don't need to set the level unnecessarily high.

Step 18: Start the Final Rendering
For the rendering, set a low sample density for global illumination and choose a higher resolution for the final pass. Start the render process and check the result at your leisure. Pay particular attention to the cut edge and the bark. The combination of bump, diffusion, and displacement should now give the chopping block the desired depth.

Summary – Texturing a Chopping Block in Cinema 4D with Relief, Diffusion and Displacement
You have seen that a realistic chopping block consists of several building blocks. The wood end requires proper alignment via flat mapping, while the bark benefits from cylindrical mapping. Relief and diffusion create structure and dirt, while displacement actually deforms the surface. With subpolygon displacement you additionally achieve a particularly plastic look, provided your license supports it. Always test the values in a region before you have the final image rendered.
FAQ
Do I need a separate material for each texture?Yes, the wood end and the bark should each get their own material so that you can adjust mapping and settings independently of each other.
Why does the texture appear to run in the wrong direction after assigning it?This is usually due to the mapping type. For cut surfaces, flat mapping in the top view helps, and the alignment can then be corrected in Texture Axis mode.
What is the grayscale image in the relief channel for?The relief detects brightness values. Bright areas are raised, dark ones are recessed. A grayscale image therefore provides a clear and controllable structure.
What exactly does the diffusion channel do?It simulates dirt and unevenness by darkening the surface unevenly. This makes the wood more lively and less smooth.
Why is the bark distorted after cylindrical mapping?The texture is not seamless and therefore not long enough for the entire circumference. Adjusting the length in the U direction largely fixes the distortion.
When should I use displacement instead of just relief?Relief only simulates depth but does not change the geometry. Displacement actually deforms the object and therefore looks much more believable in close-ups.
Can I use subpolygon displacement with every Cinema 4D version?No, the function is tied to Studio or Visualize. With the standard version, regular displacement is available to you.


