

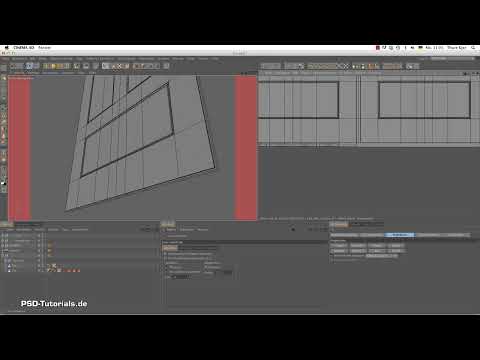
A smooth, new door looks lifeless in any scene. Only the traces of everyday use, that is, worn edges, rubbed-through layers of paint and the wood underneath, give it history. In this first part of the tutorial, the instructor shows you how to create exactly this look in Cinema 4D with BodyPaint. You will learn how to prepare the model for a texture in BodyPaint, arrange the UV layout and then paint directly on the model across several channels. You will work with brush presets and custom brush tips, which you use in the right places.
The video is only loaded from YouTube when you play it – data (including your IP address) is then transmitted to YouTube/Google. More in the privacy policy

Key Takeaways
Realistic wear comes from several channels working together. The color channel determines the appearance of the surface, the alpha channel defines where the paint layer disappears, and the relief channel adds depth. A clean UV unwrap is the foundation for this, because only when the surfaces are arranged logically can you paint precisely on the right areas. The quality of your brush tips also determines whether the wear later looks sharp or pixelated. And with the airbrush you create soft transitions that feel like real wear and tear.
Step-by-Step Guide
Step 1: Understand the scene and isolate the door
Before you start painting, get an overview of the scene. The room contains a window, the door, a baseboard, as well as sunlight and two fill lights. The camera perspective is often impractical for working, because it distorts the subject heavily. Therefore, you create a render preset, for example in A5 portrait format, and drag a copy of the door into this view while holding the Control key (on a Mac). With a less wide-angle camera you see the door more clearly. Then hide the remaining objects so that you can concentrate fully on the door. You can also hide the glass for now.


Step 2: Switch to BodyPaint UV Edit and create the texture
Switch to the BodyPaint UV Edit layout. Use the Paint Wizard to create the texture for your model. Make sure that not all objects are preselected in the wizard. Deselect them first and activate only your door folder. Then select the channels you need: a color channel for the paint layer, an alpha channel for the sanded-off areas, and a relief channel for the depth.
For the resolution, a simple rule of thumb applies: for large renderings, the texture should have a higher resolution. A value of 1024 pixels quickly seems too small, so in the example you set it higher. After confirming, the texture appears, and you see the unwrap of your model.

Step 3: Arrange the UV layout
The wizard often distributes the surfaces of the door unfavorably. Individual parts lie far apart and do not touch each other. Therefore, you should sort the unwrap before painting. To do this, switch to the Edit UV Polygons mode and try out the projection types. In this example, the box projection delivers the most suitable arrangement, because the top edge and the front of the door lie neatly next to each other.
One problem remains, however: the inner sides of the window frame lie over the door surfaces in the unwrap. If you paint there, the paint ends up in the wrong place. So select these surfaces specifically and move them to free areas of the texture. With the Move tool, you place all the parts, piece by piece, in sensible positions. The parts to the left and right of the window also go to the edges where you can continue working later.


A tip on navigation: with the keys 1 to 0 as well as the numbers in the number area of your keyboard, you can switch between views more quickly without constantly clicking the icons. Holding the Alt key and the left mouse button moves the view, and the right mouse button zooms. Save your scene regularly. When saving, Cinema 4D asks whether the changes to all textures should be saved. Confirm this so that the channels are created as separate image files in the texture folder.


Step 4: Checking the Material Channels
After saving, you will find your new material for the door in the Object Manager under the Materials tab. There you can see the Color, Bump, and Alpha channels. The small pen icon shows you which channel is currently being edited. This is an important source of errors: if you activate several channels at the same time, you paint on all of them simultaneously. So always work only with the channel you actually need. With the Shift key held down, you can select several channels if you want to edit them together.


Step 5: Painting the Alpha Channel for the Worn Areas
For the wear, you mainly need the Alpha channel. White stands for the visible paint layer, black for the translucent wood layer. So switch to the Alpha channel and temporarily hide the color. In the Alpha channel, the 3D brush preview is not displayed, whereas in the Color channel it is. That's why it's best to work in the UV view, where you can see the result directly.


Step 6: Loading and Adjusting Brush Tips
The brush presets that Cinema 4D comes with offer a solid foundation. You add your own brush tips via the Brush section and the Load Brush button. In the brush's Attribute menu, you open the tip presets and choose the suitable one. An edge, for example, works best when you rotate the tip by 180 degrees so that it starts on the correct side. You can also adjust the size and opacity.
Pay attention to the resolution with custom tips. Very small images become blurry in the texture as soon as they are enlarged. With large textures such as 3000 pixels, this is especially noticeable. So choose tips with enough pixels.


Step 7: Creating Soft Transitions with Airbrush
The Airbrush function is well suited to blending the wear evenly into the surface. Activate it and paint with the mouse button held down or with a graphics tablet. The brightness of the color determines how strong the effect is. For wear, you use black in the Alpha channel so that the area becomes transparent.
By holding the mouse button, the effect builds up gradually. With the Flow value and the opacity, you control how quickly this happens. Low values are ideal because they produce a finer gradient. If you click once and drag the mouse, on the other hand, visible offsets easily appear. For even results, therefore, work with Airbrush and steady movements.

Step 8: Checking the Results and Refining
Check the areas in the preview after each work step. Pay particular attention to the resolution, because at the top the pixels can quickly become noticeable on large surfaces. If you don't like a spot, undo it with Ctrl or Command plus Z or paint over it with white. A soft, slow gradient is also worthwhile at the corners and edges. Work through the corner areas at the bottom and top one after the other until the door looks as if it had been used for years.


Summary ??? Texturing a Worn Door in Cinema 4D with BodyPaint
You have seen how to create a worn door in Cinema 4D with BodyPaint. You prepared the scene, set up the texture with color, alpha, and bump channels, and organized the UV layout. Then you applied the wear using brush presets, custom tips, and airbrush. The next part covers further refinement of the material.
FAQ
Why should I organize the UV layout before painting?Without organization, paint and wear end up in the wrong places, because surfaces overlap or are spaced far apart.
Which channels do I need for the wear?You need at least the color channel for the paint layer and the alpha channel, which controls the worn areas. The bump channel adds depth.
Why does my texture look pixelated in large renderings?The resolution is set too low. Set the value higher and use brush tips with sufficient pixels.
Why can't I see my 3D brush preview in the alpha channel?The preview is not displayed in the alpha channel. Work in the UV view there to see the result directly.
How do I achieve soft transitions when painting?Use the airbrush function with low flow or low opacity and hold the mouse button down longer instead of clicking multiple times.
How do I correct an area I don't like?You can undo the step with Ctrl or Command plus Z or paint over the area with white in the alpha channel.


