

A wooden door only looks believable when it bears the traces of everyday use: scratches from a key ring, dents from bumps, and paint runs from earlier rounds of painting. In this second part of the material series, you build up exactly this wear and tear in Cinema 4D. You work with the professional features of BodyPaint, brush presets, and several material channels that you paint directly on the model.
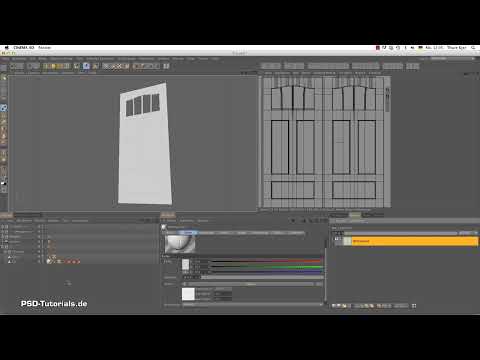
The video is only loaded from YouTube when you play it – data (including your IP address) is then transmitted to YouTube/Google. More in the privacy policy
The working file comes from part 1 of the tutorial. The video runs about 33 minutes, and you should allow enough time for the rendering phase.
Key Takeaways
The bump channel controls the surface depth. With grayscale values, you determine which areas protrude outward and which are pressed into the wood. Depending on the setting, black and white may appear reversed, so you should always check the preview.
Brush presets with scratch and dent textures save you a lot of manual work. A new layer in the material allows you to make subsequent corrections without losing your previous work.
A wood texture from an external template gives the paint depth. The detour via Photoshop is worthwhile because you can arrange image sections there with precise fit.
When rendering, region rendering helps you test corrections in a targeted way. Multipass layers, which you merge later in Photoshop, give you additional control over shadows, reflections, and global illumination.
Step-by-Step Guide
Step 1: Switch from the Alpha Channel to the Bump Channel
You begin in the material area of the door. Switch to the bump channel and deactivate the alpha channel there if it is active. This ensures that your scratches and dents are not overlaid by an existing mask. Via the bump channel, you later determine the height differences of the surface, and this is exactly where the three-dimensional effect is created.

Step 2: Load the Suitable Scratch Texture as a Brush
In the brush menu, open your library of presets. Pick out a scratch texture there that matches a typical pattern of wear marks. Reduce the brush size until the scratches look fine and realistic. Make sure you don't use motifs that are too large, because otherwise the surface quickly looks artificial.

Step 3: Check the Direction and Course of the Scratches in the Preview
As soon as you activate the texture in the brush, BodyPaint shows you a preview. It tells you in which direction the pattern would move. Use this information to place the scratches so that they fit the movement of a door, for example around the handle or along the edge, where hands and keys frequently bump.

Step 4: Define Raised or Pressed-In Areas
First decide whether an area should be swollen or pressed in. In the bump channel, you work with grayscale values. Neutral gray forms the base surface. If you paint with black, a depression into the wood is created, while white makes the area stand out. Consider whether you want to depict old, flaking paint areas or damage in the wood.

Step 5: Correct the Reversed Display
In practice, the display is sometimes reversed. What is actually supposed to be embossed outward then appears pressed in. Therefore, check the preview in the viewport after every brushstroke and, if necessary, invert the grayscale values. Only when the raised and recessed areas look consistent do you continue.

Step 6: Place Dents and Paint Runs in a Targeted Way
Now add dents, such as those caused by impacts, and reduce the brush opacity so that the transitions become softer. For the paint runs, meaning the small ridges of dripped paint, you use a suitable texture. You place these areas mainly at the bottom edge of the door and beneath edges, because paint naturally runs down there.

Step 7: Creating a New Layer in the Material
If you want to modify an area later without touching the existing work, a separate layer is worthwhile. In the Material Manager, right-click the icon, choose "New Layer," and make sure the mode is set appropriately. For dirt and wear marks, the "Multiply" mode usually leads to the desired result, similar to Photoshop.

Step 8: Disabling Specular and Setting Up Reflection for the Paint
In the material area, you turn off the specular highlight, because old door paint is rarely very glossy. Instead, you activate reflection and choose a physical Fresnel variant. The paint should look like a white, slightly worn coat, not like bare chrome. To achieve this, you adjust the color and the reflection so that both harmonize together.

Step 9: Flexibly Readjusting Color via an Effect
You don't necessarily have to create the base color anew. Instead, add a layer with the "Hue/Saturation" effect and adjust hue, saturation, and brightness there. The advantage of this method is that you can make corrections at any time without having to open Photoshop. This saves you many switches between the programs.

Step 10: Saving the UV View as a Template for the Wood Structure
So that the wood grain becomes visible under the paint, you switch to the UV Edit view. Take a screenshot of the view there. On a Mac, this works with the key combination Alt, Shift, and 4, then you drag out the desired area. This image serves as a placeholder so that you can position the wood structure precisely.

Step 11: Renaming Textures and Saving Them Separately
Before you continue working, give your textures clear names. To do this, go to the color channel, right-click the texture, and choose "Save Texture As." TIF is sufficient as a format for now. Assign a clear name to each channel, for example "Lackfarbe," "Relief," or "Alpha." That way you won't lose track later.

Step 12: Opening the UV Template in Photoshop and Inserting the Wood Structure
Open the screenshot in Photoshop and copy the image. Then paste it into the saved wood color file. With the "Free Transform" command, you adjust the size so that the template matches the texture. The resolution of the template doesn't have to be perfect, since it only serves as orientation.

Step 13: Positioning, Rotating, and Mirroring the Wood Structure
Next, load a wood texture into the scene. Drag the file into the document via drag and drop and rotate it in fixed steps while holding the Shift key. Place the texture in the center above the door and squash it if necessary. If you duplicate the image and mirror it horizontally, a clean edge is created that connects seamlessly to the door edge.

Step 14: Using Smart Objects for Lossless Scaling
When pasting, Photoshop converts the layer into a Smart Object. This variant has the advantage that you can scale it as much as you like without permanently losing details. If you overdo the enlarging, the quality still suffers. However, by transforming back, you can return to the original resolution at any time. Afterwards, merge both layers and save the file.

Step 15: Duplicating and Naming the Wood Material in Cinema 4D
Back in Cinema 4D, you duplicate the material with Command-C and Command-V or simply by holding the Control key. Name the duplicate "Holz." Remove the alpha channel if it is no longer needed, and load the wood texture you just created in the color channel. At this point, you first turn off the reflection, because the wood layer doesn't have any paint yet.

Step 16: Derive a Relief from the Wood Structure
The wood layer should also get its own surface structure. To do this, copy the texture as a shader image into the relief channel. Create a layer with the "Hue/Saturation" effect and set the saturation to zero so that a pure black-and-white image is produced. Then increase brightness, contrast, and gamma until the grain stands out clearly. Check the result using a section of the door.

Step 17: Transfer the Relief to the Paint
To keep the wood grain visible through the paint, copy the relief into the material for the paint layer. Create a new layer there and insert the shader image. Set the mode to "Multiply" so that both layers overlap. The grain now looks as if it were lying beneath a thin coat of paint.

Step 18: Add a Second Layer for the Paint Thickness
A single layer is not enough to represent a thicker, unevenly applied coat of paint. Therefore, create another layer in the alpha channel, insert the shader image there as well, and set it to "Multiply". You adjust the strength of this layer via the value. A value of about 20 percent is often enough, because the default setting is already at 200 percent. Try out different values until the edges look lively.

Step 19: Enhance the Plasticity with High Values
If you increase the values of the relief layers, edges stand out much more strongly. Proceed carefully, though, because values that are too strong quickly look exaggerated. Check your results in the viewport and hide individual layers in between to better judge the effect.

Step 20: Add a Door Handle and Align It to the Model
Load a door handle into the scene via "File" and "Merge". Adjust its size and height to the door and rotate it into the correct position. With snapping active, the handle sticks to the outer edge of the door. You place the axis in the center, and then create a mirror object so that the second handle is created automatically. Check the alignment several times in the process.

Step 21: Create a Metal Material for the Handle
A copper-like tone is suitable for the handle. Activate the physical reflection with Fresnel and choose the color copper. Set the mode to "Multiply" and reduce the reflection so that the handle does not look too glossy. A slight matte effect gives the surface additional realism.

Step 22: Define Render Settings for Multipass and Quality
Set up the render output so that you can combine several layers in Photoshop later. Create three object buffers for the door, floor, and door frame, and activate the RGBA image for display in the multipass. In addition, you save the shadow reflection and the global illumination. Use the physical renderer with medium sampling values and a moderate threshold. Set the output to 32 bit, because you are working in a linear workflow.

Step 23: Create a Render Region for Targeted Corrections
With the interactive render region, you can calculate only a section of the scene. This saves an enormous amount of time if, for example, you only want to touch up the door handle. Drag the frame so that the handle and its surroundings are completely included, so that cast shadows and reflections are also taken into account. You then copy the region as its own image via the render settings and save it under a new name.

Step 24: Merge the Render Sections in Photoshop
Open the renderings in Photoshop. Beforehand, convert them to the 8-bit color space via "Image" and "Mode". You insert the section into the main layer using a selection. To do this, hold down the Command key and click on the selection so that you can mark the same area again in the other layers. Then you duplicate the layers into the main document.

Step 25: Combining the Multipass Layers with Suitable Modes
Arrange the layers so that shadows and global illumination are set to "Multiply" mode, while the reflection works in "Linear Dodge" mode. First set the main layer to "Normal" and then merge the layers. Afterwards, you restore the original mode. Now you can show and hide the individual effects until the balance is right.

Step 26: Fine-Tuning with Opacity and Curves
Increase the shadow intensity, for example to 20 percent, if the door looks too bright. By brightening the overall scene and slightly strengthening the reflection, the door gains depth. Finally, you add a curves adjustment and increase the contrast so that the surface looks crisper. Then your worn door is finished.

Summary ??? Worn Door in Cinema 4D: Scratches, Wood Texture and Rendering with BodyPaint
You have aged a wooden door in Cinema 4D by painting the bump channel with scratches, dents and paint runs. With brush presets, layers in the Material Manager and a wood texture from Photoshop, you create the impression of a varnish that has been used for years. A copper door handle, a multipass rendering and region rendering round off the result. The combination of BodyPaint, Multiply layers and targeted post-processing shows you how to build up materials flexibly and realistically.
FAQ
How can I tell whether an area is being embossed outward or inward?Black in the bump channel creates a depression, white raises the area. Always check the result in the preview, because the display is sometimes reversed.
Why should I create a new layer in the material?With a separate layer, you can make corrections without changing your previous work. You can show or hide the layer at any time.
Which layer mode is suitable for dirt and signs of wear?The "Multiply" mode works well in most cases because it emphasizes dark areas and leaves the underlying structure visible.
What is the UV view used for with the wood texture?The UV view shows where the texture lies on the model. The screenshot serves as a template so you can place the wood texture precisely in Photoshop.
Why work with smart objects in Photoshop?Smart objects can be scaled without permanently losing quality. You can reset the size at any time.
What are the benefits of region rendering?With region rendering, you only calculate a section of the scene. This saves computing time when you want to test small corrections.
Why should I render in multipass?Multipass layers such as shadows, reflection and global illumination can be edited separately in Photoshop and combined with suitable modes.


