

Good stone material rarely comes from a single click. You combine several shaders, layer them as in an image editing program, and then decide where the surface should only be visually deformed and where it should actually be deformed. That is exactly what this tutorial shows you. You start with a simple scene, build up relief, color and gloss step by step, and finally add a displacement that makes your second stone noticeably more three-dimensional.
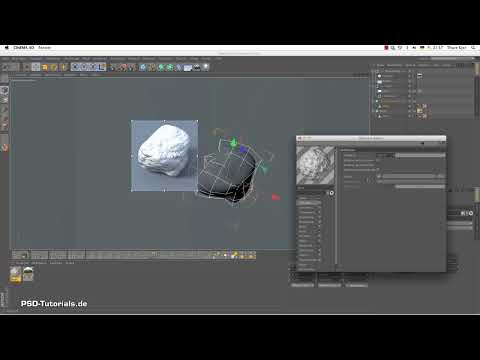
The video is only loaded from YouTube when you play it – data (including your IP address) is then transmitted to YouTube/Google. More in the privacy policy
Key Takeaways
Noise-based shaders are the key to natural stone surfaces. The Rust shader already provides a usable basic structure that you refine using layers.
Texture mapping determines the result. Without suitable mapping, the effect looks too large or remains invisible. With "Fit to Object" and Googel mapping (spherical mapping), you bring the texture to the right size.
Relief and displacement are not the same thing. A relief only fakes depth through lighting; the object remains geometrically unchanged. Displacement, on the other hand, actually shifts the geometry. This costs more computing time, but delivers real indentations that are also visible in the cast shadows.
Gloss and reflection must be used sparingly. Especially with stone, less gloss often looks more realistic. A subtle Fresnel behavior still provides slight highlights.
Step-by-Step Guide
Understanding the Starting Point and Creating the Material
Before you get started, it is worth taking a look at the final product. Your scene contains two identical stones made from simple polygon models with Hypernurbs. The left stone serves as the test object, while the right one will get the displacement later. In addition, there is a floor, an HDR sky and an area light. Now create a new material by double-clicking in the Material Manager and name it "Stein".

Building the Relief Channel with the Rust Shader
In the Relief channel, you start with the Rust shader from the Surfaces category. It has a gradient from blue to red that serves as a height template. Dark areas are interpreted as elevations, which is why the slider initially inverts the depressions and has to be pulled to the left. Switch on the interactive render region to see the effect directly on the object.

Adjusting the Mapping
If nothing happens in the render region, the cause is usually the mapping. In this case, the shader is much larger than the small stone. Since the object is very uniform, Googel mapping is a good choice. Then, in Texture Axis mode, right-click the texture and choose "Fit to Object". Confirm that subobjects are included. Only now do the structures clearly stand out.


Increasing the Strength and Using Layers
The strength of the effect is initially not enough. Set the value from 100 to 300 percent. The result now looks like a piece of chalk with broken-off corners, which is useful for a start. To achieve more depth, add a layer via the arrow icon. Similar to Photoshop, you stack several shaders on top of each other.


In the upper layer, set up a second Rust shader and increase its proportion to about 80 percent. The structure becomes noticeably bumpier as a result. So that both layers harmonize with each other, you can change the blending mode. Then reduce the opacity of the lower layer to about 50 percent so that individual areas look softer.

Adding Diffusion for Impurities
Copy the finished shader into the Diffusion channel. This channel is responsible for uniform coloring and impurities. When activated, the material initially looks much too dark. Therefore, reduce the strength to about 4 percent. This creates darker spots based on the texture that give the stone age. In addition, you activate the Reflection channel, which will be fine-tuned later.
Create color with color quick-memory slots
For the color, you use color quick-memory slots in which you prepare suitable shades in advance. In the bottom layer, choose the appropriate tone for the base color, for example a light gray. Then you add another layer with an FBM shader. For the global size, you should set about 500 percent so that the distribution becomes larger in scale. Tint it slightly earthy and choose a darkening blend mode such as Multiply so that it blends with the color underneath.


Additional variation with the vein shader
So that the color doesn't stay monotonous, you place a vein shader on top. It creates a fine, swirl-like structure that initially doesn't quite fit. Therefore, significantly reduce the frequency, for example to 50, and reduce the rotation until the structure becomes calmer. A value of about 5 percent creates a slight discoloration, which you complement with additional shades. Finally, you apply a final correction over the material with a Hue/Saturation filter and make it a little darker.


Rotate the texture to remove distracting spots
A spot on the stone disturbs the overall picture. To fix this, switch to Texture Edit mode and rotate the texture with the Rotate tool until the spot moves out of the visible area. This doesn't always work completely, but it is usually sufficient.

Reduce the highlight and dose the reflection
In the Specular channel, the stone quickly looks greasy in the preview image. Lower the height of the highlight and increase the width instead so that the highlight falls off softly. For realistic behavior, you add a Fresnel effect in the Reflection channel. Set it to Multiply and keep the strength low, since stone hardly reflects. The highlight should only be hinted at. If you want a dry stone, you can disable the highlight completely.


Use displacement on the second stone
Now you shape the second stone with real depth. Drag and drop the material onto the right stone and switch to Model Edit mode. Duplicate the texture with Ctrl+C and Ctrl+V, or Command+C and Command+V on a Mac. Rename the copy to "Displacement" and copy the shader into the Displacement channel. Activate the channel to see the preview. The deformation is initially too strong, so you adjust the values step by step until the surface looks homogeneous.


Set subdivision and height
For the displacement to be calculated, the stone must be subdivided. To do this, activate support for Subpolygon Displacement, as it acts directly on the subdivision of the mesh. Estimate the size of the stone, about 8.5 centimeters, and set the maximum height of the bulges to around 5 centimeters. A height value of 2 is a good starting point for this. If you increase the subdivision level, for example to 3, the structures become finer, but the calculation takes noticeably longer. For this small stone, a level of 3 is usually enough. You then set the strength to about 50 percent.


Fine-tuning with reflection and refractive index
The second stone already looks very three-dimensional now, but it is still too shiny. Therefore, reduce the displacement strength to about 25 percent and dial back the reflection. If you want a wet look, you can raise the refractive index in the material to about 10 percent. This creates shiny edges without making the surface look unnatural. At the end, render the image again to compare both stones directly.


Summary ??? Stone Material in Cinema 4D: Rust Shader, Layers, and Displacement
You have learned how to build a stone material from multiple shaders. The rust shader forms the basis for the relief. With layers, opacity, and blending modes, you combine structures, similar to an image editing program. The right mapping ensures that the texture fits the object. In the color channel, you work with color quick-stores and complementary shaders, and through specular and Fresnel you set the surface realistically. Finally, with the displacement on a second stone, you saw how true geometry deformation differs from a pure relief.
FAQ
What is the difference between relief and displacement?A relief simulates depth only through light and shadow; the geometry remains unchanged. Displacement actually shifts the points of the mesh and thus creates real indentations.
Why does the rust shader initially appear invisible in the render area?This is usually due to the mapping. The shader is too large for the object. With "Fit to Object" or Googel mapping, you adjust the texture to the size of the stone.
What are layers used for in the Material Manager?Layers allow you to stack multiple shaders on top of each other and combine them with opacity and blending modes. This creates more complex structures than with a single shader.
Why should the specular be reduced for stone?A high specular value quickly makes stone look like plastic or wet material. A low value with a slight Fresnel effect looks more natural.
When is displacement worthwhile?Displacement is worthwhile when the depth should also be visible in the cast shadows and in the silhouettes. The downside is a longer calculation time, which is why you should choose the subdivision level carefully.

