

A golden toy cup from olden days is a rewarding target for any material exercise. It only looks real if the shine, hue, and surface structure are right. In this tutorial, you create an old gold material for an object in Cinema 4D, build a simple studio scene with a cove, lighting, and sky reflection, and texture the floor so that you can freely adjust its color later.
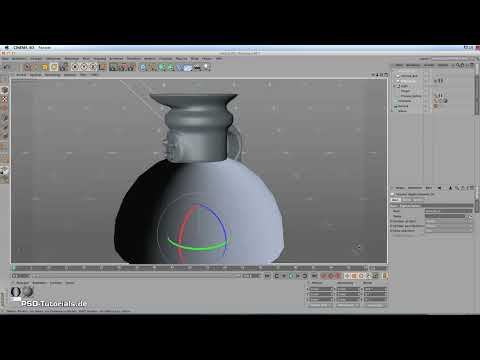
The video is only loaded from YouTube when you play it – data (including your IP address) is then transmitted to YouTube/Google. More in the privacy policy
The guide follows the workflow of the original video. You will learn how to work with Fresnel reflections, build gradients in the Colorizer, use Global Illumination via a sky sphere, and adjust an HDRI with a color gradient. At the end, we render the result and check how close it comes to the original.
Key Takeaways
A convincing gold material is not created by a single color value, but by the interplay of several channels. The color sets the base tone, the Diffusion channel uses Ambient Occlusion and Turbulence to control where the metal looks darker or lighter, and the Reflection channel with Fresnel determines how strongly the object reflects its surroundings. The dullness of about 25 percent breaks the perfect chrome shine and makes the gold look old and used.
Scene lighting is also important. A sky sphere with blue Global Illumination and an HDRI with a warm color gradient provide the reflections that bring the gold to life. With a Multiply blend mode, brightness and color can be controlled without losing the structure.
Step-by-Step Guide
Step 1: Model the Cove as the Studio Foundation
Start with the scene. The cove forms the floor and background in one continuous, soft surface, so that no distracting shadow edge appears. To do this, you create a cube, convert it into a polygon object with the C key, and delete the two front points. Then you select the edge between the floor and the back wall and use the Bevel tool with about 20 subdivisions in Convex mode so that a clean curve is created. With the Knife tool in top view, you add extra cuts that smooth the transition between large and small polygons.

Step 2: Create the Cove Material
Create a new material and give it a clear name, for example "Hohlkehle". Disable the Specular channel, because for this surface you work with Fresnel reflections, which look more realistic. Then switch to the Color channel and load a gradient image via a Colorizer. You created this texture beforehand in Adobe Illustrator using white and black. The Colorizer translates the brightness values of the image into color values, so your template directly determines the resulting gradient.

Step 3: Fine-Tune the Color Gradient in the Colorizer
In the Colorizer's gradient window, first remove the middle point so that only two color points remain. The start point is set to white, the end point to a medium gray. Pure black looks too dark, so for the end point you use an average gray tone with the values 127, 127, 127. Make sure that the upper area of the gradient is also set appropriately. This gives you an even gradation that will look clean on the floor later.

Step 4: Set Up Reflection with Fresnel and Dullness
In the Reflection channel, set the Fresnel type to Physical. Without adjustment, the floor quickly looks like a freshly polished hospital corridor, so you reduce the strength via the Dullness effect. A value of about 15 percent distributes the reflection more softly and takes the sharpness out of the shine. This step is especially important because it gives the surface a slight roughness that can be seen in the original.
Step 5: Align the Floor with UV Mapping
So that the texture sits correctly on the floor, you open the Texture tag of the floor object. Set the UV mapping. For the position, you shift the Offset until the pattern fits. For the repetition, you set the tiling so that the motif is evenly distributed. Afterwards, look at a section in the editor and compare the result with your template. A quick test with rendered sections shows whether the distribution is really coherent.

Step 6: Prepare the Sky Sphere for Global Illumination
In the Object Manager, create an Environment that serves as the sky. A point light is also present; it casts light downward and slightly from the front and side. For Global Illumination you need a separate material, which you name "GI", for example. Disable Color and Specular and work exclusively in the Luminance channel. There you add a color gradient of the Cylindrical type with the 2D direction. Shift and scale the gradient colors so that the center is bright and the edges are darker.

Step 7: Setting the Blue Tone of the Global Illumination
Now define the blue tone for the sky. For example, use the values 216, 229, and 255 as the basis for the gradient. For the brightness of the overall material, set the value to 75 percent. Since this value alone has no effect yet, switch the blend mode to Multiply. Now the gradient is combined with the brightness, and you can conveniently control the intensity. The sphere gets a spherical mapping, and in the Render Assignment tag you activate the option that the object is visible only for Global Illumination. Camera rays should remain switched off.

Step 8: Using a Preview Sphere for Control
So that you can see exactly where the blue takes effect, create a simple sphere as a preview object and drag the GI material onto it. This way you can see which direction the blue radiates in the scene. You can rotate the sphere and thereby adjust the angle of the sky color. Once the sphere looks right, transfer the values to the actual sky.

Step 9: Setting Up the HDRI as a Reflection Source
For the sky reflection, create another material, for example "HDRI". Here too you need neither specular nor color, but use the luminance channel. Load a Fusion shader into the luminance channel, and within it your HDRI image in the output channel. In the blend channel, create a gradient that determines the color mood. The studio lighting of the HDRI should not look like a studio, but more natural, with a slight sky impression.

Step 10: Building the HDRI Gradient
Add additional color points in the gradient and set a light blue tone at the edges, such as 191, 202, and 255. In the middle, use a warm light tone that hints at sunlight. Move and narrow the gradient until you like the distribution. Then set the gradient type to cylindrical. For mixing the two colors, choose Multiply in the blend mode so that blue and warm tone overlap and work together.

Step 11: Controlling the Brightness via the Blend Mode
If you also set the blend mode one level higher to Multiply, you can regulate the brightness of the HDRI precisely. The sphere again gets a spherical mapping, and as with the GI material, you activate the render tag so that it is visible only for reflections, transparencies, and shadows. A short region render shows that the white areas on the floor now take on a slight bluish touch.
Step 12: Creating the Gold Material with Dark Brown
For the actual gold material, create a new material and name it "Gold". In the color channel, set a dark brown with the values 51, 93, and 15. The color itself plays a minor role later, since the reflection channel and the luminance channel determine the gold tone. The color channel nevertheless gives the material a starting point, which you will later refine with dirt and light channels.
Step 13: Equipping the Diffusion Channel with Ambient Occlusion and Turbulence
In the diffusion channel, you control where the metal reacts more strongly or weakly, similar to a metal rod with fingerprints or smudges. To do this, load a Fusion shader and create an Ambient Occlusion effect with a smaller value in the blend channel. This creates darker areas in edges and corners. In the output channel, work with a Wavy Turbulence pattern. Reduce the global size to about 25 so that small dots appear, and correct the clipping until the image looks brighter and less harsh. A light gray as the color ensures a soft blend. In the second output channel, repeat the procedure with a normal turbulence, which you readjust with lower and upper clipping values.

Step 14: Merging the Two Diffusion Channels
Set the blend modes of both channels to Multiply so that Ambient Occlusion and turbulences complement each other. This creates a surface that looks darker in some places and brighter in others, just as is typical for an old object.

Step 15: Setting Up the Reflection Channel for Gold
The gloss must be handled differently for gold than for the floor. First deactivate the specular and set a Fresnel type in the reflection channel. Metals do not reflect their surroundings back in white, but in their own color. Therefore the Fresnel value must be high. However, you deliberately set the dulling to about 25 percent, because the object does shine, but does not reflect like high-gloss chrome. In the luminance channel, enter the yellow tone with the values 255, 221, and 153, and set the relief texture to 100 percent. Then set the blend mode to Multiply so that the color of the material actually takes effect.

Step 16: Creating the Bump for More Depth
For the surface structure, you use a Fusion shader in the Bump channel, in which you again insert the Wavy-Turbulence entry. You take over this entry from the Diffusion channel so that both channels match. For the second output, you again use a Turbulence and adjust the values until the bump looks even. You reduce the bump depth so that the structure doesn't appear too harsh. In the preview window, you can enlarge the result at any time and check it.

Step 17: Assigning the Gold Material to the Cup
Drag the finished material onto the object. Finally, set the blend mode of the Bump blend channel to Multiply and reduce the value to about 5 so that the bump doesn't look too harsh. With that, the gold material is finished and can be assigned to the cup.

Step 18: Checking the Renderer Settings
Before you start rendering, check the renderer settings. Use the Physical Renderer with an output of 1280 x 720 pixels. Set the antialiasing to Medium, and add Global Illumination via the effects. Set Sampling and Irradiance to low, and the ray depth to four. By right-clicking the term and calling up the help, you can find out what the ray depth does.

Step 19: Setting Up the Light and Camera
The light source is positioned at the top left and comes slightly from the front. It has a bright, yellowish skin-toned color and an intensity of 250. Placed far away, it doesn't blow anything out and creates a soft area shadow toward the back. You set the falloff to inverse square, since this is physically correct. The camera works with a focal length of 36, a focus distance of 430, and an aperture of 4. You link the focus to a target, which you select via the arrow on the camera.

Step 20: Rendering and Evaluating the Result
Now start the renderer. The calculation takes a while, depending on your hardware. Afterward, compare the result with the original image. The gold looks old, warm, and coherent, and a few additional highlights arise from the lighting. The material itself matches the reference, so you can be satisfied with the result.

Summary ??? Inca Gold in Cinema 4D: Creating Gold Material and Floor Texture
You have created an old gold material for a toy cup and in doing so got to know all the essential building blocks. You modeled a cove that seamlessly connects the floor and the background, and aligned the floor via UV mapping. You supplied the Global Illumination with a blue sky sphere and set up an HDRI with a gradient as the reflection source. Finally, you built up the gold via color, diffusion, reflection, and bump, and checked the renderer settings. With this knowledge, you can build any material in a similar way and adapt it to your own scenes.
FAQ
Do I absolutely have to use a cube for the cove?A cube is the quickest starting point, but you can also use any other basic shape, as long as a continuous curve can be formed from it.
Why do I disable the specular highlight and work with Fresnel instead?Fresnel calculates the reflection depending on the viewing angle and therefore looks more realistic than a uniform highlight spot.
What is the matte effect for?It distributes the reflection more softly and removes the artificial-looking, hard shine from the surface.
Why do I use Multiply instead of Normal for the gold?In Multiply mode, the channels are combined with each other, so that color and brightness work together and complement each other.
Can I still change the color of the floor later?Yes, that is exactly what the Colorizer was used for. You can adjust the gradient at any time without recreating the texture.
What does the ray depth do in Global Illumination?The ray depth determines how often light rays are reflected back and forth between surfaces. Higher values produce more light distribution but increase the render time.


