

Large-area wood only looks believable when light travels across the surface and small irregularities become visible. That is exactly what this tutorial is about: you build a varnished wooden board step by step, for example for a tabletop or a floor, and adjust it so that it looks natural. In doing so, you combine texture, bump, specular highlight, diffusion, and reflection in Cinema 4D.
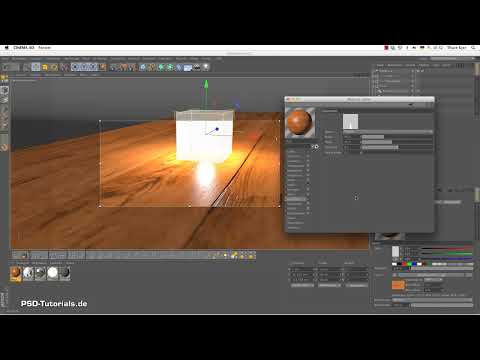
The video is only loaded from YouTube when you play it – data (including your IP address) is then transmitted to YouTube/Google. More in the privacy policy
Key Takeaways
The texture is split across several channels. Color, bump, diffusion, and reflection each have their own job. You use the same image as a basis, but edit it differently for each channel.
The bump provides the depth. A black-and-white version with increased contrast creates indentations that refract the light correctly. You should keep the strength subtle.
Specular highlight and reflection create the varnish effect. Only the interplay of highlight edges and a weakened reflection looks like a varnished surface.
The diffusion channel makes the surface look aged. Dark areas simulate dirt and signs of wear that give the wood character.
The render region helps you with fine-tuning. With the interactive render region you see changes immediately and save yourself many test renders.
Step 1: Create the Material and Load the Wood Texture
First create a new material by double-clicking in the Material Manager, and name it, for example, "Wood". Then switch to the Color channel and load your wood texture into it. For this example, the texture comes from a paid platform, but you can also use your own wood images. Make sure the grain suits the desired application.


Step 2: Prepare the Bump Image
For the Bump channel you need a grayscale template that depicts the structure of the wood. Such templates often come as texture bundles that contain bump and diffusion files in addition to the color image. You can also create the image yourself, but the result is then usually not quite as clean. For now, a suitable base is enough, which you will process further in the next step.

Step 3: Transfer the Texture to the Bump Channel
Copy the wood texture image from the Color channel. Then activate the Bump channel and paste the image there. You can carry out this process via the small arrow menu next to the image. So you have the same grain available, which now creates height differences.

Step 4: Edit the Bump Image to Black and White in Cinema 4D
You do not have to prepare this image in Photoshop; you can edit it directly in Cinema 4D. To do so, click on the image in the layers to open the menu for images, shaders, and effects. Select the "Hue/Saturation" effect there and set the saturation completely to zero. This gives you a black-and-white image. Then you add a contrast effect and increase the contrast so that the indentations stand out more clearly.

Step 5: Apply the Texture to the Board and Use the Render Region
Then drag and drop the material onto your object, in this example the tabletop. You may still need to adjust the alignment later. Then activate the interactive render region to see the effect of the bump directly. With the zoom you can take a closer look at specific areas.


Step 6: Adjust the Bump Strength
In the Relief channel, you determine how strong the depressions appear. In the example, the value is about 20 percent. Whether you prefer it stronger or weaker is a matter of taste. A value that is too high quickly makes the wood look like a relief carved in stone, while a value that is too low disappears completely.

Step 7: Activate the Specular and Create Specular Edges
Now activate the Specular channel. In the render area, you can immediately see that the light creates highlight edges on the raised areas. You can increase the height of the specular to make the effect stronger. This gives the surface a greasy character, like a varnished surface. If you reduce the width, the specular concentrates on narrow areas. This usually looks more natural than large-area reflections.


Step 8: Use the Diffusion for Signs of Wear
The Diffusion channel is not strictly necessary for this wood. However, it serves to enhance impurities and contrasts, such as fingerprints or wear. To do this, copy the black-and-white relief motif again and paste it into the Diffusion channel. After activating it, the preview becomes noticeably darker, and the smooth surface looks rougher and more worn. Then reduce the value step by step until you like the result. Between 40 and 50 percent is a good starting point.


Step 9: Add the Reflection
Activate the Reflection channel and load the relief motif there as well. The reflection quickly makes the surface look metallic, especially at high values. Therefore, reduce the strength until only a slight varnish character remains. You can also blend in the reflection in Multiply mode. Then the degree of effect can be changed quickly without influencing the motif too much. If necessary, increase the refractive index to strengthen the reflection. A value of about 10 is a good starting point.


Step 10: Fine-Tune the Overall Result
Compare the result with and without the specular to see the difference. With the specular activated, the panel usually looks more lively and realistic. You can also scale back the relief a little so that the tabletop looks calmer overall. A reflection with about 5 percent blur additionally creates soft transitions. Also try out how the panel looks without the relief. Then you can see what contribution the depressions really make.


Step 11: Optimize the Render Settings
For matte, diffuse surfaces, the Physical Renderer is particularly well suited. It usually calculates such effects more cleanly and often faster as well. A proven combination is a mix of low and medium quality; for antialiasing, values around 10 and a sampling subdivision of 2 are usually sufficient. You then set the matte effect to 4 so that it is calculated correctly. After that, you start the render button.


Summary ??? Varnished Wooden Floor in Cinema 4D: Setting Up Relief, Specular Highlight, and Reflection Correctly
With this tutorial, you build a varnished wooden board that looks natural. You load a wood texture into the color channel and use the same graphic as relief after editing it in black and white in Cinema 4D. Specular highlight and reflection create the varnish effect, while the diffusion channel adds signs of wear. With the interactive render region, you keep track of every change. Finally, you set the render options and get a balanced result. It is best to try out the values yourself, because the right degree of gloss and relief is always also a matter of taste.
FAQ
Do I have to create a separate grayscale template for the relief channel?No, you can copy the wood texture and paste it into the relief channel. Then you edit it in black and white in Cinema 4D and increase the contrast.
Is the diffusion channel absolutely necessary?No, it is optional. It enhances impurities and contrasts and makes the surface look more worn.
Why does my reflection look too metallic?The reflection is probably set too strong. Reduce the strength and work with a dulling effect until only a slight varnish character remains.
Which renderer is suitable for matte surfaces?The Physical Renderer generally calculates diffuse matte effects better and often faster as well.


