
A ball that tilts slightly as it leaves the frame and bounces back up from the bottom immediately looks more alive. In this tutorial, you build exactly this movement step by step in After Effects. You combine null objects, expressions and keyframes with the graph editor until rotation, position and the bounce off the floor are coordinated with each other.
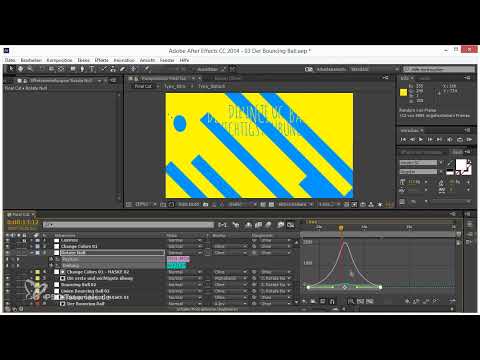
The video is only loaded from YouTube when you play it – data (including your IP address) is then transmitted to YouTube/Google. More in the privacy policy
Key Takeaways
Key Takeaways
- A clean project structure with clearly named folders saves you a lot of time with complex animations.
- A null object is ideal for rotating and moving several layers together.
- The expression "fromComp toSurface" ensures that the Draw effect is calculated correctly even with moving layers.
- With a checkbox, you can turn the Draw effect on and off as needed.
- The transform box and the graph editor allow you to refine the timing without much effort.
- Identical values for the floor keyframes ensure that the ball lands at exactly the same height.
Step-by-Step Guide
Step 1: Tidy Up and Structure the Project
Before you start the animation, get your project in order. Create a composition folder and drag the intro composition into it. Also create a final cut composition in which all the individual parts come together, as well as a sound folder. A little trick helps keep important folders always at the top: put a dollar sign or a space in front of the folder name. You can also assign colors to folders so you can find your way around more quickly.

Step 2: Disable Adaptive Resolution
When moving layers or changing parameters, After Effects often switches to a lower resolution. This can be annoying because you can then hardly see the image. Therefore, set the quality to "Full Quality". The preview becomes slightly slower as a result, but you see every change clearly and without pixelation. Especially when working with masks that you shift by individual pixels, this is a real advantage.

Step 3: Create a Null Object and Assign Layers
Create a null object using the keyboard shortcut Ctrl, Shift and Alt plus Y. Place it in the center of your ball at its end position. Give the null object its own color so you can recognize it immediately. Now parent the ball, the text and the lines to the null object. As a result, all elements act as a unit as soon as you rotate or move the null object.

Step 4: Adjust In Points and Animate Rotation and Position
Set the in point of the null object exactly to the in point of the ball, so that the layer only starts when the ball enters the frame. As soon as the null object arrives, you begin with the animation. Set keyframes for rotation and position. Over the course of the animation, rotate the object by about 90 degrees and move it at the same time. Make sure that the movement starts slowly at first and then picks up speed.

Step 5: Fix the Draw Effect with the Expression
When moving the layer with the "To Comp" effect, the effect suddenly draws points in the wrong places. This is because it does not correctly account for the layer's movement. The solution is an addition to the expression: insert "fromComp toSurface" so that the current layer position is included in the calculation. After that, the drawing fits again. Note, however, that the effect no longer works outside the composition boundaries, which is why you have to treat the ball differently for the time being in this case.

Step 6: Set Up a Checkbox for the Draw Effect
So that you can turn off the effect after animating, you create a checkbox. Right-click on the layer, choose the setting for expressions and add a checkbox control. Name it "Zeichnen" and move it all the way to the top. In the expression, you now formulate a condition: if "Zeichnen" is active, the effect is calculated with "fromComp toSurface". Otherwise, you set the value to 10000 and 100000, i.e. far outside the composition. This way, the effect no longer draws anything as soon as you deactivate it.

Step 7: Refine motion curves with Easy Ease
Now it's all about the feel of the motion. The rotation and the position should behave similarly, even though they have different values. Select both parameters and apply Easy Ease. In the curve editor, you can move the tangents of both curves together so that they fit together harmoniously. Also pay attention to the work area: it should only be as long as you actually need it. A short lead-in makes sense so that the timing feels right, but the entire clip doesn't have to play everywhere.

Step 8: Make the ball tilt as well
Now the ball should also tilt as it falls. Since the object is now oriented differently because of the rotation, the ball no longer moves along the Y axis but along the X axis. Therefore, you set the keyframes on the X axis and leave out the Y axis. Open the value curve and adjust the curves. Break the tangents using the Alt key and shape them into a nice arc so that the motion looks smooth.

Step 9: Design the jump arc and scale keyframes
Copy the keyframes to the point where the ball touches the ground, and shape a clean arc there as well. Avoid using the Easy Ease button on individual keyframes, as it can destroy your arc work. Then select all keyframes and scale them together. The tangents are scaled along with them, so the curve is preserved. It's important that you use the transform box to adjust the timing quickly without having to rework each tangent individually.
Step 10: Ripple Edit, mini bounces and whole frames
To make the jump feel fast enough, you speed up the first part of the animation and shift the subsequent keyframes with the Ripple Edit. Add small mini bounces that ensure a natural fade-out after the ball lands. Afterwards, align the keyframes to whole frames. This prevents the ball from landing unevenly between two frames. Zoom in close if needed to reach individual handles precisely.

Step 11: Align ground keyframes exactly
The height of the ball on the ground should be identical at every impact. To do this, select all keyframes that lie on the ground in the curve editor. Hold down the Shift key while selecting and make sure not to accidentally include the last keyframe. Right-click the selection, choose "Edit Value," and give them all the same value. Afterwards, all impact points are at exactly the same height. You can still readjust the last two jumps a little if they seem too fast.
Step 12: Fine-tuning and outlook
Finally, you watch the entire animation calmly and adjust individual curves further. This phase is a continuous process of trying things out and improving. A jump that looks perfect on the first try is more the exception. After that, you can add further elements such as the text and a color change to round off the result.
Summary – Animating a tilting ball in After Effects: Step by step to a lively jumping motion
You have learned how to make your ball tilt with a null object, how to control the Write-on effect via expressions and a checkbox, and how to design the ground jump precisely with the curve editor and transform box. What matters is that you proceed step by step and consciously check every curve. With a little practice, you will develop a feel for timing and motion that will benefit you in all your future animations.
FAQ
Why should I turn off adaptive resolution?With adaptive resolution enabled, the image is displayed pixelated while moving or editing. With final quality, you see every change clearly, even if the preview takes a bit longer.
What is the null object used for in this animation?The null object bundles the ball, text and lines. When you rotate or move it, all child layers move together, which simplifies the animation considerably.
What does the expression "fromComp toSurface" do?It incorporates the layer's current position into the calculation of the Write-on effect. This way, the points are drawn in the right place even with moving layers.
Why do I need a checkbox for the Write-on effect?With the checkbox, you can turn off the effect after animating. This makes distracting lines disappear, and you can move the layer freely.
When should I use broken tangents?Broken tangents are useful when you need a change of direction in the motion, such as when the ball hits the ground. This creates a hard, natural transition instead of a smooth curve.
Why should I place keyframes on whole frames?Keyframes that lie between two frames produce uneven motion. Aligning to whole frames ensures a clean and consistent flow.


