
The trailer is taking shape, and right now it is decided whether the animation looks fluid or wooden. This tutorial guides you through the final fine-tuning of the text animators. You will learn how to control multiple layers centrally with a null object, how to make movements smoother with Easy Ease, and how to design the transition to the next section cleanly. You will also get to know the scribble effect, which brings hand-made movements into your composition.
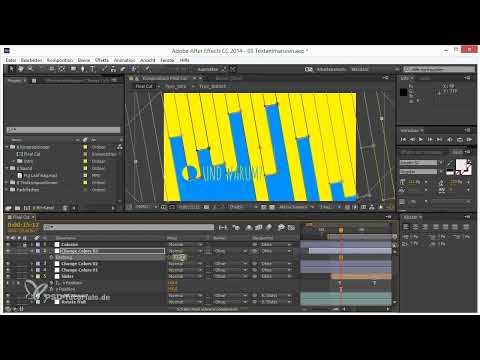
The video is only loaded from YouTube when you play it – data (including your IP address) is then transmitted to YouTube/Google. More in the privacy policy
Key Takeaways
- A null object acts like an invisible controller to which you parent multiple layers in order to control movements together.
- Linear keyframes look mechanical. Easy Ease In and Easy Ease Out provide natural acceleration and deceleration.
- The value graph is well suited for fine-tuning, especially when you are animating only one axis.
- Markers on the audio track help you align animations precisely with sounds and music cues.
- Linked values of the range selector keep multiple animators in sync, so you can adjust the speed in one place.
- A flicker effect via expression gives text a lively, slightly wobbly character.
Step-by-Step Guide
Planning the Scribble Effect Slide
Before you start with the finishing touches, you define the sequence. The next slide of the trailer is the scribble effect, which you will get to know for the first time in this section. Keep the order of the slides in mind, because the text layers will later be linked to the transition.

Combining the Water Group
So that the two elements of the water group work as a unit, you arrange them together in the timeline. Grouped layers can then be moved and controlled together without you having to edit each layer individually.
Moving the Text and Setting Up the Color Change
Now you move the group to its new position. Then you insert the color change again and apply the text effect that you already used for the "Warum" animation. Make sure that the color change and the text effect do not run against each other in terms of timing.
Creating a Null Object
For the movement from left to right you need a null object. You create it using the keyboard shortcut Shift + Alt + Y or via the menu Layer, New, Null Object. In current versions, the layer lands directly above the currently selected layer, which speeds up the work considerably.

Naming the Slider and Marking It with a Color
Name the null object clearly, for example "Slider", so that you can find it immediately in the project. A distinct color also helps. In the example, pink barely stood out from the material, and lavender got lost among the surrounding colors. That is why apricot was chosen. Choose a color that clearly stands out from the remaining layers.
Setting a Marker for the Sound
When you work with sound, a marker is worthwhile. With the comma key on the numeric keypad you start the audio preview. With the asterisk key you set the marker at the current position. This way you can later find exactly the moment where the new animation should begin.

Setting Keyframes at the Starting Point
Go to the point where the new animation should begin, and set the first keyframe there for the text animator and for the Bouncing Ball. Afterwards, parent both to the slider again so that you can control them together.

Parenting the Rotation Null Object Instead of the Ball
The Bouncing Ball is already parented to a rotation null object. Therefore, you do not drag the ball itself onto the slider, but the parent null object. The rule behind this is: if an element is already parented to a layer, you move that parent layer. This way you avoid duplicate links and unexpected conflicts.
Using Easy Ease and the Value Graph
Do not use linear keyframes, because they look artificial. Select the keyframes and choose Easy Ease In and Easy Ease Out. Since the movement only takes place on the x-axis, you do not need keyframes for the y-axis. The value graph is your best helper here, because you can grab the curve directly and fine-tune it.

Duplicate and move Change Colors
Duplicate the Change Colors effect and move the copy to the beginning of the movement. Set the value to 70 so that the color change fits. The color change should start slightly earlier than the movement itself so that it prepares the viewer's eye.

Control the next text with the null object
Now comes the text "Every animation follows a few rules". Parent it to the null object so that it moves along when sliding out. If the movement is not enough, go back to the null object's keyframe, move it a bit further, and check the result again. Since the text should not be visible from the beginning, you also don't have to push it far out of the frame. While doing so, also check the text layers for superfluous spaces, because one such character shifted the line in the example.

Copy and adjust the text animator
For the new text, copy the "Warum" text animator with its three properties and paste it directly. The animator makes the text come up from below. Move its position value slightly downward so that the movement fits the new text box completely.

Adjust the speed via the range selector
The movement is too fast. Open the range animator and set the range end to about 25. This extends the duration of the effect. Keep in mind that the other animators do not automatically adopt this change.

Link the values with Alt-click
So that all animators use the same range selection, you link the values. Press the Ü key to open the timeline in full screen. Then hold down the Alt key and click on the end of the range selection. Linking is one of the simplest expressions there is and saves you a lot of manual rework.

Readjust the timing by feel
After linking, the movement still seems a bit too slow. Play the animation several times, because at a high zoom level it's easy to misjudge. Adjust the speed in small steps until the text flies in energetically without seeming frantic.
Add the flicker effect via expression
The wobbly text effect from the typo intro is still missing from the other texts. Take it over in the version with expression, which works without additional time offset. Add it to the Bouncing Ball and the text layers. You can recognize the text layers by the text icon in the layer panel. Afterwards, the entire section looks much more cohesive.

Preview of the scribble effect in After Effects
Finally, a book appears beneath the text, created with the scribble effect. This effect is excellent for handmade animations that look lively without having to be elaborately drawn. In the next part, you will delve deeper into this technique.

Summary – Fine-tuning text animators: timing, keyframes, and transitions in the trailer
In this tutorial, you have learned how to bundle text animators with a null object, make movements smoother with Easy Ease and the value graph, and adjust the speed via the range selector. With markers, you align the animation to the sound, and the flicker effect gives the texts character. The transition to the scribble effect slide is thus prepared.
FAQ
What is a null object used for in the trailer?A null object is an invisible controller. You parent several layers to it and thus control movements centrally.
Why should I avoid linear keyframes?Linear keyframes produce a constant speed that looks mechanical. Easy Ease In and Easy Ease Out provide natural acceleration and deceleration.
When is it worth setting a marker?Markers help you align animations precisely to audio tracks or music cues.
What does linking the range selection achieve?Linked animators use the same values. If you change the speed in one place, all linked texts adjust at the same time.
Do I have to pay attention to all axes in the value graph?No. If you only animate on the x-axis, you don't need keyframes for the y-axis. This simplifies fine-tuning significantly.
How do I recognize text layers in the layer panel?Text layers show their own text icon in the layer panel. This way you keep an overview when linking and applying effects.


