
Music gives an animation rhythm, and when movement and sound match, the result looks much more impactful. This is exactly the effect you will use in this tutorial to make individual words of a text appear precisely on the beats of a melody. The approach comes from a motion design workflow in After Effects and can be applied to your own projects.
The video is only loaded from YouTube when you play it – data (including your IP address) is then transmitted to YouTube/Google. More in the privacy policy
You will learn why sound and image belong together, how to set markers, how to work with text animators and keyframes, and how to get by with an expression without any animators at all. At the end, you can also create a hard color change in time with the music.
Key Takeaways
Music and animation have to match, because our perception expects that what we see and what we hear belong together. Set markers at the points where the words should appear, and use the beats of the music as your guide. With hold keyframes and interpolation turned off, words stay in fixed positions and jump abruptly from one state to the next. Move the keyframes forward by about one frame so that the image appears minimally before the sound. The expression method using a slider is a quick alternative, especially with a lot of text.
Why Music and Animation Belong Together
Before you start working in After Effects, it is worth taking a look at why animations work so well with music. Our senses are geared toward correspondence. If someone falls down and no sound can be heard, it feels wrong. If image and sound match, on the other hand, the viewer finds it satisfying.
For your animation, this means: every visible impulse should meet an audible impulse. A word that appears exactly on the beat feels more powerful than a word that shows up somewhere between two beats.
Step 1: Write the Text and Place It in the Composition
Start with your text. Write it as a text layer in your composition and choose a section of the music that the words fit. Play the section several times until you get a feel for the tempo. A text that feels almost like singing along works best here.
Make sure you don't fix the text too early. Words can still be rearranged later, but it helps if you already know while writing how many syllables and stresses fit which beat.

Step 2: Align and Crop the Text
So that the text sits cleanly in the composition, you center it using the Paragraph panel. Then you open the Align panel to place the text layer in the middle of the composition. Move the text if necessary until the position is right.
In addition, you can crop the layer with a mask. To do this, draw a shape with the Ellipse or Rectangle tool that defines the visible area. This way, the text only becomes visible once it is inside the cutout. This is especially handy if words are later supposed to move in from below or from the side.

Step 3: Set Markers on the Music
Now comes the most important step for the beat. Play the music and set a marker at every point where a word should appear. On the numpad, you do this with the asterisk key; on a MacBook, with the key combination Control and 8.
Make sure not to place the markers only roughly. The more precisely they land on the beat, the more coherent the animation looks. If the start of a phrase needs more lead-in, plan for that section right away so you don't miss any words.

Step 4: Use a Text Animator with Scale
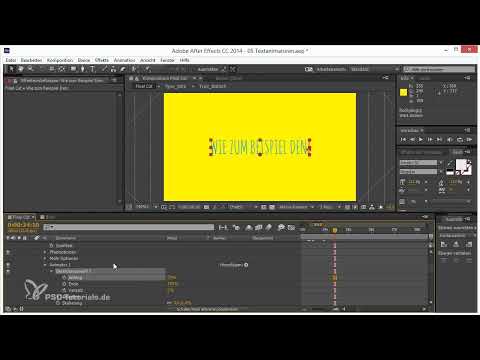
The first technique works with a text animator. Create an animator and set the scale to 0 percent. As a result, the letters are initially invisible. Then you use the Start and End values to define which characters appear and when.
This method is quick to implement and works well for short texts. With longer texts containing many letters, however, the preview can stutter, and handling becomes confusing. Especially in 3D layers, the text animator becomes noticeably slower with large amounts of text.

Step 5: Set Hold Keyframes for Each Word
For more control, you set keyframes directly on the scale or opacity of the words. To do this, go to the first marker, set a keyframe, and let the first word appear. Then you jump to the next marker and do the same for the second word. You repeat this procedure until all words have a keyframe at the right place.
Pay attention to accuracy when setting the keyframes. With slight deviations, the animation quickly looks imprecise. Use the markers as a guide and zoom into the timeline if necessary.

Step 6: Turn Off Interpolation
Without any further setting, the value would change evenly between two keyframes. The word would therefore build up slowly instead of appearing abruptly. To prevent this, you right-click the keyframes and select the option for suppressing interpolation.
After that, you have hold keyframes. Between the keyframes, the value stays constant, and you only see the individual states. Play the composition and check whether each word appears exactly on the desired beat.

Step 7: Move Keyframes Forward by One Frame
In perception, a minimal delay often occurs. When you react to the beat during the animation, the image comes slightly later than the sound. It is therefore worth shifting all the keyframes you set based on the markers forward by one frame.
In some cases, it can also be more than one frame if you were significantly late when setting them. Overall, though, an animation usually looks better when the image appears a touch earlier than the spoken word or the beat in the music. Test the shift in small steps until the result feels right.
Step 8: The Expression Technique for Words
The second technique is especially practical when it comes to individual words and you don't feel like dealing with percentage values in text animators. It works entirely without animators and instead uses an expression in the Source Text of the text layer.
For this you only need a slider, which you name, for example, Words, as well as the appropriate expression. Insert the expression into the text field of the Source Text. As soon as you set the slider to one, the first word appears. At two, both words appear, and so on. You can therefore animate the value directly with keyframes and match it to the beat.

Step 9: Adjust Spaces and Alignment
With the expression method, it can happen that no space appears between the words. This is due to a small exception in the expression that you need to delete. Remove the corresponding line, and the spacing will be right again.
In addition, centered text often looks unsteady with this method because the width changes with each word. Therefore, switch the alignment to left-aligned. Then the beginning of the sentence stays stable, and the words grow to the right.
The expression is also useful when you want to animate a lot of text. Hide the layer, but leave it in your working file so you can reuse it later.

Step 10: Implement a Hard Color Change on the Beat
Finally, I'll show you a transition that deliberately does without a soft crossfade. When there is a break in the music, for example a short run on the piano, you can change the color of the text layer abruptly.
To do this, delete the masks you set earlier and let the text appear exactly at the point where the break in the music happens. Set the color change at the same moment or one frame earlier than the change of the text layer. This way the color jumps from yellow to blue, without a transition. Especially when the hard cut is placed exactly on the point in the music, it looks very powerful.


Summary ??? Animating Words to the Beat: Step-by-Step Guide for After Effects
You have now learned two ways to make words appear to music. The text animator with scaling is quick to implement and is suitable for short texts. For more control, you set Hold keyframes, which you place based on the markers, and move them forward by one frame. The expression method with a slider offers the best solution for a lot of text and long sequences. With a hard color change at the right moment, you can additionally emphasize breaks in the music.
FAQ
Why should you combine animation and music?Our senses expect that what we see and what we hear match. When movement and sound are in rhythm, the animation feels more satisfying and impressive.
Which marker keyboard shortcut do I need in After Effects?On the numpad, you set markers with the asterisk key, on a MacBook with Control and 8.
Why are Hold keyframes needed?Hold keyframes prevent values from changing slowly between keyframes. As a result, words appear abruptly and match the beat exactly.
Why should I move the keyframes forward by one frame?Perception usually has a slight delay. If the image appears minimally earlier, it feels synchronized with the music.
When is the expression method worthwhile instead of text animators?With long texts and complex text layers, especially in 3D, text animators are often slow. The expression with a slider stays smooth even with a lot of text.
Why must the text alignment be left-aligned with the expression?Since the text width changes with each word, the beginning stays stable with left alignment while the text expands to the right.


