
Imagine stars flying toward you, and in the end your title floats in the middle of space. You can create exactly this look in After Effects without expensive add-on packages. All you need are the built-in features, the particle plug-in CC Rainfall, and a few tricks with the camera and layers.
The video is only loaded from YouTube when you play it – data (including your IP address) is then transmitted to YouTube/Google. More in the privacy policy
The tutorial takes you from the new composition through the starry sky and the polar lights to the finished camera flight with multiple titles. The setup is deliberately modular, so you can easily apply the steps to your own texts later.
Key Takeaways
A believable space effect is created from several layers: a star field with CC Rainfall, a second, fixed starry sky to counter the tunnel vision effect, and colored light in the background. The camera provides the depth, keyframes provide the rhythm. If you duplicate the title several times and fly toward each one with the camera, you end up with an intro sequence with multiple titles.
Step 1: Create the Composition and Background
Start with a new composition that you give a sensible name, for example "Universe Title". Set a width and height in 16:9 format, such as 1280 x 720 pixels, and set a duration of 15 seconds. Then right-click to create a black solid and name it "Background". This dark base forms the foundation for everything else.

Step 2: Prepare the Camera and the 3D Layers
Duplicate the background layer with Ctrl + D and enable the 3D switch on the copy. Then create a new camera via right-click. You will need this camera later for the flight through the universe. Rename the duplicated layer to "Stars".

Step 3: Insert the Title as a Text Layer
Create a new text layer and name it "Universe Title". Choose a simple font like Tahoma, set the font size to about 90, and experiment with font style and capitalization. Then also enable the 3D switch for the text layer and move it to the desired position.

Step 4: Set the Anchor Point Correctly
So that the scene doesn't later rotate around the wrong point, open the transform properties and increase the Z position a little. Also move the anchor point to the center of the title. This way, the image rotates around the text as you fly past, and not around a random point in space.
Step 5: Create Stars with CC Rainfall
Apply the CC Rainfall effect to the "Stars" layer. You can find it via the Effects menu, the search is enough. At first you won't see any stars, because the drops still need to be adjusted. To do this, adjust the number of drops, their size, the scene depth, and the speed.
Step 6: Refine the Stars
Under Extras you will find the Ground Level, with which you shift the starting position of the particles. First change the brightness so that the particles clearly glow. For the rendering, choose the "Refracting" mode. Reduce the Spread so that the drops become small stars and not long lines. Then lower the speed so that the stars don't constantly fall downward. Finally, add some variation by slightly increasing the Spread and adjusting the size moderately. Don't overdo it, otherwise the image quickly looks restless.

Step 7: Create a Second, Fixed Starry Sky
The problem with the camera flight is that the stars near the camera disappear as soon as you fly past them. The solution is a second starry sky. Duplicate the "Stars" layer and name it "Stars 2". You let this copy run without the 3D switch. It stays fixed in the image and thus simulates a constant background while the 3D stars pass by you. Disable it for now, because you will enable it later at the right spot.

Step 8: Add Color and Polar Lights
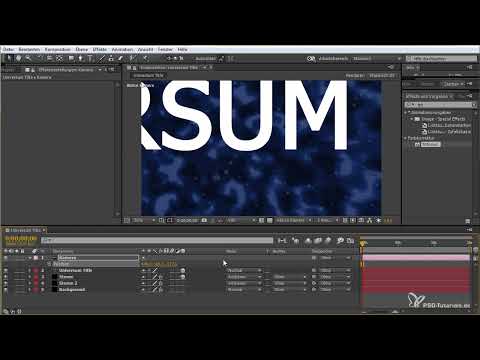
To make space look more alive, you need color. Apply a preset light in pink to the background, which looks a bit strange at first. Add the Tritone effect on top of it and tint it blue to create a polar light impression. Set the look darker so that it doesn't distract from the title. The stars' mode should be set to "Add" so that the stars glow over the colors and don't blend anything over them.

Step 9: Duplicate and Vary the Stars
Duplicate the stars layer one more time and change the values. Increase the size of the particles, add more drops, and increase the zoom factor so that you feel more depth during the flight. Move the position slightly forward. As you move forward, this creates a 3D effect in which individual particles appear to fly along with you.

Step 10: Refine the Northern Lights
Open the settings of the northern lights layer. Lower the complexity so the structure becomes more diffuse, and reduce the opacity so the light stays subtle. You can disable Fast Blur and Radial Blur because they cost unnecessary rendering time. Make the Tritone effect a bit brighter until the effect becomes visible in the image.

Step 11: Animate the Camera Flight with Keyframes
Now set keyframes for the camera. Start at a position a little distance from the title, set the first keyframe, and then move forward a few steps until you are close to the text. A gentle forward flight is important so that the image never stands still. To make the movement smoother, use Easy Ease with the F9 key. In the interpolation assistant, you can additionally adjust the speed curve.

Step 12: Activate the Stars on a Timed Basis
The trick lies in the timing. Only switch on the starry sky layer "Stars 2" when the flight passes the appropriate spot. To do this, first set the opacity to 0 and from a certain point in time to 100. That way the viewer hardly notices the change. At the end of the flight, you can activate the target point to create additional, permanent movement in the stars.

Step 13: Build in a Pause and Duplicate the Title
So that the title can have an impact, plan a short pause in which the title stays still. After that, the flight outward or further into the depth follows. Once you have finished this movement, you can duplicate the complete "Universe Title" layer with Ctrl + C and Ctrl + V and rename it "Universe Title 2". Move the copy and adjust the camera position so that the next title appears exactly in the center.

Step 14: Fade in Multiple Titles in Succession
Move the camera from title to title by setting a new position with keyframes each time. Make sure you readjust the camera slightly when moving it, as it can otherwise easily slip. Fade in the next title as soon as the previous one moves out of the frame. You can adjust the horizontal alignment to improve the effect, and build in a bouncing effect that makes the animation a bit more lively.

Step 15: Refine the Result with Glow
Finally, you can round out the overall image. Right-click in the adjustment layer to add the Glow effect and activate it. Adjust the threshold so that mainly the stars are highlighted. With this setting, you get glowing stars that put the title dramatically in the spotlight.

Summary ??? Creating a Universe Title in After Effects
You have seen how an impressive space intro can be created with built-in functions and the CC Rainfall plug-in. The starry sky is created from particles that you balance with Extras and Spread. A second, fixed starry sky prevents the stars from disappearing as you fly past. Colored northern lights, keyframes, and a targeted camera movement create depth, and duplicating the title allows you to fade in as many titles in succession as you like. With Glow, the scene finally gets its final shine.
FAQ
Do I need additional plug-ins to create the intro?No, the CC Rainfall effect and the other tools such as Tritone and Glow are already included in After Effects.
Why do the stars disappear when I fly close past them?The 3D stars are overtaken by the camera. A second starry sky that is not set as a 3D layer, on the other hand, stays in the image and fills this gap.
How do I prevent the stars from permanently falling downward?Reduce the speed in the CC Rainfall effect until the movement is barely visible.
How do I make the camera movement smoother?Select the keyframes and use Easy Ease with F9. You can fine-tune the curve additionally in the interpolation assistant.
Can I use the title multiple times?Yes, duplicate the layer with Ctrl + C and Ctrl + V, rename it, and reposition the camera for the next title.


