
Imagine you need a lower third, a graphic, or an animated transition in every other project. Rebuilding the keyframes or isolating layers again each time costs time and carries the risk that something shifts in the process. This is exactly where the compressed alpha channel comes in. You save the finished element once with its transparency as a video file and can then drag it into any project like any other footage.
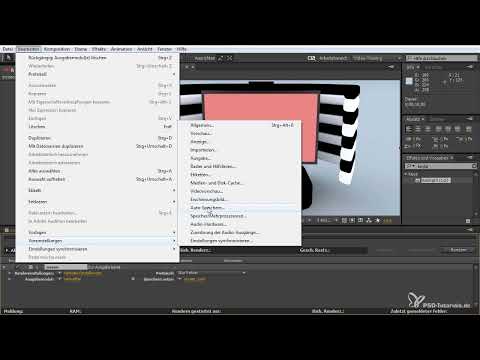
The video is only loaded from YouTube when you play it – data (including your IP address) is then transmitted to YouTube/Google. More in the privacy policy
In this tutorial, you will learn how to key out a green screen in After Effects with Keylight, set up the render queue and the output module correctly, export the Quicktime format with the Animation codec and an alpha channel, and then reuse the finished file. You don't need any prior knowledge of codecs, just an installed version of After Effects with Quicktime.
Key Takeaways
An alpha channel stores the transparency of an element and is preserved during export, provided you use Quicktime with the "RGB + Alpha" channel and the Animation codec. Compression reduces the file size and gives you a good balance between quality and file size. The price for this is slightly lower image sharpness, which you can control via the quality setting. Alpha elements that you have rendered once save you a lot of work with recurring tasks.
Step-by-Step Guide
Step 1: Bring the prepared file into the project
Start by dragging the already prepared green screen animation into your project. It opens with all the necessary settings. You see an animation that reveals a green background while slightly scaling up. Drag the file into the composition just as you would with any other clip. The advantage: you don't have to cut out the green screen again every time you use it.

Step 2: Key out the green screen with Keylight
To make the transparency visible, you use the Keylight effect. Find it in the Effects panel and drag it directly onto the layer with the animation. Then use the eyedropper to select the green tone in the preview image. As soon as the color is recognized, the background disappears. Afterwards, dial the sliders back a little until the edges look clean and no green remnants are visible anymore.

Step 3: Create a test layer for checking
So that you can check the keying, you create a solid layer. To do this, press Ctrl+Y (Cmd+Y on macOS). Move the new layer below the animation. This way you can immediately see whether the transparency works, because the color of the solid layer shines through in the keyed-out areas. This background only serves for checking and is deactivated again before rendering.

Step 4: Open the render queue and access the output module
Press Ctrl+M to open the render queue. All processes you have queued for rendering are displayed there. Click on the output module for your composition. A new menu opens in which you determine which layers and channels are exported. However, you will only find the actual format settings in the next step.

Step 5: Re-enable deprecated formats
If not all the required options appear in the format menu, it is often due to hidden formats. In this case, click Cancel and open the preferences via the Edit menu. There you will find the templates or presets and within them the Output section. Enable the option to show deprecated formats in the output module there. This setting is important because otherwise the desired formats remain hidden.

Step 6: Select Quicktime and activate the alpha channel
With this option, the classic formats are available again. Select Quicktime. The format should already be present on your system anyway, as it is part of the scope of delivery of After Effects. If it is missing, a warning message appears at startup, and some functions are not available to you. It is also important that you choose the RGB + Alpha option in the Channels section. Only this allows the program to write the transparency into the file.

Step 7: Set the Codec, Compression, and Quality
Now open the format options. This is where the real key to compression lies. Choose the Animation option as the video codec, since it is particularly well suited to alpha channels. Then set the quality. In the example, a value of 50 percent is used. The lower the value, the smaller the file, but the more likely streaks are to appear. If you need a lossless file instead, you can also work without compression. However, the smaller, compressed version is the better choice if you want to use the element frequently. Confirm your selection with OK.

Step 8: Disable the Layer and Render the File
Before you start rendering, disable the solid layer. It only serves as a check and should not end up in the file. Then return to the render queue. There, use Save As to choose the destination and the file name. Then click Render. After Effects creates the file and compresses it directly in the process. You should wait for the notification that rendering has finished before you continue.

Step 9: Insert the Finished File into a Project
Now the file is ready for use. You can remove the test file and the plugin from the project, as you no longer need them. Then drag the rendered QuickTime file directly from the desktop into your project. The file has the extension mov instead of mp4 and can be used just like any other footage. Activate the layer, and you will notice immediately that the alpha channel is now a fixed part of your scene.

Step 10: Identify and Fix Quality Losses
Look at the result closely, especially if you enlarge the element significantly. Because of the compression, fine streaks or slight artifacts can appear, because the scene was saved at a reduced size. This is not a mistake in the workflow, but a consequence of the setting. If this bothers you, simply increase the quality in the format options and render the file again. This means you invest somewhat more time during export, but you save that much more effort with every later use.

Summary – Rendering an Alpha Channel Compressed in After Effects
You have learned how to key out a green screen with Keylight, set up the render queue and the output module, and make hidden formats visible again. With QuickTime, the RGB + Alpha channel, and the Animation codec, you export a small, transparent file that you can reuse as often as you like. When rendering, pay attention to the quality setting, because it determines how visible the compression becomes.
FAQ
Why doesn't QuickTime appear in the format menu?The option is often hidden, so you need to enable the display of deprecated formats in the preferences under Output.
What happens if QuickTime is missing on my system?After Effects displays a warning at startup, and some functions are not available, so you should have QuickTime installed.
Which codec is suitable for an alpha channel?The Animation codec is well suited to elements with transparency and can be saved compactly with a quality level of about 50 percent.
Why does my file look blurry after rendering?The compression reduces the scene, which can cause streaks or artifacts. Increase the quality in the format options and render the file again.
Do I have to remove the solid layer before rendering?You don't have to delete it, but you should disable it so that the background doesn't end up in the rendered file.
Can I also render losslessly?Yes, that is possible, but it produces significantly larger files, which are less suitable for frequent use.


