
Imagine you have worked on your animation for a long time, set keyframes and maybe even written expressions. Now only the last step is missing: the finished result has to get out of After Effects so that you can send it, burn it to DVD or keep using it in an editing program. That is exactly what rendering is for. In this guide, I'll walk you through the render queue, the render settings and the output module. I'll also show you which codec you should choose and how to create a Flash banner from a composition.
The video is only loaded from YouTube when you play it – data (including your IP address) is then transmitted to YouTube/Google. More in the privacy policy
Key Takeaways
- You start the rendering process via Composition > Make Movie > Render or with Ctrl+M.
- In the render settings, it is worth leaving effects, solo switches and guide layers on "Current Settings" so that the result matches your design exactly.
- For the final output, set the resolution to "Full" and the quality to "Best".
- QuickTime is a safe choice as a container, since the files play on Mac and Windows. For alpha channel and lossless output, the "Animation" codec is suitable.
- You have to activate audio output in the output module, otherwise no sound will be rendered.
- For Flash banners, you use the "Export File" function and the Flash Player export; afterwards, the file can be further optimized in Flash.
Step-by-Step Guide
Step 1: Open the Render Queue
You start the rendering process via Composition > Make Movie > Render or with Ctrl+M. The render queue then opens with a new entry for your composition. With the checkbox in the entry, you determine whether this composition should be rendered at all. If you deactivate it, the entry remains but is not executed.

Step 2: Set the Save Location
In the render queue entry, click on "Save As" and choose a fixed folder, for example a folder named "renders". A dedicated output folder quickly pays off, because that way you can find your finished files again without a long search.
Step 3: Open the Render Settings
Via "Render Settings" you get to the fine settings. The "Best Settings" template is usually a good starting point, but it is worth going through each option deliberately once. It quickly becomes clear which settings are important for the final output and which only help with previews.

For the finished file, you set the quality to "Best". The "Draft" and "Wireframe" settings are only suitable for quick checks in between. For the resolution, you choose "Full" for the final rendering. In a 1080p project, you can generate a preview faster while working using third or half resolution, but for the final result you should switch back to "Full".

Disk cache and OpenGL are not activated on my machine, so these options offer no advantage here. With proxies, you have to weigh up whether you want to have them rendered as well. For effects, solo switches and guide layers, I strongly recommend "Current Settings". Only this way is the output generated exactly as you set it up in the project, and you won't experience unexpected results.
You also leave the color depth on "Current Settings". If your project is 8 bit, it will also be rendered in 8 bit; 32 bit would bring no added value here. You only switch on frame blending for previews, because the render then runs faster. With motion blur, you decide whether it is calculated for the activated layers. You only need fields if the material is later to be shown on television in PAL or NTSC format. For normal material, they stay off.
With the time span, you decide whether the entire composition or only the work area is rendered. Alternatively, you can set a custom start and end. I usually work with the work area, provided I have set it beforehand. You should leave the frame rate unchanged, otherwise the audio will run out of sync with the video.
Step 4: Choose Output Module and Format
In the "Output Module" area, you set the format. "Lossless" is preset by default. The selection includes QuickTime, Windows Media, FLV, H.264 and image sequences such as JPEG, among others. I recommend QuickTime because the files play without problems on both Mac and Windows. Windows Media files, on the other hand, can often only be opened on a Mac with difficulty, and with codecs there are many variants where you cannot be sure whether they will run on the target computer.

Step 5: Choose a codec
Within the QuickTime format, you choose the appropriate codec. I most often use Photo-JPEG when I want to keep working on the footage. The H.264 codec is heavily compressed and produces small files that are easy to send. If you need an alpha channel or want the footage to remain as uncompressed as possible, you go for "Animation". This codec is lossless. Think beforehand about what you need the video for, because the codecs differ significantly in file size and compressibility.

Step 6: Set quality, color depth, and audio
In the codec dialog, you set the quality. The "Medium to High" or "Best" setting is usually a safe default. I often use a value of around 95 percent. If you want to render quickly and the file should be small, about 70 percent is also enough. For color depth, you choose between color and grayscale. You do not need to change the frames per second here; After Effects takes them from the composition.
Also pay attention to the audio output. After Effects does not output audio as long as you do not tick the checkbox. Many beginners forget exactly this step. If you enable the checkbox, you can specify the sample rate, channels, and compression. If your composition contains no sound, you simply leave the option switched off.

Step 7: Add multiple output modules
You can create multiple output modules for a project. To do this, you click the plus icon. In older versions before CS4, you had to duplicate the module with Ctrl+D. A typical example: one module renders the RGB channel, a second one the alpha channel. Name the modules so that you do not get confused later. The default name contains only the composition name; custom names such as "lossless" or "compression" make the overview much better.
Step 8: Design output file names with templates
In the "Templates" field, you determine what your file should be called. The placeholders "[Comp Name]" and "[File Extension]" are usually already entered. However, you can create your own patterns, for example composition name, width x height, and compressor. For me, this results in a name like "Coverflow_1280x720_Photo JPEG". This way you can see at a glance what is in the file.

Step 9: Start the rendering process
When all settings are right, you click "Render". In the blue progress bar, you see the start and the end, the current time, the estimated remaining time, and the render time so far. If you expand the details, you can also see which sub-step is currently running, such as calculating, compressing, or writing. If you have disabled the "Save as" option, a warning appears at the end because no output file has been specified.

Step 10: Find and check the finished file
After rendering, you find your file via the small arrow in the render progress. One click opens the folder where the MOV file is located. Open it in the QuickTime Player and check the result before you pass it on. Despite full resolution, my test file stayed at only 13.5 MB. This shows how much the right codec can make a difference.

Step 11: Distinguish between rendering and exporting
Besides rendering, there is exporting. It is only worthwhile in a few cases, such as for Flash Professional or Premiere Pro. For all other targets, I recommend rendering, because there you get more setting options, more flexibility, and usually better quality. For Flash banners, however, exporting is exactly the right way.

Step 12: Prepare the banner in After Effects
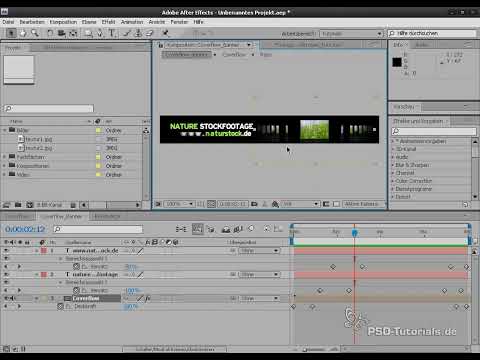
For a banner, you use the standard format of 468 x 60 pixels at 15 frames per second. My original project is 720p, and the export adopts this resolution. Therefore, I put the background into a sub-composition, which I call, for example, "Coverflow Sub-composition". I leave the animated text in the main composition. This way the banner can later be cleanly processed further in Flash.

Step 13: Export to Flash
Select the sub-composition and open File > Export > Flash Player. There you set the JPEG quality. For the options for unsupported elements, I choose "Ignore". This way you can see right away whether something is missing in the banner and can fix the error in a targeted way. For pure images and text, "Ignore" delivers the correct result. You should also enable the endless loop, because a banner usually has to repeat continuously. Click "OK" to start the export.

Step 14: Reduce the file size in Flash
The exported banner was quite large at around 492 KB. You can optimize it further in Flash. To do this, create a new ActionScript 2.0 file with 468 x 60 pixels, 15 frames per second and a black background. Then import the SWF file onto the stage via Ctrl+R. Here you can see that after the rebuild the file is only 254 KB.

Step 15: Add a link to the banner
In Flash, create a new layer named "Link" and draw a rectangle with the Rectangle tool. The fill color doesn't matter; what matters is the alpha value 0. This way the rectangle is invisible in the banner and only active as a click area. Convert it into a movie clip with F8, assign an instance name such as "link" and put the function getURL("http://www.psdtutorials.de", "_blank"); on the first frame. With "_blank" the link opens in a new window, which is common for banners.

Step 16: Publish the banner
You publish the file with Shift+F12. Afterwards you will find the finished SWF file in the folder. With the link and the optimized file size, your banner is ready to use, and clicking on the banner leads to the stored address. You can remember the whole process as a template for future banners.

Summary ??? Rendering in After Effects and exporting Flash banners
You have seen that rendering in After Effects consists of several clearly separated areas. In the render queue you define the entry and the storage location. In the render settings you decide on quality, resolution and time span. In the output module you choose the format and codec and don't forget the audio output. For Flash banners you use a sub-composition, the export to Flash and post-processing in Flash, in which you reduce the file size and add a link. With this sequence you get reliable results that you can pass on or reuse.
FAQ
Which setting should I choose in the render settings for the final output?For the final output, you set the quality to "Best" and the resolution to "Full"; effects, solo switches and guide layers remain on "Current Settings".
Why should I use QuickTime instead of Windows Media?QuickTime can be played without problems on both Mac and Windows, whereas Windows Media files often cause problems on the Mac.
Which codec do I use for an alpha channel?The "Animation" codec is suitable for an alpha channel and lossless output.
Why is my video without sound?Audio output is not enabled by default in the output module; you have to tick the checkbox for audio output.
When is exporting worthwhile instead of rendering?Exporting is worthwhile mainly for Flash Professional and Premiere Pro; for all other targets, rendering is usually the better choice.
What size and frame rate does a standard Flash banner have?A standard banner is 468 x 60 pixels at 15 frames per second.
How do I reduce the file size of my Flash banner?You can re-import the exported SWF file in Flash and rebuild it in a new document with the appropriate size and frame rate; in the example, this reduced the file from 492 KB to 254 KB.
How do I add a link to the banner?You create an invisible button using a rectangle with an alpha value of 0, convert it into a movie clip and add the getURL function with the desired address.


