
Imagine you have to isolate a hand from a background whose colors and transitions are almost identical to the hand. In the past, this would have taken a lot of time and patience. With the Roto Brush 2.0 in After Effects CC 2020 (October update), you can achieve a clean result in a short time. In this tutorial, I will show you how to select the Roto Brush, mark and remove areas, fix errors, and compare the new version with the classic one.
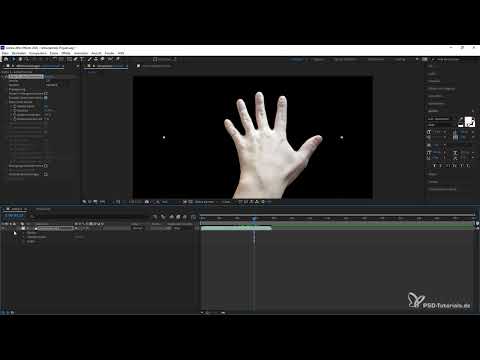
The video is only loaded from YouTube when you play it – data (including your IP address) is then transmitted to YouTube/Google. More in the privacy policy
Key Takeaways
- The Roto Brush 2.0 uses machine learning. The more precisely you work, the better results you achieve.
- With the Alt key, you remove areas from the selection that do not belong to the object.
- You can work in both directions. The Roto Brush calculates the in-between frames on its own.
- Errors can be corrected afterwards by setting a new keyframe and tracing the area again.
- Version 2.0 is significantly faster than the classic version and delivers cleaner edges, especially in dark areas.
Step 1: Select the Roto Brush and open the layer
The first step is quickly done. Select the Roto Brush in the toolbar at the top. Then drag your footage from the Project panel into the Composition panel. Double-clicking the layer opens the Layer view, which you can also reach whenever you double-click a layer in general.


Step 2: Understand the Layer view
In the Layer view, you see a green marker. It indicates that the tool is active. If you had selected the cursor instead, this marker would not be visible. So make sure the Roto Brush is actually active before you start painting.

Step 3: Roughly mark the object
Now it's time to paint. Move the Roto Brush over the hand you want to isolate. The marking doesn't have to be perfect yet; a rough stroke is enough to begin with. The Roto Brush recognizes the structure of the object on its own and adjusts the selection as you proceed. Once you have drawn the first stroke, the foundation for further work is laid.

Step 4: Remove unwanted areas with the Alt key
Not everything you have marked belongs to the object. Between the fingers, for example, there are areas of the background that you need to exclude. To do this, hold down the Alt key and paint over these spots. This removes them from the selection. In the video you can see that this step doesn't have to look clean. What matters is that the major errors disappear. The fine-tuning comes later.

Step 5: Understand how the AI works
The Roto Brush 2.0 works with machine learning. The AI analyzes the marked areas and transfers the selection to the following frames. The rule here is: the more details you mark, the more precisely the AI works. So you don't have to edit every frame by hand. You merely give hints, and the program takes care of the rest. Especially in areas with similar colors, this saves you an enormous amount of time.
Step 6: Work in both directions
You can have the selection calculated both forward and backward through the video. The progress bar shows you with arrows which direction the program is currently working in. This is helpful so that you always know which direction you are currently using.

Step 7: Understand the starting point and use keyframes
When you jump to the end of the clip, you see the point where you began working. That's where the key keyframe is located, i.e. the starting point of your mask. From this keyframe, the Roto Brush calculates the remaining frames. When you go back, you can already see quite good results that you wouldn't have achieved with the old Roto Brush.

Step 8: Fix Errors
Not every spot is perfect from the start. For example, there are still inaccuracies when the hand closes. To correct them, go to the relevant spot in the clip and trace the finger again. The program automatically creates a new keyframe. From this point on, the frames are recalculated, and the AI steps in again. This way you work step by step toward a clean result.


Step 9: Check the Result in the Composition View
Now switch back to the composition view. There you can see how cleanly the hand has been isolated. The result is already so good that you can use it directly.

Step 10: Choose Between Version 2.0 and the Classic Version
You can find Version 2.0 in the effect settings under Effects, then Roto Brush and Refine Edge. There you can select the version you want. Some programs or workflows only work with the classic version. It therefore remains available. For most projects, however, I recommend the new version.

Step 11: Adjust Contrast and Feather
In the settings, you can change the contrast and adjust the feather. This way you refine the isolation and get a professional result. Some areas may still need reworking. For this test, however, that is not crucial.

Step 12: Experience the Speed Comparison with the Classic Version
A direct comparison shows the big difference. If you switch to the classic version, the calculation takes significantly longer, and the progress bar behaves quite differently. With Version 2.0, everything runs faster, the display is clearer, and the shading and sub-areas are captured more cleanly.


Step 13: Reliably Process Dark Areas and Masks
The improvement is especially evident in very dark areas. Parts of the hand that used to blend into the background are now recognized as a separate object. In addition, you can disable the effect at any time to edit areas or to view the footage undisturbed. You can also copy it, so that masks you have already created are carried over without any problems.
Step 14: Check the Final Result
Finally, you compare the result with the original image. You can see that the blurring in the transition areas has been specifically addressed. With that, you have cleanly isolated your object and can use it in your own projects.

Summary ??? Using Roto Brush 2.0 in After Effects CC 2020 Reliably and Quickly
Roto Brush 2.0 is a significant step forward. You select the tool, roughly mark the object, remove unwanted areas with the Alt key, and let the AI calculate the selection across the video. You correct errors with new keyframes, and in the effect settings you adjust contrast and feather. Compared to the classic version, you work much faster and get cleaner results, even in dark areas. It's best to practice with your own material, and you will quickly become more confident.
FAQ
Which version of the Roto Brush should I use?As a rule, use Version 2.0. It is faster and delivers more accurate results. The classic version remains available only for special cases, such as when certain programs depend on it.
Where do I find the settings for Version 2.0?You can find them in the effect settings under Effects, then Roto Brush and Refine Edge. There you select the version you want.
What is the Alt key used for with the Roto Brush?While holding the Alt key, you remove areas from the selection. This lets you correct spots that do not belong to the object, such as background between the fingers.
Why don't I have to repaint the selection in every frame?Roto Brush 2.0 uses machine learning. It transfers your markings to the following frames and adapts them to the movement.
What do I do if individual spots are wrong?Go to the relevant spot in the clip and trace the area again. This creates a new keyframe, and the frames from that point on are recalculated.
Can I still change or turn off the effect later?Yes, you can disable the effect at any time to view the footage without isolation. You can also copy it and apply it to other layers.


