
A stroke that tapers, waves and changes in phases as if by itself can be created directly in the shape layer with the May 2020 update of After Effects CC 2020. The tapered shape strokes are a native effect, for which you don't need any additional plugins. In this tutorial, I guide you from creating a star through tapering and the wave to animation. You will find all the functions in the Stroke section of your shape group.
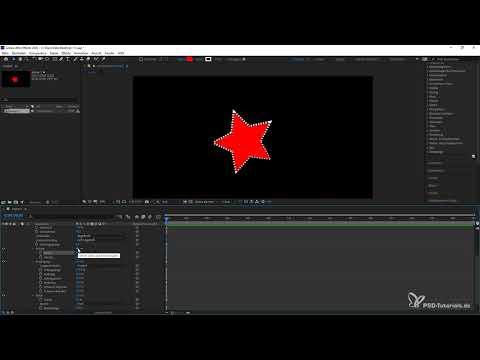
The video is only loaded from YouTube when you play it – data (including your IP address) is then transmitted to YouTube/Google. More in the privacy policy
Key Takeaways
- Tapered shape strokes are a native After Effects effect. It is GPU-accelerated and can be edited smoothly.
- You will find the sub-items Taper and Wave when you switch to the Stroke section of your shape.
- With Ctrl or Cmd, Shift and H, you hide all helper displays and evaluate the effect in isolation.
- You specify lengths in percent or pixels. Dashes continue the taper and expand the design possibilities.
- You control the wave via cycles and phases, and you animate the progression with keyframes.
- With the pick whip, you link parameters to each other. In the video, this tool is referred to as the lasso tool.
Step-by-Step Guide
Open the composition and prepare the shape
First, open the composition in which the shape is to be created. With the update, you can import paths or create shapes directly. For this example, you stick with the shape tools, because they are best suited to trying out the new functions step by step.

Create a star with the Star tool
Select the Star tool in the toolbar. You can also use the Pen tool, as the effect works with any shape. Then drag out a star in your composition, which you will edit in the following steps.

Activate strokes and choose a color
If the stroke is not yet visible for you, activate it in the shape options above the workspace. There you will also find the color selection. Choose a color that stands out well from the background so that you can see the changes better later on.
Set the stroke width
In the layer overview, click on your star once more and open the group. Set the stroke width to the desired value; in the example it is 29 pixels. Make sure the width is not set to zero, otherwise the stroke is invisible and the effect remains hidden.
Find tapered strokes in the Stroke section
In the star group, open the Fill or Stroke section and select Stroke. The new sub-items appear here, including Taper and Wave. These two functions are the building blocks of tapered shape strokes and form the basis for everything that follows.

Open Taper
Click on Taper. A menu with several settings then opens, which you can edit without any prior knowledge. The effect begins to become visible as soon as you change the first values.
Isolate the view
To see the effect better, press the key combination Ctrl or Cmd, Shift and H. This makes all helper displays disappear, and you see only the shape with the effect. With the same combination, you can bring the displays back afterwards.

Set start and end length
In the Taper menu, you first set the start length. You immediately see how the effect changes on the star. Then you determine the end length and the point at which the start of the taper lies. If the sliders are too small, enlarge the menu so that you can set the values more precisely. If you shift the values, a smooth transition results, which lets the stroke taper off evenly.
Select the length unit
Lengths can be specified in percent or in pixels. In the tutorial, the setting stays at percent, because it allows you to respond more flexibly to different stroke lengths. If you work with fixed measurements, simply switch the unit to pixels.
Add strokes
Additionally, you can activate strokes. The generated taper will then continue along the strokes. You can edit the strokes and thus create further designs that go beyond the simple taper.
Disable individual effects
Each effect can be switched on and off separately. If you want to view only the taper without strokes or other effects, for example, you disable the corresponding switches. This way you can compare different combinations without losing the values.
Open the wave
Next to the taper, you will find the wave in the Stroke section. Click on it to open the associated menu items. It differs from the taper in that it gives the stroke a wave-like movement.
Set the strength of the wave
Under the Strength item, you determine the intensity of the wave. To make the effect even more noticeable, you can additionally increase the stroke width. Since you retain control over every value, the effect can be fine-tuned as needed and combined with other effects.
Use cycles and phases
Instead of using pixels, you can also choose cycles here. This lets you determine how many wave cycles are displayed, and the phases will help you later with the animation. For a clean animation, first set the strength to zero, activate the taper, and then increase the effect. Afterwards, you set the cycles.

Build the animation using the phase
Go a few seconds forward in the timeline and set a marker there. Then activate the animation of the phase and change the value while letting the timeline continue to run. Afterwards, zoom the composition back out a little so that you keep an overview of the result.
Keep the overall composition in view
Changes to the taper affect your entire composition. So you can readjust the taper at any time and observe how the overall impression changes. If needed, add further effects to extend the animation.

Vary color and fill
The stroke itself can also be changed at any time. Choose a different color to give the star a new accent. You can also adjust the fill so that the effect stands out more and the star looks fresher overall.
Use stroke width creatively
You also control the effect via the stroke width. With different values, you can create grungy patterns or psychedelic effects, for example. If you animate the width later, lively movements emerge that fit well into a larger project.
Link parameters with the Pick Whip
Finally, you can connect individual parameters with each other using the linking tool. In the video it is referred to as a lasso tool, but what is meant is the Pick Whip. With it, properties can be linked into a chain reaction that you later control via other sliders.

Summary – Tapered shape strokes in After Effects CC 2020: Step-by-step guide
The tapered shape strokes in the May 2020 update of After Effects CC 2020 open up new design possibilities directly in the shape layer. You create a shape, activate the stroke, and find the taper and the wave in the Stroke section. With start and end length, strokes, cycles, and phases, you design the effect and animate it in a targeted way. Color, fill, and stroke width extend the result, and the Pick Whip links the parameters with each other. This produces animations that adapt flexibly and can be combined with other effects.
FAQ
Which version of After Effects do I need for tapered shape strokes?The feature is included in the May 2020 update of After Effects CC 2020. Older versions do not support it.
Where do I find the taper and the wave?You will find both functions in your shape group in the Stroke section. The sub-items appear there as soon as you have activated the stroke.
Why can't I see the stroke?Check whether the stroke is activated and the stroke width is greater than zero. A width of zero hides the stroke completely.
How do I hide distracting helper displays?Press Ctrl or Cmd, Shift, and H. With the same key combination, you bring the displays back.
Can I animate the effect?Yes. You can change cycles and phases over the timeline and thus build an animation.
What is the Pick Whip?The Pick Whip is a tool with which you link parameters with each other. In the video, it is referred to as a lasso tool.


