
With the October 2020 update, Adobe has noticeably improved the 3D design space in After Effects CC. If you have mainly worked with 2D layers so far and now want to bring cameras, depth and spatial movements into play, you will find a clear path here. The tutorial is aimed both at beginners and at users who have been working with compositions for a while. You will learn how to enter 3D space, position layers in space, use nested compositions and set up your system performance optimally.
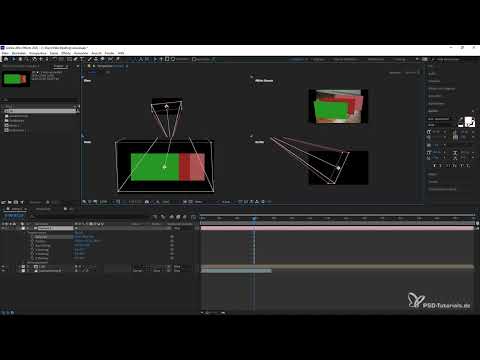
The video is only loaded from YouTube when you play it – data (including your IP address) is then transmitted to YouTube/Google. More in the privacy policy
Key Takeaways
- You activate 3D space via the 3D layer switch in the timeline. First check whether it is switched on for your layers.
- With the Orbit tool and a camera, you move spatially through your composition.
- Nested compositions make it possible to use 2D and 3D layers together. For the camera and the Orbit tool to work, you must activate the asterisk icon for composition layers.
- GPU acceleration (Mercury GPU or CUDA) and sufficient video memory ensure smooth working.
- With multiple 3D areas, you must pay close attention to which camera you link and use.
Step-by-Step Guide
Step 1: Activate 3D Space via the Layer Switch
The easiest way into 3D space is via the layer switches in the timeline. Make sure that the 3D switch is active for your layers. By default it is switched on, but by chance it may be deactivated. One click on the switch brings the layer into 3D space. If you want to toggle several layers at once, you can drag over the switches while holding down the left mouse button. As soon as the layers are active, you are already in 3D space.

Step 2: Move and Rotate Layers in Space
In the activated 3D space, you can move your layers along the X and Z axes. In the example, you move one layer along the X axis, push another one backward and move a third layer in the direction of the Z axis, that is, toward you. Then you pick up the Orbit tool and rotate the layers directly in the viewer. This quickly gives you an impression of how your layers behave in relation to one another in space.

Step 3: Create a Nested Composition
If you want to use 2D and 3D layers at the same time, a sub-composition is worthwhile. Select the desired layers, press Ctrl+Shift+C and confirm the option for a new composition. Assign a name, for example "3D", and choose the option to move all attributes into the new composition. With a click on OK, the sub-composition is done and you can continue to use it in the master composition.

Step 4: Add a Camera and Activate the Composition Layer
Now return to your master composition. Right-click in the layer area, choose the option to add a new camera and confirm it with OK. You can leave the default settings unchanged for now. You are now in 3D space, but the Orbit tool cannot initially be used in a meaningful way. The reason: the attributes of the sub-composition are not yet passed on to the master composition. Therefore, activate the switch with the small asterisk for composition layers. After that, the sub-composition passes the transformations on to the camera, and you can use the Orbit tool across the 3D design space.
Step 5: Control the Camera via the Transform Properties
If you want to work globally in the 3D design space, you can return to the master composition at any time and edit your camera directly. To do so, select the camera and press the P key to display the position. Alternatively, you open the transform properties via the dropdown menu. There you can adjust position, point of interest, orientation and the coordinates on the X axis. This way is particularly precise if you want to define specific viewing angles exactly.

Step 6: Use Four Views in the Viewer
To check the camera and the scene from different angles, switch the viewer to the four-view option. This way you see the camera itself and the scene simultaneously from several perspectives. If you now change a point, the standard camera view shows the effect directly, and you can verify the result in the other views. This makes precise work considerably easier.

Step 7: Enable Mercury GPU Acceleration
For the 3D space to run smoothly, you should turn on GPU acceleration. Click the small rocket icon in the viewer and select Mercury GPU Acceleration (CUDA). However, this option is only available if your graphics card supports it. If only Software is selected, you will not benefit from the acceleration. In that case, you also won't be able to make optimal use of some color depths such as 8, 16, or 32 bits per channel.

Step 8: Check GPU Information and Memory in the Preferences
You can find the important settings under Edit and then Preferences. In the Preview section, you get information about your GPU, such as which model is being used, whether the drivers are up to date, and how much video memory is available. In this example, just under 8 GB is available. You can increase the memory for After Effects, but you should proceed carefully. More memory allows longer sessions without areas having to be recalculated again and again. As a result, the timeline stays smoother and responds faster, even when you are working in the 3D space.

Step 9: Understanding Grayed-Out 3D Tools and the Global 3D Switch
Sometimes 3D tools are not available in the 3D space. They then appear grayed out or are missing entirely. This often happens when you have deactivated individual areas. In this case, the precomposition only shows the layers that are actually enabled via the 3D function. Layers without an enabled 3D switch cannot be rotated, even though they are moved along in the space. The tip is therefore: Enable the switch for composition layers (the asterisk). It connects the precomposition globally to the 3D design space, so that the tools are available again in the master composition.

Step 10: Correctly Linking Multiple 3D Areas and Their Cameras
As soon as you use multiple 3D design spaces in one composition, you need to proceed carefully. When you set the global switch, all connected areas are animated at the same time. This is not always desired. Therefore, make sure that the camera you link is also the right one. You have two options: Either you create your own camera inside the precomposition and link it to the master composition, or you use a global camera. In that case, also place it in its own precomposition using Ctrl+Shift+C so that you can animate it separately in the 3D space. This creates clearly separated partial animations that can be controlled precisely.
Summary – Mastering the 3D Design Space in After Effects CC 2020: Step-by-Step Guide
The 3D design space in After Effects CC 2020 can be entered with just a few steps. You enable the 3D switches of the layers, position them in the space, and add a camera if needed. Nested compositions connect 2D and 3D layers, and the switch for composition layers makes the transformations usable for the camera and the Orbit tool. Anyone who additionally pays attention to active GPU acceleration, sufficient video memory, and clean linking of the cameras will work much more smoothly and precisely in the 3D space.
FAQ
How do I enter the 3D space in After Effects CC 2020?Enable the 3D switch for the desired layers in the timeline, and you are in the 3D space.
Why can't I use the Orbit tool with a precomposition?The attributes of the precomposition are only passed on to the master composition once you enable the switch for composition layers (the asterisk).
How do I create a nested composition?Select the layers, press Ctrl+Shift+C, enter a name, and confirm with OK.
What is the P key used for with a camera?With P, you display the position of the camera in order to change it precisely.
Why are some 3D tools displayed grayed out?This often happens when individual 3D areas are deactivated. The switch for composition layers makes the tools available again in the master composition.
How do I enable GPU acceleration?Click the rocket icon in the viewer and select Mercury GPU Acceleration (CUDA), provided your graphics card supports it.
How do I increase the video memory for After Effects?Open the Preferences under Edit, select the Preview section, and adjust the memory carefully.


