
A gray, monotonous sky can quickly make an otherwise successful shot look boring. With After Effects, you can replace the sky and transform the entire scene into a dark, gloomy night mood. This tutorial guides you through the complete process: from isolating the sky, through realistically animating a static sky texture, to the final color grading. In the end, you will have a result that makes the viewer believe the footage was shot at night from the start.
The video is only loaded from YouTube when you play it – data (including your IP address) is then transmitted to YouTube/Google. More in the privacy policy
Key Takeaways
Clean source footage is the foundation of every day-to-night conversion. You should avoid bright areas such as overexposed waves or glaring light sources if possible, or selectively hide them later. With the Keylight effect and the Pixel Sampler, the sky can be isolated precisely, provided you determine the right key color. Static skies only look natural through a shear effect: the foreground moves faster than the horizon. Edges that are too bright can be darkened with an inverted Light Wrap. The final mood is ultimately created through curves, saturation, and targeted light spots.
Step 1: Choosing the Right Source Footage
Before you even start in After Effects, it is worth taking a look at the footage itself. For a believable conversion, shots with low brightness and without harsh light sources are suitable. Shots at dusk are ideal, because the lighting conditions are then particularly even. Strong shadows or glaring highlights make the later work considerably more difficult.
In the tutorial's example, the scene shows rocks and a body of water with very bright waves. These waves are cut off later, because otherwise they would look unconvincing. So crop the work area so that distracting elements such as logos or overexposed areas are no longer in the frame.

Step 2: Determining the Sky's Key Color
To isolate the sky, you first need a suitable key color. Use the Pixel Sampler effect for this. Select the layer and use the area tool to define the entire sky. The effect averages the colors in this area and gives you an average value. This value is suitable as a basis for the Keylight effect, because it covers as many shades of the sky as possible.
Then copy the determined value into the Screen Color field of the Keylight effect. You can remove the short expression you used to transfer the value afterwards. It is important that you pick the color from the result with the eyedropper so that the key matches the sky exactly.


Step 3: Isolating the Sky with Keylight
Once the key color is set, you refine the result via the Screen Matte. There you can adjust the contrast of the alpha channel with Clip Black and Clip White. Settings that are too extreme cause bright stones on the horizon to disappear as well. Therefore, make sure to fully preserve the stones while the sky disappears as cleanly as possible.
A little blur, about 1.5 pixels, smooths the edges. With Shrink and Grow, you can then reduce the edges to remove remnants of the original sky. Proceed carefully here, as otherwise you will cut off parts of the rock as well.


Step 4: Bringing Back the Water
Since the key has also captured parts of the water, you duplicate the layer and remove the Keylight effect on the copy. Then you draw a mask along the horizon that follows the contour of the rocks exactly. Set the mask with keyframes at various points in the clip so that it moves along with the scene.
Activate the mask feather with Shift and F and feather it by about five pixels. This creates a soft transition between water and sky. At the end of the clip, check whether the mask sits cleanly everywhere.

Step 5: Insert the New Sky
Now you put all layers except the sky into a composition and give it a fitting name, for example Rocks. The Pixel Sampler is no longer needed in this composition and can be deleted.
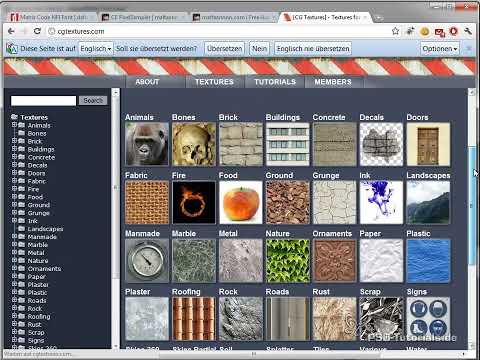
For the new sky, a texture from a stock site such as CG Textures, which provides real photographed skies, is a good choice. In the tutorial, the Overcast category with a dark, gloomy sky is used. Insert the texture below the rock layer and scale it appropriately. Reducing the size helps if the sky looks too large. Then position it so that it does not end directly at the edge of the horizon.


Step 6: Move the Static Sky Realistically
A sky whose position is simply animated quickly looks artificial. In reality, the clouds above the viewer move faster than the clouds at the horizon, because perspective comes into play. You create this effect with the Transform effect and a skew.
Set the skew axis to 90 degrees so that it runs horizontally. You shift the anchor point by copying the position value and pasting it into the anchor point. This way the sky stays in place but is skewed around the center. Animate the skew only over a small distance. The movement must not be too strong, so that it looks natural. A render preview helps you check the result.


Step 7: Darken Edges with a Reversed Light Wrap
The rock edges are often too bright compared to the new, dark sky. A classic Light Wrap would make the edges even brighter. That is why you use the reverse approach and deliberately darken the edges.
To do this, create a precomposition with the sky. On the rock layer, apply the Set Channels effect and select the sky as the source. The layer now takes on the pattern of the sky. Then invert the alpha channel so that everything except the rocks is selected with the sky. Soften this area, for example with Fast Blur. This creates a slight glow at the boundaries. You trim this with the CC Composite effect to the original alpha structure of the layer and set the mode to Stencil Alpha.
Duplicate the Composite effect, set the mode to Multiply, and select all channels instead of just RGB. The edges now become darker and blend better into the scene.


Step 8: Shape the Mood with Curves and Saturation
With an adjustment layer with Curves, you control the basic mood of the night scene. Pull the brightness down significantly so that dark areas merge and the scene looks mystical. Reduce red and green so that the shot takes on a cooler, bluish tone. For a nighttime color look, you also remove some of the saturation, for example with the Tint effect. If desired, the rocks get their own Curves layer to make them a bit darker still.


Step 9: Dramatize the Sky and Set a Light Spot
At this stage, the sky often still looks too bright. Therefore, create a Curves layer within the sky composition and slightly increase the saturation there so that it matches the ground. Then you deliberately darken the upper area. To do this, set a mask, adjust the curves strongly, and feather the mask with a soft edge so that the transition stays smooth.
For a magical touch, a light spot in the center of the image is a good choice. Use the Circle effect, which you otherwise use for vignettes, set the mode to Overlay or Add, and increase the radius. With a soft edge, a subtle spot of light is created that adds extra life to the scene.


Step 10: Checking the Final Result
Finally, you adjust the settings once more. Increased vibrance and slightly reduced saturation round off the look. Check the result in a render preview and compare it with the original. Pay particular attention to transitions, edges, and the movement of the sky.


Summary ??? Replacing the Sky and Day-to-Night in After Effects: Step by Step to a Mystical Night Scene
You have learned how to key out a dull sky with the Keylight effect and the Pixel Sampler, cleanly bring back water and edges, and realistically insert a new sky. The Shear effect provides believable movement, while the inverted Light Wrap makes the transitions look coherent. With curves, saturation adjustments, and a light spot, a dark, mystical night mood is finally created.
FAQ
Which footage is best suited for a day-to-night conversion?Ideal are shots taken at dusk without glaring light sources, strong shadows, or overexposed areas.
Why shouldn't I just animate the sky using position alone?A pure position animation looks unnatural. With a shear, the front area moves faster than the horizon, as it would with real perspective.
What do I do if the Keylight effect also removes the water?Duplicate the layer, remove the Keylight effect on the copy, and draw a mask along the horizon. You can animate this mask with keyframes if needed.
What is the Pixel Sampler used for?The Pixel Sampler determines the average value of the colors in the sky area. You take this value as the Screen Color for the Keylight effect.
Why is the brightness reduced rather than increased with the Light Wrap?A classic Light Wrap brightens the edges. In a night scene, however, the rock edges are too bright, so you invert the effect and darken them.
Can I use a different sky than the one used in the tutorial?Yes, you can use any sky texture that fits the desired style. Make sure it has sufficient resolution and a similar viewing angle.


