3D animations bring life to your projects, and one of the most useful tools in this area is the use of expressions in Adobe After Effects. In this guide, I will show you step by step how to create a 3D Helper that helps you efficiently automate object movements. I will pay special attention to the use of try and catch – two powerful commands that help you handle errors in your expressions.
Key Takeaways
- The 3D Helper automates movement between different layers in After Effects.
- The use of try and catch enables robust error handling, avoiding unexpected interruptions during the animation.
- There are numerous ways to be creative with the 3D Helper by combining different animations and effects.
Step-by-Step Guide
Step 1: Create Null Object
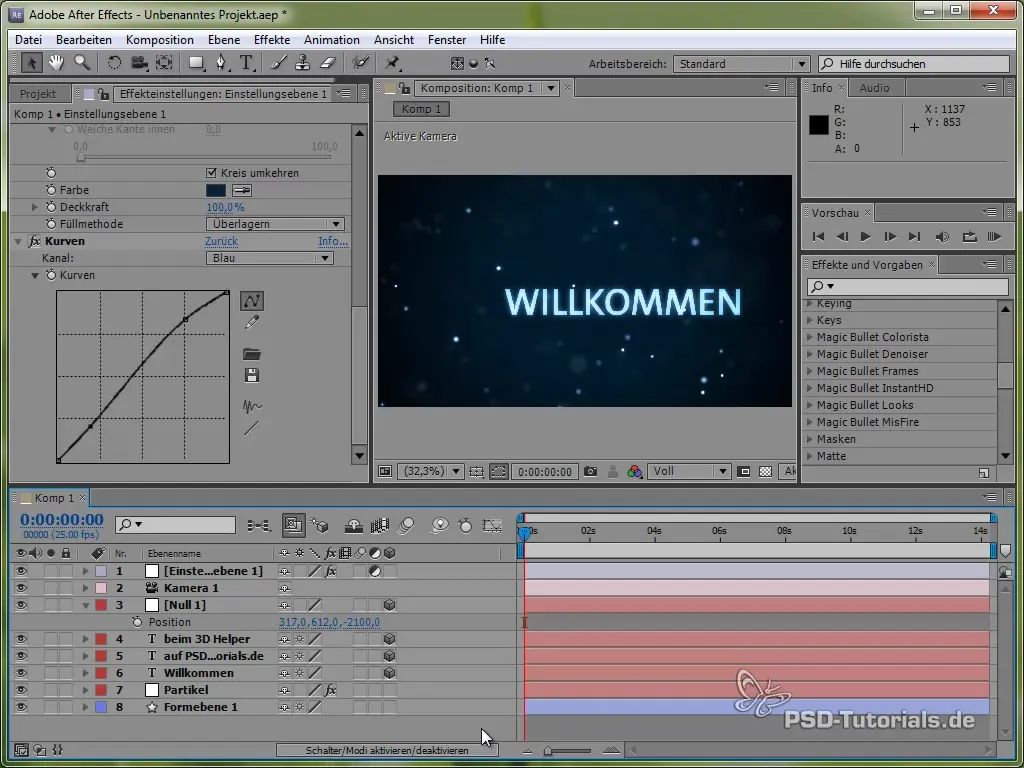
Start After Effects and create a new project. Add a null object that will serve as the basis for the 3D Helper. Go to “Layer” > “New” > “Null Object”. Name it “3D Helper.”
Step 2: Set Up 3D Helper
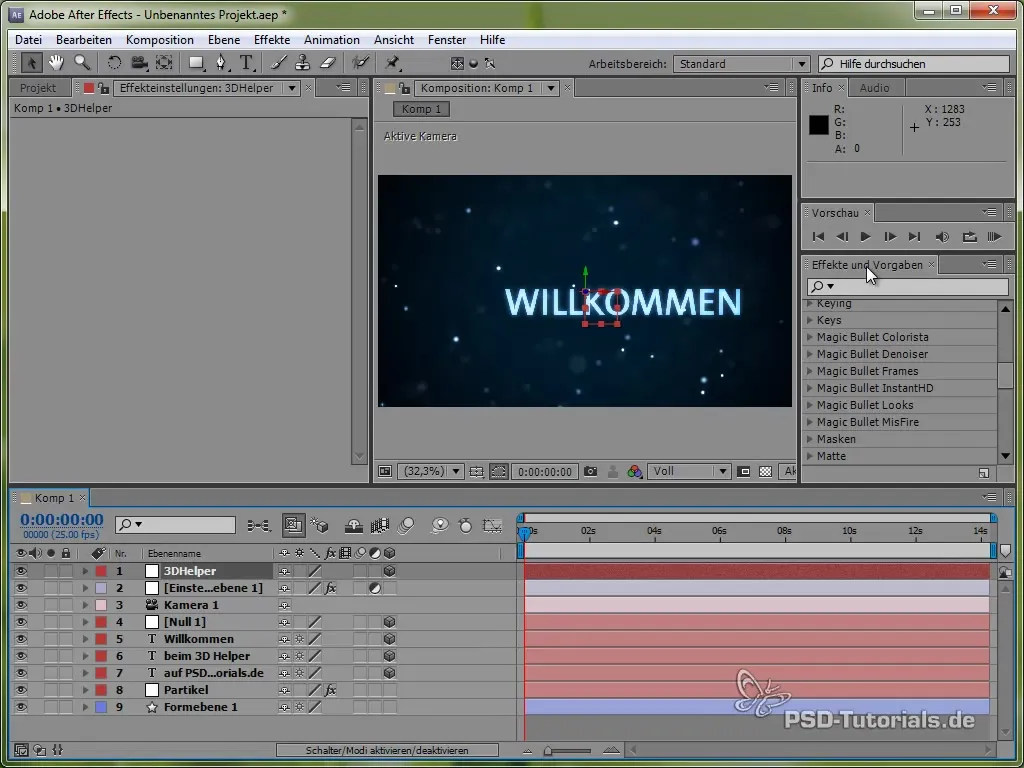
Select the 3D Helper and enable the 3D layer by checking the box in the layer list. This allows you to work with Z positioning and animate objects in 3D space.
Step 3: Create Layers
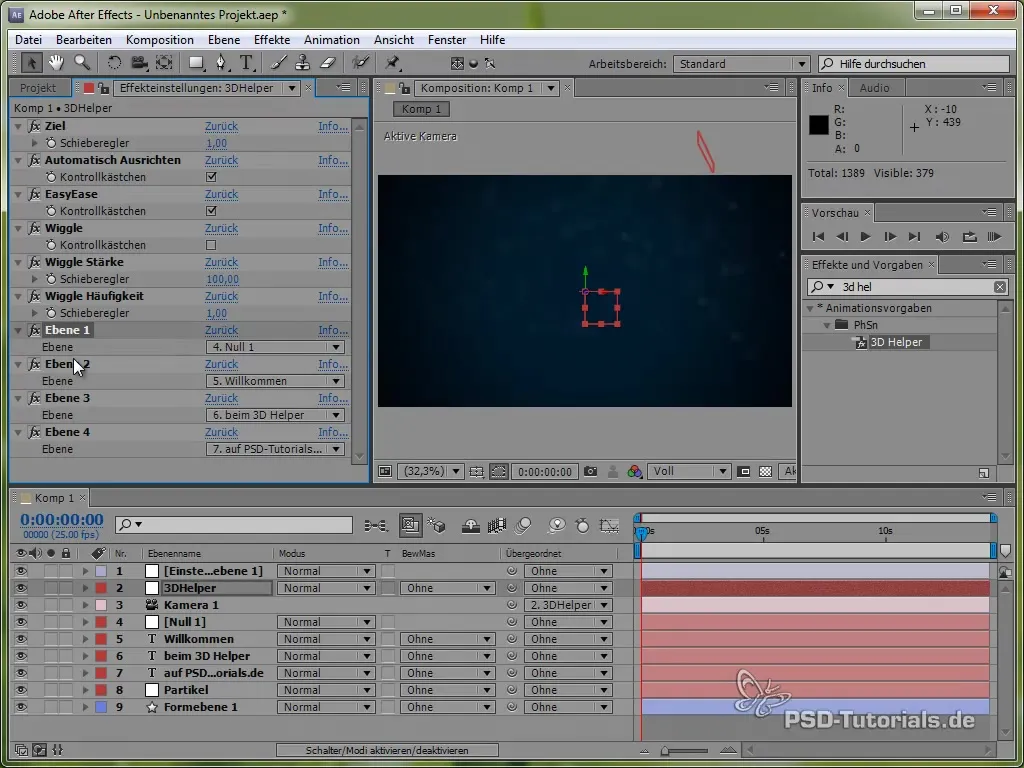
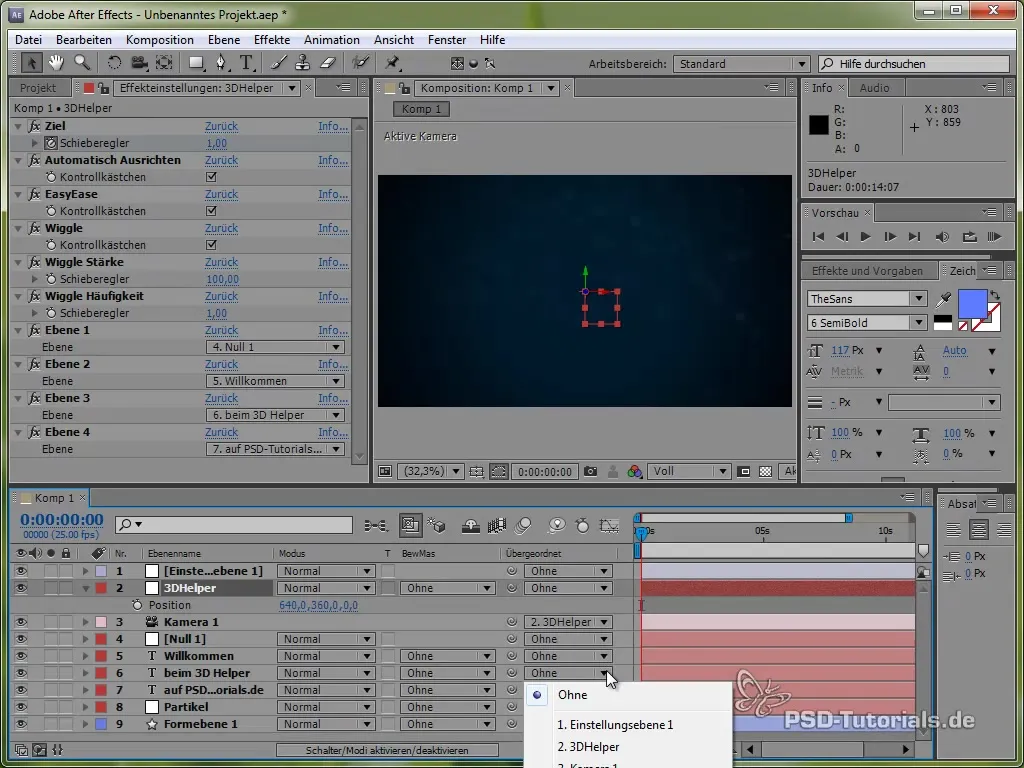
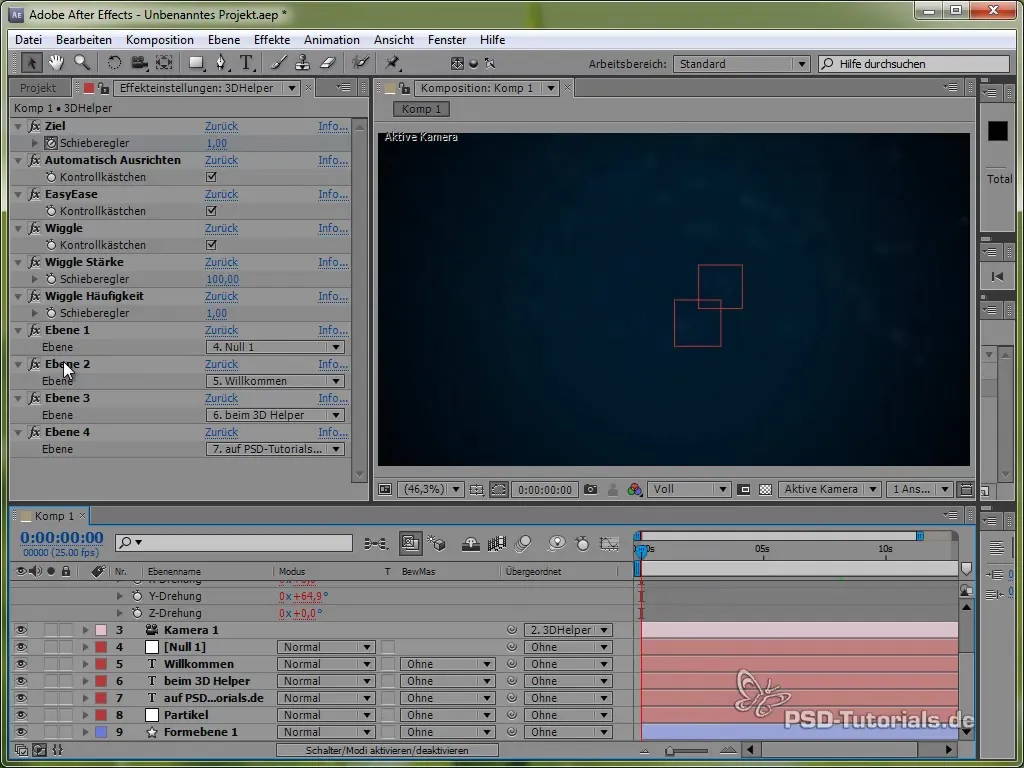
Create the text layers that your 3D Helper will control. You can create four different text layers: “Welcome,” “3D Helper,” “PSD Tutorials,” and you can create as many duplicates as you like to test different animations.
Step 4: Set Up Animation
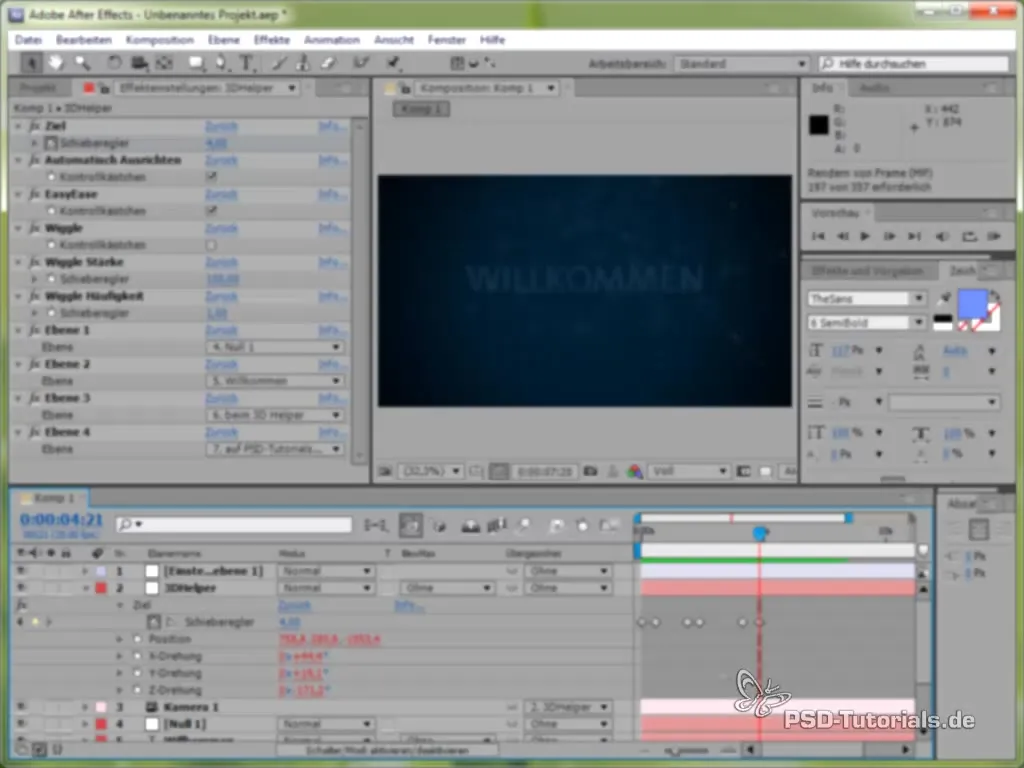
Set keyframes for the targets the 3D Helper should move to. Select a layer and set keyframes for the positions so that the Helper jumps from one layer to the next.
Step 5: Add Wiggle
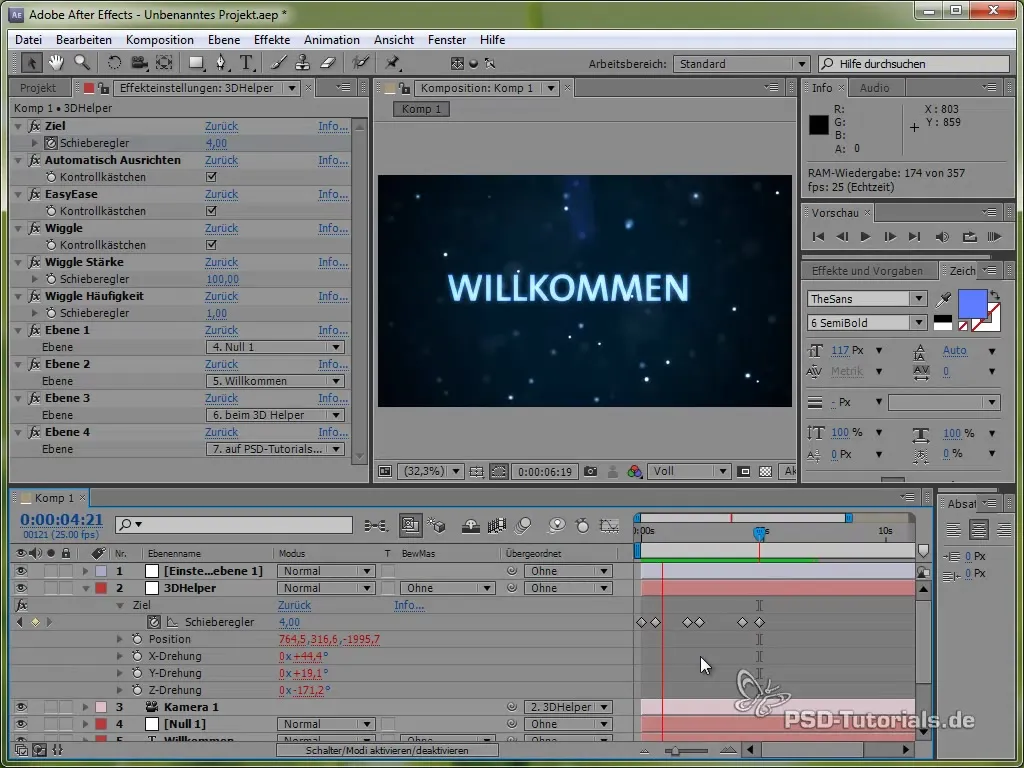
To give the 3D Helper more dynamics, you can use the wiggle function. Select the position of the null object and add the wiggle command. A value of 100 for the magnitude and 1 for the frequency results in lively movement.
Step 6: Adjust Position Code
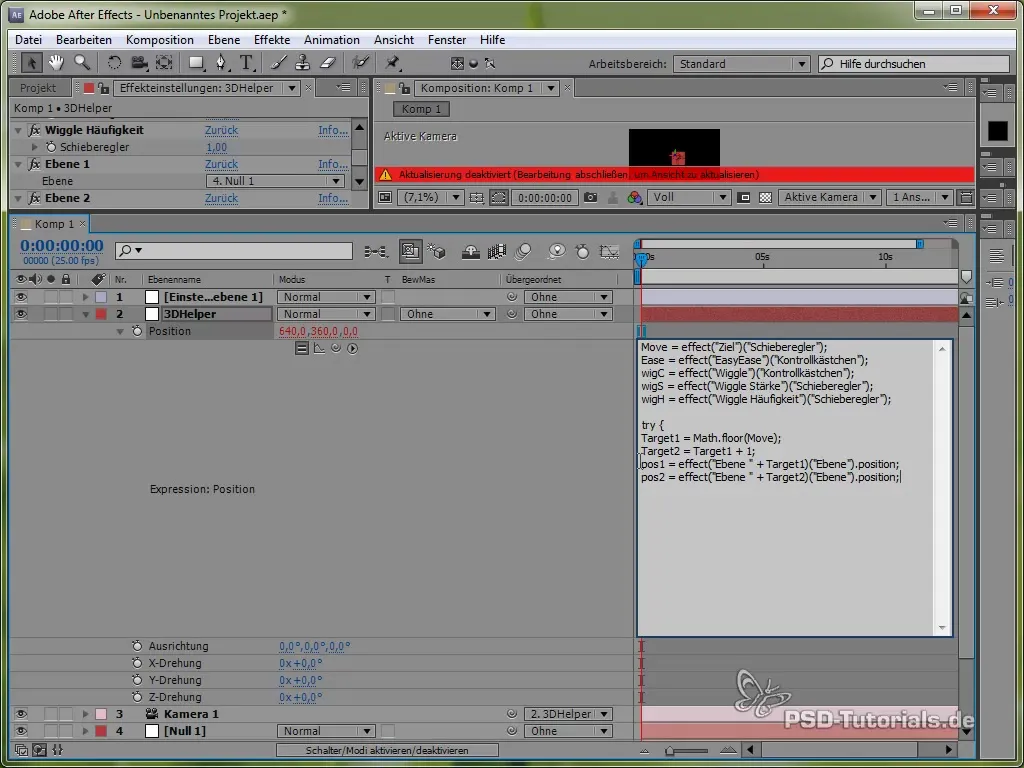
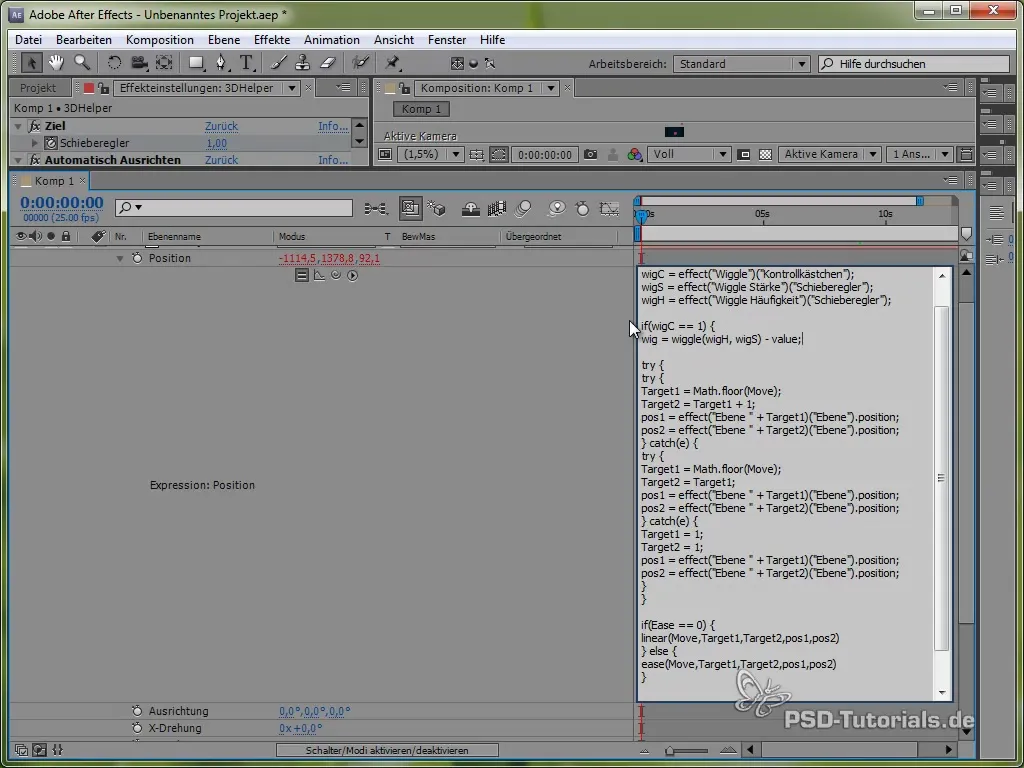
Now it’s time to adjust the position code for the 3D Helper. Delete the existing code and prepare your new code. You will add an expression to control the movements between layers.
Step 7: Insert try and catch
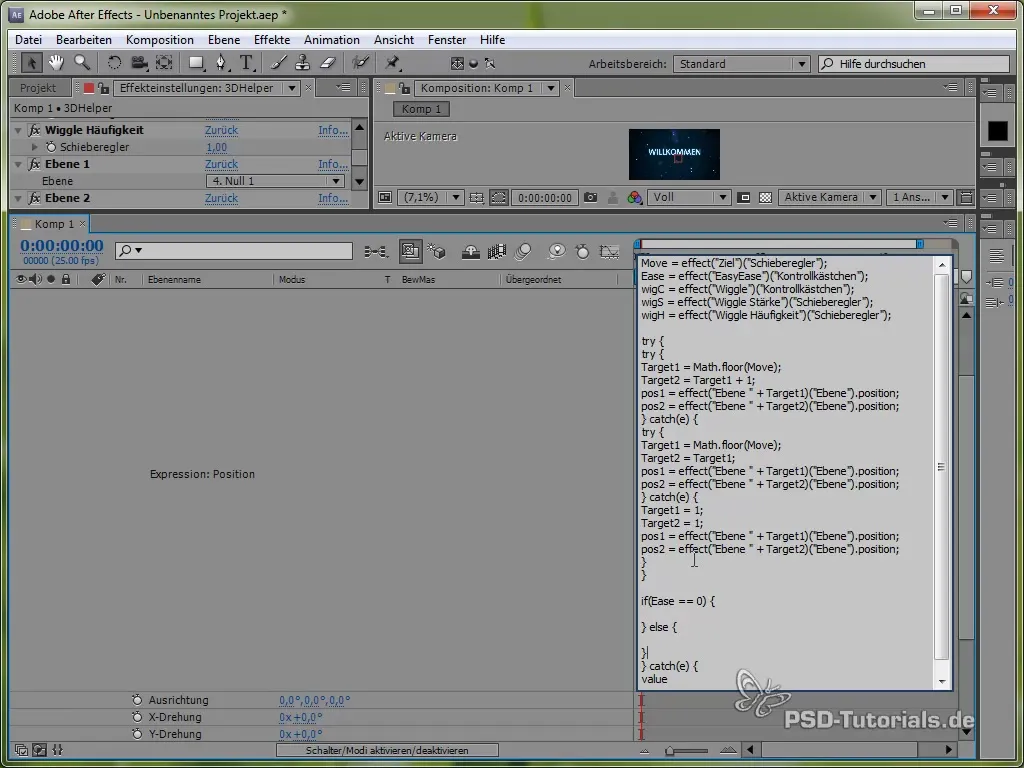
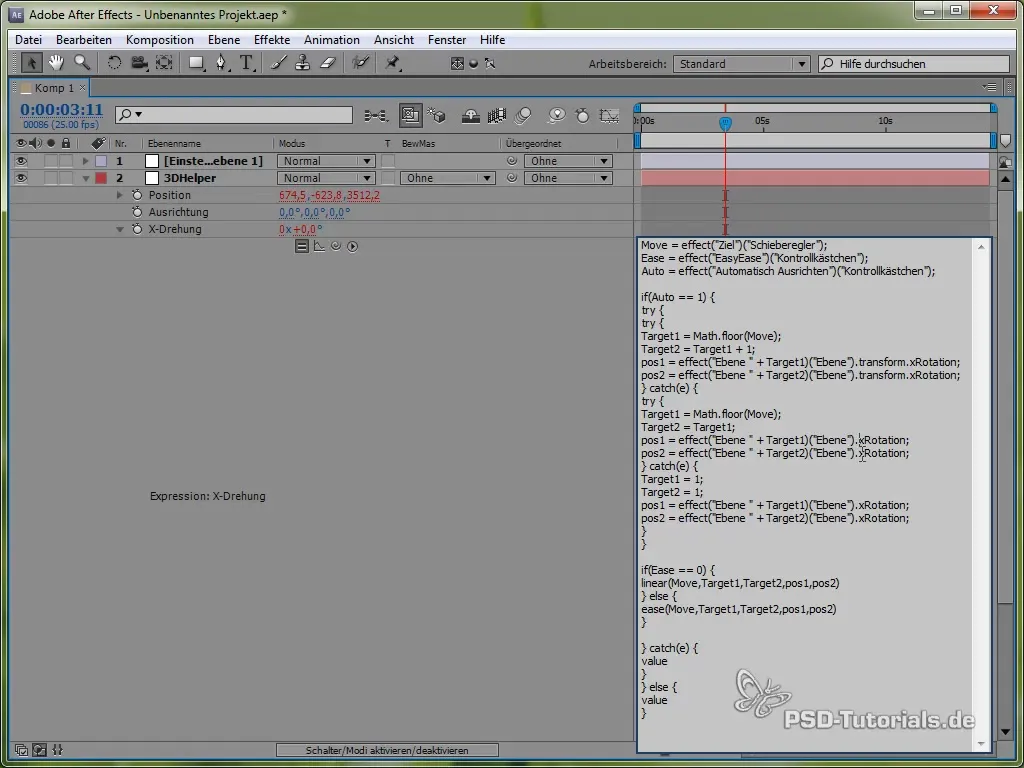
Use the try and catch structure to ensure that your code is robust against errors. Insert the expressions such that they do not crash in the event of an error, but return a default value.
Step 8: Optimize Animation Transitions
Create a query that distinguishes between linear and easy ease transitions. This improves the overall fluidity of the animation. Check the box for Easy Ease and implement the animations accordingly.
Step 9: Insert Wiggle and Automation Functions
Once you’ve decided whether the wiggle checkbox is checked, add the corresponding expressions to work with the wiggle values. Implement these for both motion and rotation parameters.
Step 10: Enable Automatic Orientation
Add a function for the automatic orientation of the 3D Helper so that the layers are always correctly aligned, no matter how they move. This helps avoid unwanted rotations.
Step 11: Final Adjustments
Review the entire animation to ensure everything works. Mission the Helper to switch smoothly between targets, and make sure that error messages are caught.
Summary - Creating a 3D Helper in After Effects
In this guide, you learned how to create a 3D Helper in After Effects. You saw how to use null objects to enable animations between different layers, and how important it is to use try and catch for error handling in expressions. These techniques will help you create more creative and error-resistant animations.
Frequently Asked Questions
How exactly does the 3D Helper work?The 3D Helper controls the movements of null objects between different layers, enabling dynamic animations.
What is the advantage of try and catch in expressions?These commands help catch and handle errors, keeping your project stable even when unexpected inputs occur.
Can I add more than four layers?Yes, you can add as many layers as you want by simply duplicating the existing layers and adjusting them accordingly.
